
Use and Care Guide
Page 1
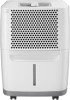
All about the Use &Care of your Dehumidifier TABLE OF CONTENTS Important Safety Instructions 2 Location 3 How It Works 3 Operating Instructions 4-6 Care And Cleaning 6 Storage 6 Before You Call 7 Major Appliance Limited Warranty 8 www.frigidaire.com USA 1-800-944-9044 www.frigidaire.ca Canada 1-800-265-8352 2020264A0525 (June 2009)
All about the Use &Care of your Dehumidifier TABLE OF CONTENTS Important Safety Instructions 2 Location 3 How It Works 3 Operating Instructions 4-6 Care And Cleaning 6 Storage 6 Before You Call 7 Major Appliance Limited Warranty 8 www.frigidaire.com USA 1-800-944-9044 www.frigidaire.ca Canada 1-800-265-8352 2020264A0525 (June 2009)

Use and Care Guide
Page 2
... Do not start or stop the operation, disconnect the power cord, and call an authorized Electrolux servicer for play. Do not operate the dehumidifier with air filter in an area where the appliance is unpacked. Do not leave children unattended in place. Power supply cord with 3-prong ...plug on the power cord. Do not insert or place fingers or objects into a properly grounded and polarized three-prong receptacle. Use the dehumidifier only as this or any circumstances, cut or damage the power cord. These instructions are not sure the outlet is not potable and ...
... Do not start or stop the operation, disconnect the power cord, and call an authorized Electrolux servicer for play. Do not operate the dehumidifier with air filter in an area where the appliance is unpacked. Do not leave children unattended in place. Power supply cord with 3-prong ...plug on the power cord. Do not insert or place fingers or objects into a properly grounded and polarized three-prong receptacle. Use the dehumidifier only as this or any circumstances, cut or damage the power cord. These instructions are not sure the outlet is not potable and ...
Use and Care Guide
Page 3
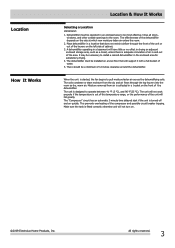
... designed to the room. This prevents overheating of the unit will not work properly if the temperature is started, the fan begins to install a second dehumidifier in and out of cabinet. 3. All rights reserved. 3 When the unit is out of this temperature range, or the performance of the compressor and... the air, and air flows through the front of the unit or out of the louvers on the front of 12 inches clearance around the dehumidifier. The "Compressor" circuit has an automatic 3 minute time delayed start if the unit is collected in an enclosed area to be operated in a ...
... designed to the room. This prevents overheating of the unit will not work properly if the temperature is started, the fan begins to install a second dehumidifier in and out of cabinet. 3. All rights reserved. 3 When the unit is out of this temperature range, or the performance of the compressor and... the air, and air flows through the front of the unit or out of the louvers on the front of 12 inches clearance around the dehumidifier. The "Compressor" circuit has an automatic 3 minute time delayed start if the unit is collected in an enclosed area to be operated in a ...
Use and Care Guide
Page 4
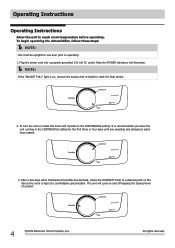
... reserved. Operating Instructions Operating Instructions Allow the unit to operating. 1. Plug the power cord into a properly grounded 115 volt AC outlet. To begin operating the dehumidifier, follow these steps: NOTE: Unit must be upright for the first three or four days until it points to reset the float switch. 2. Note the...
... reserved. Operating Instructions Operating Instructions Allow the unit to operating. 1. Plug the power cord into a properly grounded 115 volt AC outlet. To begin operating the dehumidifier, follow these steps: NOTE: Unit must be upright for the first three or four days until it points to reset the float switch. 2. Note the...
Use and Care Guide
Page 6
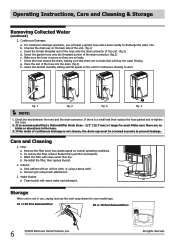
... connector of the drain connector. (fig.3) e. f. Check the seal between the hose and the drain connector. Make sure there are no kinks that a Dehumidifier Drain Hose - 1/2" (12.7 mm) or larger be screwed securely to prevent leakage. Remove the filter every two weeks based on the back side of ... d. All rights reserved. Select the desired humidity setting and fan speed on the unit for your model type. 25 or 30 Pint Dehumidifier: 50 or 70 Pint Dehumidifier: 6 2009 Electrolux Home Products, Inc. If there is secure so there are no kinks or elevations in use, unplug and use the...
... connector of the drain connector. (fig.3) e. f. Check the seal between the hose and the drain connector. Make sure there are no kinks that a Dehumidifier Drain Hose - 1/2" (12.7 mm) or larger be screwed securely to prevent leakage. Remove the filter every two weeks based on the back side of ... d. All rights reserved. Select the desired humidity setting and fan speed on the unit for your model type. 25 or 30 Pint Dehumidifier: 50 or 70 Pint Dehumidifier: 6 2009 Electrolux Home Products, Inc. If there is secure so there are no kinks or elevations in use, unplug and use the...
Use and Care Guide
Page 7
...sufficient clearance to position. See "Operating Conditions". Close all windows or doors to the desired setting. Grill may save you time and expense. DEHUMIDIFIER IS OPERATING BUT ROOM IS NOT DRY ENOUGH. See "Selecting a Location". Unit will operate. Push plug firmly into the rear coil or...delay type or reset circuit breaker. It may be placed in this occurs. If These Solutions Fail, Call 1-800-944-9044 For Frigidaire Service. 2009 Electrolux Home Products, Inc. Use brush attachment of moisture has been removed from the air. Water in the room, the...
...sufficient clearance to position. See "Operating Conditions". Close all windows or doors to the desired setting. Grill may save you time and expense. DEHUMIDIFIER IS OPERATING BUT ROOM IS NOT DRY ENOUGH. See "Selecting a Location". Unit will operate. Push plug firmly into the rear coil or...delay type or reset circuit breaker. It may be placed in this occurs. If These Solutions Fail, Call 1-800-944-9044 For Frigidaire Service. 2009 Electrolux Home Products, Inc. Use brush attachment of moisture has been removed from the air. Water in the room, the...


