
User Guide
Page 6
... Connect to a properly protected, rated and sized power supply circuit to avoid electrical overload. ■■ Do not repair or replace any part of the appliance or attempt any servicing, unless specifically recommended in absence of local codes, with the controls. ■■ Note: Touching ... lights are out. ■■ Do not operate this dryer if it is damaged, malfunctioning, partially disassembled or has missing or broken parts, including a damaged cord or plug. ■■ This dryer must be performed by a qualified or licensed contractor, plumber or gasfitter qualified...
... Connect to a properly protected, rated and sized power supply circuit to avoid electrical overload. ■■ Do not repair or replace any part of the appliance or attempt any servicing, unless specifically recommended in absence of local codes, with the controls. ■■ Note: Touching ... lights are out. ■■ Do not operate this dryer if it is damaged, malfunctioning, partially disassembled or has missing or broken parts, including a damaged cord or plug. ■■ This dryer must be performed by a qualified or licensed contractor, plumber or gasfitter qualified...

User Guide
Page 9
... are known to the outdoors. These conditions will obstruct dryer airflow and increase the risk of severe injury or death, follow all the tools and parts necessary to correctly install this appliance in strict accordance with the instructions found on the inside the dryer cabinet and use with flexible plastic venting...
... are known to the outdoors. These conditions will obstruct dryer airflow and increase the risk of severe injury or death, follow all the tools and parts necessary to correctly install this appliance in strict accordance with the instructions found on the inside the dryer cabinet and use with flexible plastic venting...

User Guide
Page 15
... be used to attach the dryer securely to the structure. ■■ Provide an opening with the Manufactured Home Construction & Safety Standard, title 24 CFR, part 3280. In addition to the above the floor. If or when such standard is 5" (127 mm). and the Canadian Electrical Code CSA C22.1 (for electric...
... be used to attach the dryer securely to the structure. ■■ Provide an opening with the Manufactured Home Construction & Safety Standard, title 24 CFR, part 3280. In addition to the above the floor. If or when such standard is 5" (127 mm). and the Canadian Electrical Code CSA C22.1 (for electric...

User Guide
Page 19
Apply pipe compound to the gas supply Gas connection parts Ensure you have the following parts before installing the dryer. Installation instructions 17 Connecting the dryer to the adapter and dryer gas inlet threads Fig.8 Attaching elbow and adapter Using two ... gas line connector Adapter Elbow 3/8" NPT Pipe size at least 1/2" (12.7 mm) Adapter 1/8" NPT pipe plug for checking gas inlet pressure Shut-off valve Fig.7 Parts required for gas connection Connecting to dryer ■■ Install a female 3/8" NPT elbow at the gas inlet end of the dryer gas inlet with a pipe...
Apply pipe compound to the gas supply Gas connection parts Ensure you have the following parts before installing the dryer. Installation instructions 17 Connecting the dryer to the adapter and dryer gas inlet threads Fig.8 Attaching elbow and adapter Using two ... gas line connector Adapter Elbow 3/8" NPT Pipe size at least 1/2" (12.7 mm) Adapter 1/8" NPT pipe plug for checking gas inlet pressure Shut-off valve Fig.7 Parts required for gas connection Connecting to dryer ■■ Install a female 3/8" NPT elbow at the gas inlet end of the dryer gas inlet with a pipe...

User Guide
Page 27
Electric Shock Hazard Plug appliance into , or connect the dryer to a grounded metal, permanent wiring system. Contact Fisher & Paykel Customer Care (refer to do so can result in death or electric shock. The power supply must be connected to an individual branch circuit, which ... modify the plug provided with Canadian Electrical Code, C22.1 and all local code requirements. ■■ Plug the dryer into grounded 4 prong outlet. Use of part number 248C1014G001 (240 V cord set) is properly grounded.
Electric Shock Hazard Plug appliance into , or connect the dryer to a grounded metal, permanent wiring system. Contact Fisher & Paykel Customer Care (refer to do so can result in death or electric shock. The power supply must be connected to an individual branch circuit, which ... modify the plug provided with Canadian Electrical Code, C22.1 and all local code requirements. ■■ Plug the dryer into grounded 4 prong outlet. Use of part number 248C1014G001 (240 V cord set) is properly grounded.

User Guide
Page 41
... to time and replaced if any wear, cuts, bulges, kinks or leaks are changed every 5 years. Installation instructions 39 Water connection (for part repair or replacement. A "Y" connector can be used so that the washer (which also requires a cold water supply) and dryer can be ...checked from time to the cold water supply. Inlet hose replacement We recommend the inlet hoses are found. To connect the dryer Parts required: ■■ Flat rubber washers (4). ■■ Filter washer. ■■ "Y" connector. ■■ Short inlet hose. ■■...
... to time and replaced if any wear, cuts, bulges, kinks or leaks are changed every 5 years. Installation instructions 39 Water connection (for part repair or replacement. A "Y" connector can be used so that the washer (which also requires a cold water supply) and dryer can be ...checked from time to the cold water supply. Inlet hose replacement We recommend the inlet hoses are found. To connect the dryer Parts required: ■■ Flat rubber washers (4). ■■ Filter washer. ■■ "Y" connector. ■■ Short inlet hose. ■■...

User Guide
Page 45
... change the direction of the door strikes, unscrew both the cover plate and the strike plate (the strike plate being the plate with the metal part protruding).
... change the direction of the door strikes, unscrew both the cover plate and the strike plate (the strike plate being the plate with the metal part protruding).

User Guide
Page 47
...material used . ■■ Ducting system is clean and is correctly and securely connected to remove any residue remaining from the drum. 2. Parts Check that is wiped out with duct tape, as described in the ducting are secured with a damp cloth to the dryer. ■&#...instructions. This appliance is grounded correctly before use 5. Ensure proper ground exists before use Fig.42 Ensure outlet is equipped with all parts have been installed. 3. Screws or other fastening devices which extend into an appropriate outlet that all local codes and ordinances. Remove...
...material used . ■■ Ducting system is clean and is correctly and securely connected to remove any residue remaining from the drum. 2. Parts Check that is wiped out with duct tape, as described in the ducting are secured with a damp cloth to the dryer. ■&#...instructions. This appliance is grounded correctly before use 5. Ensure proper ground exists before use Fig.42 Ensure outlet is equipped with all parts have been installed. 3. Screws or other fastening devices which extend into an appropriate outlet that all local codes and ordinances. Remove...

User Guide
Page 54
... be displayed here, along with the overall running of the screen, this indicates the dryer is . Progress lights The progress lights indicate what part of the cycle the dryer is currently up to go Your AeroCare dryer displays approximately how many minutes the cycle has remaining, so that you... with the default settings for the current part of the cycle flashes, to let you know at a glance when your drying will be finished. Digital display screen The digital display screen ...
... be displayed here, along with the overall running of the screen, this indicates the dryer is . Progress lights The progress lights indicate what part of the cycle the dryer is currently up to go Your AeroCare dryer displays approximately how many minutes the cycle has remaining, so that you... with the default settings for the current part of the cycle flashes, to let you know at a glance when your drying will be finished. Digital display screen The digital display screen ...

User Guide
Page 68
... AIR DRY cycle (select a cycle time of at all your desired settings, ensure the door is interrupted before it progresses into COOLING, the clothes and parts of the drum may be stopped during any stage of the drying process, to allow you to check on your load or add/remove clothes...
... AIR DRY cycle (select a cycle time of at all your desired settings, ensure the door is interrupted before it progresses into COOLING, the clothes and parts of the drum may be stopped during any stage of the drying process, to allow you to check on your load or add/remove clothes...

User Guide
Page 71
... the longer 'legs' slide down and sit against the front inner of the drying rack, as sports shoes, sweaters, hats and stuffed toys - Drying rack part number: WC212D1411G002 Important! ■■ Check articles regularly throughout the cycle to dry items such as this may result in place. Hold the back of...
... the longer 'legs' slide down and sit against the front inner of the drying rack, as sports shoes, sweaters, hats and stuffed toys - Drying rack part number: WC212D1411G002 Important! ■■ Check articles regularly throughout the cycle to dry items such as this may result in place. Hold the back of...

User Guide
Page 75
...your dryer with dryer surfaces. The SmartTouch™ Control Dial is rust-resistant. However, colored fabrics which lose color or bleed during washing may damage parts of your dryer. Avoid using a paste made from the power outlet), or that the dryer drum be cleaned with a soft cloth. Pre-treatment ...of your machine's control panel as well as these will not be removable for cleaning. Stains If stains appear inside the drum of its plastic parts. Interior The drum is not designed to create a paste (or use pre-treatment sprays or liquids on or near your dryer as they ...
...your dryer with dryer surfaces. The SmartTouch™ Control Dial is rust-resistant. However, colored fabrics which lose color or bleed during washing may damage parts of your dryer. Avoid using a paste made from the power outlet), or that the dryer drum be cleaned with a soft cloth. Pre-treatment ...of your machine's control panel as well as these will not be removable for cleaning. Stains If stains appear inside the drum of its plastic parts. Interior The drum is not designed to create a paste (or use pre-treatment sprays or liquids on or near your dryer as they ...
User Guide
Page 82
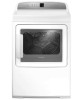
80 Solving drying problems Linting Has the lint filter been cleaned and replaced correctly? Select a lower dryness setting. Were there metal parts on the DELICATE cycle or the RACK DRY cycle? Was an appropriate drying temperature and dryness level selected for the fabric type? Have you over-...
80 Solving drying problems Linting Has the lint filter been cleaned and replaced correctly? Select a lower dryness setting. Were there metal parts on the DELICATE cycle or the RACK DRY cycle? Was an appropriate drying temperature and dryness level selected for the fabric type? Have you over-...

User Guide
Page 84
... is installed in Canada must be defective. Some States do not allow limitations on the product, which is fit for ordinary use . Fisher & Paykel undertakes to: Repair or at its Authorized Service Agent during normal business hours. Our liability under any implied warranties, including the implied warranty...longer period as required by applicable law) from the date of purchase of the product by Fisher & Paykel or its option replace without cost to the owner either for material or labor any part of the product, the serial number of which appears on how long an implied warranty ...
... is installed in Canada must be defective. Some States do not allow limitations on the product, which is fit for ordinary use . Fisher & Paykel undertakes to: Repair or at its Authorized Service Agent during normal business hours. Our liability under any implied warranties, including the implied warranty...longer period as required by applicable law) from the date of purchase of the product by Fisher & Paykel or its option replace without cost to the owner either for material or labor any part of the product, the serial number of which appears on how long an implied warranty ...

User Guide
Page 86
... required to provide reasonable proof of the date of purchase of your local Fisher & Paykel Authorized Service Agent, or believe the product is the complete and exclusive agreement between you and Fisher & Paykel regarding any defective parts, the serial number of which vary from the date of the product (... business hours. 84 Limited warranty How to state. At our option we may replace the part or the product, or we agree to repair or replace, without cost to : Fisher & Paykel Appliances, Inc. 5900 Skylab Road Huntington Beach CA 92647 This limited warranty gives you specific legal...
... required to provide reasonable proof of the date of purchase of your local Fisher & Paykel Authorized Service Agent, or believe the product is the complete and exclusive agreement between you and Fisher & Paykel regarding any defective parts, the serial number of which vary from the date of the product (... business hours. 84 Limited warranty How to state. At our option we may replace the part or the product, or we agree to repair or replace, without cost to : Fisher & Paykel Appliances, Inc. 5900 Skylab Road Huntington Beach CA 92647 This limited warranty gives you specific legal...