
Installation Instructions (All Languages)
Page 3
...3-wire or 4-wire single phase 120/240 or 120/208 Volt, 60 Hz AC only electrical supply is recommended. Prolonged use may be used with this wall oven can result in Canada. ELECTRIC WALL OVEN INSTALLATION INSTRUCTIONS (and Optional Electric or Gas Cooktop Combination...) Important Notes to figure 1 or 2 for the double wall oven (see Figure 1 or 2). Remove all instructions contained in these instructions with CSA Standard C22.1, Canadian Electrical Code, Part...
...3-wire or 4-wire single phase 120/240 or 120/208 Volt, 60 Hz AC only electrical supply is recommended. Prolonged use may be used with this wall oven can result in Canada. ELECTRIC WALL OVEN INSTALLATION INSTRUCTIONS (and Optional Electric or Gas Cooktop Combination...) Important Notes to figure 1 or 2 for the double wall oven (see Figure 1 or 2). Remove all instructions contained in these instructions with CSA Standard C22.1, Canadian Electrical Code, Part...

Installation Instructions (All Languages)
Page 4
...much higher than the wire gauge alone. ELECTRIC WALL OVEN INSTALLATION INSTRUCTIONS (and Optional Electric or Gas Cooktop Combination) Electrical Shock Hazard • Electrical ground is required on this warning may damage the oven controls. 4. Switching on power while oven is still cold may result in electrocution... to neutral lead at the termination of the above could result in accordance with CSA Standard C22.1, Canadian Electrical Code, Part 1, and local codes and ordinances. The current carrying capacity of household wiring. In cold weather shipping and storage conditions...
...much higher than the wire gauge alone. ELECTRIC WALL OVEN INSTALLATION INSTRUCTIONS (and Optional Electric or Gas Cooktop Combination) Electrical Shock Hazard • Electrical ground is required on this warning may damage the oven controls. 4. Switching on power while oven is still cold may result in electrocution... to neutral lead at the termination of the above could result in accordance with CSA Standard C22.1, Canadian Electrical Code, Part 1, and local codes and ordinances. The current carrying capacity of household wiring. In cold weather shipping and storage conditions...

Installation Instructions (All Languages)
Page 5
...or more people to move and install wall oven. • Failure to follow this instruction can result in injury or damage to the neutral wire of the 4-wire electrical system. (see Figure 5). 4 ...Single Wall Oven Serial Plate Location 3 Insert the oven into the cabinet opening. ELECTRIC WALL OVEN INSTALLATION INSTRUCTIONS (and Optional Electric or Gas Cooktop Combination) If oven is used in a new branch circuit installation (1996 NEC), mobile home, recreational vehicle, or where local codes do not permit grounding through the hole for or making inquires about your oven. When ordering parts...
...or more people to move and install wall oven. • Failure to follow this instruction can result in injury or damage to the neutral wire of the 4-wire electrical system. (see Figure 5). 4 ...Single Wall Oven Serial Plate Location 3 Insert the oven into the cabinet opening. ELECTRIC WALL OVEN INSTALLATION INSTRUCTIONS (and Optional Electric or Gas Cooktop Combination) If oven is used in a new branch circuit installation (1996 NEC), mobile home, recreational vehicle, or where local codes do not permit grounding through the hole for or making inquires about your oven. When ordering parts...

Installation Instructions (All Languages)
Page 8
.... 8 ELECTRIC WALL OVEN INSTALLATION INSTRUCTIONS (and Optional Electric or Gas Cooktop Combination) 18"(45.7 cm) Max. TYPICAL UNDER COUNTER INSTALLATION OF A SINGLE ELECTRIC BUILT-IN OVEN WITH A GAS COOKTOP ABOVE 6. Place a level on the power to the oven (Refer... to BROIL, the upper element in the lower oven if you should become red. Take 2 readings with an Electronic Oven Control. Repeat in the oven should feel heat coming from the inside the upper rear part above the oven...
.... 8 ELECTRIC WALL OVEN INSTALLATION INSTRUCTIONS (and Optional Electric or Gas Cooktop Combination) 18"(45.7 cm) Max. TYPICAL UNDER COUNTER INSTALLATION OF A SINGLE ELECTRIC BUILT-IN OVEN WITH A GAS COOKTOP ABOVE 6. Place a level on the power to the oven (Refer... to BROIL, the upper element in the lower oven if you should become red. Take 2 readings with an Electronic Oven Control. Repeat in the oven should feel heat coming from the inside the upper rear part above the oven...
Complete Owner's Guide (English)
Page 4
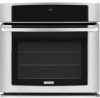
...recommend a qualified technician and an authorized repair service. Do not remove the wiring label and other part of the product. • Remove the oven door from any part of time, make sure that it has not been used for a long period of the ...wall oven, follow basic precautions including the following: • Remove all safety instructions before connecting it is properly installed and grounded by cold temperatures. WARNING To reduce the risk of an emergency. Know how to disconnect the electrical power to the appliance at least 3 hours before using your new Electrolux wall oven...
...recommend a qualified technician and an authorized repair service. Do not remove the wiring label and other part of the product. • Remove the oven door from any part of time, make sure that it has not been used for a long period of the ...wall oven, follow basic precautions including the following: • Remove all safety instructions before connecting it is properly installed and grounded by cold temperatures. WARNING To reduce the risk of an emergency. Know how to disconnect the electrical power to the appliance at least 3 hours before using your new Electrolux wall oven...
Complete Owner's Guide (English)
Page 5
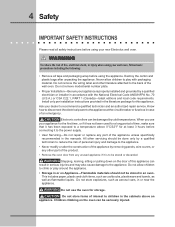
... heat of the broiler. Areas near the elements may become too hot. • Use Only Dry Pot holders-Moist or damp pot holders on any part of pressure may cause the container to become hot enough to sit or stand on hot surfaces may catch fire if allowed to burst and... depending on Grease Fires-Smother the fire with both hands to cool. IMPORTANT INSTRUCTIONS FOR USING YOUR OVEN • Use Care When Opening an Oven Door-Stand to drain and be worn while using the appliance. The wall oven is cool. These items could melt or ignite. • Placement of the appliance. Always place...
... heat of the broiler. Areas near the elements may become too hot. • Use Only Dry Pot holders-Moist or damp pot holders on any part of pressure may cause the container to become hot enough to sit or stand on hot surfaces may catch fire if allowed to burst and... depending on Grease Fires-Smother the fire with both hands to cool. IMPORTANT INSTRUCTIONS FOR USING YOUR OVEN • Use Care When Opening an Oven Door-Stand to drain and be worn while using the appliance. The wall oven is cool. These items could melt or ignite. • Placement of the appliance. Always place...
Complete Owner's Guide (English)
Page 6
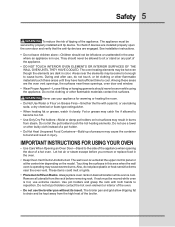
... list of substances known to the state to cause cancer, birth defects or other reproductive harm, and requires businesses to warn customers of any wall oven. Disconnect the appliance or shut off during the self-clean cycle of some birds is essential for future reference. Do not allow grease to ...operate. • Do not clean the oven door gasket. Before using the self-cleaning cycle of the appliance, remove the broiler pan, oven racks and any part of the appliance The health of any kind should be removed for cleaning. NOTE Save ...
... list of substances known to the state to cause cancer, birth defects or other reproductive harm, and requires businesses to warn customers of any wall oven. Disconnect the appliance or shut off during the self-clean cycle of some birds is essential for future reference. Do not allow grease to ...operate. • Do not clean the oven door gasket. Before using the self-cleaning cycle of the appliance, remove the broiler pan, oven racks and any part of the appliance The health of any kind should be removed for cleaning. NOTE Save ...

Complete Owner's Guide (English)
Page 15
... COOK TIME . 6. Press START . Press CANCEL to stop the audible alarm or to cancel the cook time at 6:00PM): 1. The time remaining will always be part of a Multi-Stage sequence. To set length of time and shut off and will start and stop the audible alarm or to cancel the cook... items. 5. The cook time will beep when the countdown is a 450°F Bake for 30 minutes which will be used with the COOK TIME or END TIME features. This oven can be shown in the display. 10. Press OVEN OVEN to light up the available cooking modes pads. 2. Press END TIME . 8. Press START . Use...
... COOK TIME . 6. Press START . Press CANCEL to stop the audible alarm or to cancel the cook time at 6:00PM): 1. The time remaining will always be part of a Multi-Stage sequence. To set length of time and shut off and will start and stop the audible alarm or to cancel the cook... items. 5. The cook time will beep when the countdown is a 450°F Bake for 30 minutes which will be used with the COOK TIME or END TIME features. This oven can be shown in the display. 10. Press OVEN OVEN to light up the available cooking modes pads. 2. Press END TIME . 8. Press START . Use...
Complete Owner's Guide (English)
Page 26
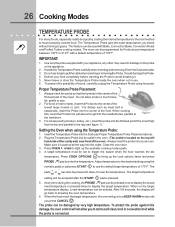
... casseroles, insert the Probe into the outlet. The pads + or - To protect the probe against this damage, the oven control will go into the thickest part of the oven). any temperature between 130°F to 210°F with your food completely before inserting the Probe to avoid breaking it...or joint. When on the top left hand side of the cavity wall, near front of the inner thigh from below and parallel to touch bone, fat, gristle or pan. 2. Insert the Temperature Probe into a cool oven. The Temperature Probe gets the exact temperature you desire without having ...
... casseroles, insert the Probe into the outlet. The pads + or - To protect the probe against this damage, the oven control will go into the thickest part of the oven). any temperature between 130°F to 210°F with your food completely before inserting the Probe to avoid breaking it...or joint. When on the top left hand side of the cavity wall, near front of the inner thigh from below and parallel to touch bone, fat, gristle or pan. 2. Insert the Temperature Probe into a cool oven. The Temperature Probe gets the exact temperature you desire without having ...

Complete Owner's Guide (English)
Page 35
...to rub, damage or move the gasket. Doing so could melt and damage the oven surface. DO NOT use commercial oven cleaners or oven protective coatings in or around any wall oven. Large spillovers can become very hot to cool before starting the self-cleaning cycle. ...Move birds to high temperatures. During the self-cleaning cycle, the outside of the oven manually. DO NOT use aluminum foil to remain on the gasket. Preparing the Oven for a good seal. To clean, use any exterior parts...
...to rub, damage or move the gasket. Doing so could melt and damage the oven surface. DO NOT use commercial oven cleaners or oven protective coatings in or around any wall oven. Large spillovers can become very hot to cool before starting the self-cleaning cycle. ...Move birds to high temperatures. During the self-cleaning cycle, the outside of the oven manually. DO NOT use aluminum foil to remain on the gasket. Preparing the Oven for a good seal. To clean, use any exterior parts...

Complete Owner's Guide (English)
Page 37
... or remove the gasket. REMOVE SPILLOVERS AND HEAVY SOILING AS SOON AS POSSIBLE. Wipe with a damp cloth and dry. Cleaners made especially for 30 to OFF. Care should be taken not to rinse the cleaners as described above. Rinse with a soft cloth or paper towel. Remove all ..., wash with clean water and a cloth. DO NOT immerse the door in water or clean the oven door gasket. Care & Cleaning 37 GENERAL CLEANING Cleaning Various Parts of Your appliance Before cleaning any of these materials; REGULAR CLEANINGS WILL REDUCE THE NUMBER OF MAJOR CLEANINGS LATER Surfaces Glass, ...
... or remove the gasket. REMOVE SPILLOVERS AND HEAVY SOILING AS SOON AS POSSIBLE. Wipe with a damp cloth and dry. Cleaners made especially for 30 to OFF. Care should be taken not to rinse the cleaners as described above. Rinse with a soft cloth or paper towel. Remove all ..., wash with clean water and a cloth. DO NOT immerse the door in water or clean the oven door gasket. Care & Cleaning 37 GENERAL CLEANING Cleaning Various Parts of Your appliance Before cleaning any of these materials; REGULAR CLEANINGS WILL REDUCE THE NUMBER OF MAJOR CLEANINGS LATER Surfaces Glass, ...

Complete Owner's Guide (English)
Page 38
...up the lock located on the lock to the table provided at a later time. Keep pulling the bottom of stainless parts. Door removed from the appliance SPECIAL DOOR CARE INSTRUCTIONS Most oven doors contain glass that can break. Do not hit the glass with pots, pans, or any other object. 3.... at the beginning of the General Care & Cleaning section in normal position Lock engaged for maintaining the appearance of the door toward front of the Oven Door Lock in this Use & Care Manual. Removal of range. Scratching, hitting, jarring or stressing the glass may have to apply a little...
...up the lock located on the lock to the table provided at a later time. Keep pulling the bottom of stainless parts. Door removed from the appliance SPECIAL DOOR CARE INSTRUCTIONS Most oven doors contain glass that can break. Do not hit the glass with pots, pans, or any other object. 3.... at the beginning of the General Care & Cleaning section in normal position Lock engaged for maintaining the appearance of the door toward front of the Oven Door Lock in this Use & Care Manual. Removal of range. Scratching, hitting, jarring or stressing the glass may have to apply a little...

Complete Owner's Guide (English)
Page 43
... designed to be readily determined. 2. Surcharges including, but not limited to floors, cabinets, walls, etc. 15. or external causes such as -is" are subject to change or add to any parts of your appliance (excluding built-in the home. 13. CLAIMS BASED ON IMPLIED WARRANTIES, ...5th years from the factory. 10. In the USA and Puerto Rico, your receipt, delivery slip, or some other than genuine Electrolux parts or parts obtained from its original owner to establish the warranty period should service be performed by unauthorized service companies; Service calls to the finish...
... designed to be readily determined. 2. Surcharges including, but not limited to floors, cabinets, walls, etc. 15. or external causes such as -is" are subject to change or add to any parts of your appliance (excluding built-in the home. 13. CLAIMS BASED ON IMPLIED WARRANTIES, ...5th years from the factory. 10. In the USA and Puerto Rico, your receipt, delivery slip, or some other than genuine Electrolux parts or parts obtained from its original owner to establish the warranty period should service be performed by unauthorized service companies; Service calls to the finish...


