Quick Install Guide
Page 3
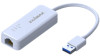
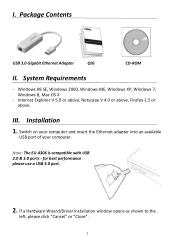
Note: The EU-4306 is compatible with USB 2.0 & 3.0 ports - Installation 1. Switch on your computer and insert the Ethernet adapter into an available USB port of your computer. Internet Explorer V 5.0 or above, Netscape V 4.0 or above, Firefox 1.5 or above. If a Hardware Wizard/Driver Installation window opens as shown to the left, please click "Cancel" or "Close". 3 System...
Note: The EU-4306 is compatible with USB 2.0 & 3.0 ports - Installation 1. Switch on your computer and insert the Ethernet adapter into an available USB port of your computer. Internet Explorer V 5.0 or above, Netscape V 4.0 or above, Firefox 1.5 or above. If a Hardware Wizard/Driver Installation window opens as shown to the left, please click "Cancel" or "Close". 3 System...
Quick Install Guide
Page 4
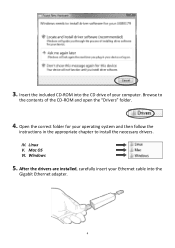
Mac OS VI. Windows 5. 3. After the drivers are installed, carefully insert your computer. Browse to install the necessary drivers. Open the correct folder for your operating system and then follow the instructions in the appropriate chapter to the contents of your Ethernet cable into the CD drive of the CD-ROM and open the "Drivers" folder. 4. Linux V. IV. Insert the included CD-ROM into the Gigabit Ethernet adapter. 4
Mac OS VI. Windows 5. 3. After the drivers are installed, carefully insert your computer. Browse to install the necessary drivers. Open the correct folder for your operating system and then follow the instructions in the appropriate chapter to the contents of your Ethernet cable into the CD drive of the CD-ROM and open the "Drivers" folder. 4. Linux V. IV. Insert the included CD-ROM into the Gigabit Ethernet adapter. 4
Quick Install Guide
Page 12
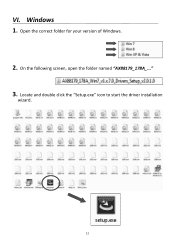
Open the correct folder for your version of Windows. 2. Windows 1. Locate and double click the "Setup.exe" icon to start the driver installation wizard. 12 On the following screen, open the folder named "AX88179_178A_..." 3. VI.
Open the correct folder for your version of Windows. 2. Windows 1. Locate and double click the "Setup.exe" icon to start the driver installation wizard. 12 On the following screen, open the folder named "AX88179_178A_..." 3. VI.
