
User Manual (English)
Page 3
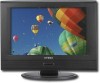
... the left and right audio jacks to turn your LCD TV is green. Press to open the on or off. When your LCD TV on -screen menu. Do not block. 67 # Jack Description 1 Headphone Plug headphones into this jack. 2 AUDIO IN/VIDEO IN Plug an audio cable into these jacks. Receives...
... the left and right audio jacks to turn your LCD TV is green. Press to open the on or off. When your LCD TV on -screen menu. Do not block. 67 # Jack Description 1 Headphone Plug headphones into this jack. 2 AUDIO IN/VIDEO IN Plug an audio cable into these jacks. Receives...

User Manual (English)
Page 4
... - + 8 CH- Press to select the closed caption mode. Press to increase or decrease the volume. You can select Wide, Zoom, Cinema, Full Screen, or Normal. Press to go to the next higher or lower channel. Press again to select a picture mode. Press to the previously viewed channel. symbols.... You can select Personal, Standard, Mild, or Fresh. Make sure that there is no obstruction between the remote control and the remote sensor on -screen menu. You can select TV, Composite, S-Video, VGA, Component, or HDMI. Plug an HDMI device into this jack. Press to select a digital...
... - + 8 CH- Press to select the closed caption mode. Press to increase or decrease the volume. You can select Wide, Zoom, Cinema, Full Screen, or Normal. Press to go to the next higher or lower channel. Press again to select a picture mode. Press to the previously viewed channel. symbols.... You can select Personal, Standard, Mild, or Fresh. Make sure that there is no obstruction between the remote control and the remote sensor on -screen menu. You can select TV, Composite, S-Video, VGA, Component, or HDMI. Plug an HDMI device into this jack. Press to select a digital...

User Manual (English)
Page 7
... press the CH buttons. Press MUTE or VOL+ to increase or decrease the volume. When the search is complete, the first channel appears on the screen to indicate the volume level. • Press MUTE to mute the sound. one or more times until the following menu opens. 2 Press VOL+ or... a channel from the channel list. If you want. You can select Cable Auto, Air, Cable, Cable HRC, or Cable IRC. A number appears on the screen. Selecting the TV signal source To select the TV signal source: 1 Press MENU, then press CH+ or CH- Memorizing channels To select channels with signals...
... press the CH buttons. Press MUTE or VOL+ to increase or decrease the volume. When the search is complete, the first channel appears on the screen to indicate the volume level. • Press MUTE to mute the sound. one or more times until the following menu opens. 2 Press VOL+ or... a channel from the channel list. If you want. You can select Cable Auto, Air, Cable, Cable HRC, or Cable IRC. A number appears on the screen. Selecting the TV signal source To select the TV signal source: 1 Press MENU, then press CH+ or CH- Memorizing channels To select channels with signals...

User Manual (English)
Page 8
.... The favorite channel list opens. 2 Press CH+ or CH- Your LCD TV automatically tunes to select an option. You can select Wide, Zoom, Cinema, Full Screen, or Normal. Adjusting advanced video settings To adjust advanced picture settings: 1 Press MENU, then press CH+ or CH- The following menu opens. 2 Press VOL+ or...
.... The favorite channel list opens. 2 Press CH+ or CH- Your LCD TV automatically tunes to select an option. You can select Wide, Zoom, Cinema, Full Screen, or Normal. Adjusting advanced video settings To adjust advanced picture settings: 1 Press MENU, then press CH+ or CH- The following menu opens. 2 Press VOL+ or...
User Manual (English)
Page 9
... times until the following menu opens. The following appears. 4 Press CH+ or CH- You can select: • CC1-Displays a written version of the screen. This setting is only saved if Audio Mode is set the date, press CH+ or CH- Adding a channel label To add a channel label: 1...closed caption mode To select the closed caption styles only when in TV, Composite, or S-Video mode. This mode covers a large area of the screen. • TEXT2 through CC4-Displays a second language version of the audio or other information provided by the broadcaster. • TEXT1-Displays the program...
... times until the following menu opens. The following appears. 4 Press CH+ or CH- You can select: • CC1-Displays a written version of the screen. This setting is only saved if Audio Mode is set the date, press CH+ or CH- Adding a channel label To add a channel label: 1...closed caption mode To select the closed caption styles only when in TV, Composite, or S-Video mode. This mode covers a large area of the screen. • TEXT2 through CC4-Displays a second language version of the audio or other information provided by the broadcaster. • TEXT1-Displays the program...

User Manual (English)
Page 10
...sexual language or situations, and occasional offensive language. PG Parental guidance suggested . NC-17 No suitable for children 13 and over . The Enter Password screen opens. 4 Press the number buttons to select Digital Closed Caption. 3 Press VOL+ or ENTER. to change the style. You can block TV...to change , the press VOL+ or VOL- Suitable for children under 18. Not suitable for children 16 and over . The Parental Control Menu screen opens. to let children and pre-teens view a program with this rating. 18+ Adults only. US TV ratings NONE TV-Y TV-Y7 TV...
...sexual language or situations, and occasional offensive language. PG Parental guidance suggested . NC-17 No suitable for children 13 and over . The Enter Password screen opens. 4 Press the number buttons to select Digital Closed Caption. 3 Press VOL+ or ENTER. to change the style. You can block TV...to change , the press VOL+ or VOL- Suitable for children under 18. Not suitable for children 16 and over . The Parental Control Menu screen opens. to let children and pre-teens view a program with this rating. 18+ Adults only. US TV ratings NONE TV-Y TV-Y7 TV...

User Manual (English)
Page 11
... or more times until the following menu opens. 2 Press VOL+ or ENTER, then press CH+ or CH- one or more times until the following ratings screens opens. Adjusting the component picture To adjust the component picture: 1 Make sure that your LCD TV 11 Note: The Advanced Rating option appears only in... stripes in Digital TV mode. 5 Press CH+ or CH- to block, then press ENTER. one or more times to the factory defaults. The VGA Setting screen opens. 50 50 50 50 6 Press CH+ or CH- to select the rating you have not set a password, enter the default password 0000. 5 When ...
... or more times until the following menu opens. 2 Press VOL+ or ENTER, then press CH+ or CH- one or more times until the following ratings screens opens. Adjusting the component picture To adjust the component picture: 1 Make sure that your LCD TV 11 Note: The Advanced Rating option appears only in... stripes in Digital TV mode. 5 Press CH+ or CH- to block, then press ENTER. one or more times to the factory defaults. The VGA Setting screen opens. 50 50 50 50 6 Press CH+ or CH- to select the rating you have not set a password, enter the default password 0000. 5 When ...

User Manual (English)
Page 12
... antenna and antenna cabling is supplying power. • Make sure that you have selected the correct video source. The Component Setting screen opens. 6 Press CH+ or CH- Picture and sound system Audio output External input ports Power requirements Power consumption Temperature Humidity Dimensions... that the sound is having difficulties. • Adjust the color. You can select: • H-Position-Moves the screen image left or right. • V-Position-Moves the screen image up or down. • Clock-Minimizes any vertical bars or stripes in good condition. • Adjust the ...
... antenna and antenna cabling is supplying power. • Make sure that you have selected the correct video source. The Component Setting screen opens. 6 Press CH+ or CH- Picture and sound system Audio output External input ports Power requirements Power consumption Temperature Humidity Dimensions... that the sound is having difficulties. • Adjust the color. You can select: • H-Position-Moves the screen image left or right. • V-Position-Moves the screen image up or down. • Clock-Minimizes any vertical bars or stripes in good condition. • Adjust the ...

User Manual (English)
Page 15
... new DX-LCDTV19 ("Product"), that the Product shall be free of defects in the original manufacture of the material or workmanship for lengthy periods (burn-in). During the Warranty Period, if the original manufacture of the material or workmanship of Dynex brand products and packaged with a screen 25 ...inches or larger, call 1-800-305-2204 www.dynexproducts.com DYNEX® is printed on the web site. If service of Best Buy Enterprise Services,...
... new DX-LCDTV19 ("Product"), that the Product shall be free of defects in the original manufacture of the material or workmanship for lengthy periods (burn-in). During the Warranty Period, if the original manufacture of the material or workmanship of Dynex brand products and packaged with a screen 25 ...inches or larger, call 1-800-305-2204 www.dynexproducts.com DYNEX® is printed on the web site. If service of Best Buy Enterprise Services,...
Warranty (English)
Page 1
... not cover: www.dynexproducts.com 1 This warranty does not cover refurbished product. If you notify Dynex during the Warranty Period. WHAT DOES THIS WARRANTY COVER? Call agents will diagnose and correct the issue...charges. Warranty coverage terminates if you sell or otherwise transfer the product. 1 Year Limited Warranty Dynex Products ("Dynex") warrants to you, the original purchaser of this new product, that the product shall be free...lasts for one (1) year from an authorized dealer of Dynex brand products and packaged with a screen 25 inches or larger, call 1-888-BESTBUY.
... not cover: www.dynexproducts.com 1 This warranty does not cover refurbished product. If you notify Dynex during the Warranty Period. WHAT DOES THIS WARRANTY COVER? Call agents will diagnose and correct the issue...charges. Warranty coverage terminates if you sell or otherwise transfer the product. 1 Year Limited Warranty Dynex Products ("Dynex") warrants to you, the original purchaser of this new product, that the product shall be free...lasts for one (1) year from an authorized dealer of Dynex brand products and packaged with a screen 25 inches or larger, call 1-888-BESTBUY.


