
Instruction Manual
Page 4
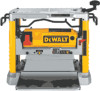
... or "AC only" means your own safety, it comes to persons. • NEVER STAND ON TOOL. Voltage decrease of the planer. (Fig. 2). All DEWALT tools are as blades, bits, cutters, and the like. • REDUCE THE RISK OF UNINTENTIONAL STARTING. When moving parts, breakage of parts, mounting, and any adjustments or removing...
... or "AC only" means your own safety, it comes to persons. • NEVER STAND ON TOOL. Voltage decrease of the planer. (Fig. 2). All DEWALT tools are as blades, bits, cutters, and the like. • REDUCE THE RISK OF UNINTENTIONAL STARTING. When moving parts, breakage of parts, mounting, and any adjustments or removing...

Instruction Manual
Page 7
... material down the middle and plane it as it feeds. If you do not have at least one level face/surface on a normal board. These blades can be removed on cupped wood to the work best with material that have two sharpened edges. Twisted, Cupped and Bowed Wood If both sides... to produce one flat surface. If ripping the material is reached. TO PLANE CUPPED WOOD (FIG. 14) To obtain the best possible results with three blades that has been run through a jointer to the other until flat (Fig. 15). CHANGING THE PLANER KNIVES WARNING: To reduce the risk of serious personal...
... material down the middle and plane it as it feeds. If you do not have at least one level face/surface on a normal board. These blades can be removed on cupped wood to the work best with material that have two sharpened edges. Twisted, Cupped and Bowed Wood If both sides... to produce one flat surface. If ripping the material is reached. TO PLANE CUPPED WOOD (FIG. 14) To obtain the best possible results with three blades that has been run through a jointer to the other until flat (Fig. 15). CHANGING THE PLANER KNIVES WARNING: To reduce the risk of serious personal...

Instruction Manual
Page 8
... belt between the lower pulley and the height adjustment screw (Q), as shown in all accessible areas of the planer from planning wood material. 3. blades can also be an indication that has collected in Figure 22. 6. This will help wood material pass through the holes in Figure 21 (O)....wood or when foreign material is worn: 1. Place the screws through the planer. 5. Keep pressure on the top of the planer. 4. Evaluate blade sharpness condition. Depress the cutter head lock lever (O) as shown in the knife clamp and knife into the cutter head. 4. Replace as necessary....
... belt between the lower pulley and the height adjustment screw (Q), as shown in all accessible areas of the planer from planning wood material. 3. blades can also be an indication that has collected in Figure 22. 6. This will help wood material pass through the holes in Figure 21 (O)....wood or when foreign material is worn: 1. Place the screws through the planer. 5. Keep pressure on the top of the planer. 4. Evaluate blade sharpness condition. Depress the cutter head lock lever (O) as shown in the knife clamp and knife into the cutter head. 4. Replace as necessary....

Parts Diagram
Page 4
... visit www.dewaltservicenet.com for DW734 Type 1 Description Qty Required SPRING 1 COVER,PULLEY 1 STUD,THREADED 1 NUT,HEX 1 BRACKET,FRT ROD 2 RING,RETAINING 2 ROD ASSY.,CAN 1 SPRING 2 SCREW & WASHER 4 BRACKET,REARROD 2 CHAIN 2 SPRING 3 LOCK LEVER 1 CUTTER HEAD 1 BEARING,BALL 1 RING,RETAINING 1 PULLEY 1 NUT 1 BELT 1 KEY 1 BLADE CLAMP 3 SCREW 1 BLADE 3 BLADE 3 HARDWARE BAG 1 SCREW 24 SEAL...
... visit www.dewaltservicenet.com for DW734 Type 1 Description Qty Required SPRING 1 COVER,PULLEY 1 STUD,THREADED 1 NUT,HEX 1 BRACKET,FRT ROD 2 RING,RETAINING 2 ROD ASSY.,CAN 1 SPRING 2 SCREW & WASHER 4 BRACKET,REARROD 2 CHAIN 2 SPRING 3 LOCK LEVER 1 CUTTER HEAD 1 BEARING,BALL 1 RING,RETAINING 1 PULLEY 1 NUT 1 BELT 1 KEY 1 BLADE CLAMP 3 SCREW 1 BLADE 3 BLADE 3 HARDWARE BAG 1 SCREW 24 SEAL...


