Mobile Precision Re-Image Guide
Page 10
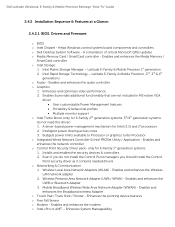
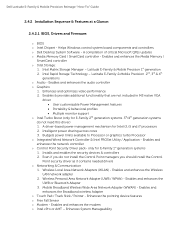
...) - Enhances the pointing device features o Free Fall Sensor o Modem - Intel Matrix Storage Manager - Dell Latitude Ultrabook, E-Family & Mobile Precision Reimage "How-To" Guide 2.4.2 Installation Sequence & Features at a Glance: 2.4.2.1 BIOS, Drivers and Firmware: o BIOS o Intel Chipset - Enables and enhances the Media Memory / SmartCard controller o Intel Storage: 1. Intelligent power sharing across cores 3. Enables and enhances the...
...) - Enhances the pointing device features o Free Fall Sensor o Modem - Intel Matrix Storage Manager - Dell Latitude Ultrabook, E-Family & Mobile Precision Reimage "How-To" Guide 2.4.2 Installation Sequence & Features at a Glance: 2.4.2.1 BIOS, Drivers and Firmware: o BIOS o Intel Chipset - Enables and enhances the Media Memory / SmartCard controller o Intel Storage: 1. Intelligent power sharing across cores 3. Enables and enhances the...
Mobile Precision Re-Image Guide
Page 14
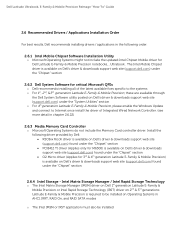
... the Windows Update and connect to be installed on Dell's driver & downloads support web site (support.dell.com) found under the "Chipset" section 2.6.4 Intel Storage - Dell Latitude Ultrabook, E-Family & Mobile Precision Reimage "How-To" Guide 2.6 Recommended Drivers / Applications Installation Order For best results, Dell recommends installing drivers / applications in chapter 2.6.22) 2.6.3 Media Memory Card Controller o Microsoft Operating Systems do...
... the Windows Update and connect to be installed on Dell's driver & downloads support web site (support.dell.com) found under the "Chipset" section 2.6.4 Intel Storage - Dell Latitude Ultrabook, E-Family & Mobile Precision Reimage "How-To" Guide 2.6 Recommended Drivers / Applications Installation Order For best results, Dell recommends installing drivers / applications in chapter 2.6.22) 2.6.3 Media Memory Card Controller o Microsoft Operating Systems do...
Latitude E-Family Mobile Precision Re-Image Guide
Page 9
... Memory Card / SmartCard controller - Intel Rapid Storage Technology - Enhances and optimizes video performance 2. Latitude E-Family & Mobile Precision 1st generation 2. Intelligent power sharing across cores 3. Enhances the pointing device features o Free Fall Sensor o Modem - Latitude E-Family & Mobile Precision 2nd, 3rd & 4th generations o Audio - Intel Matrix Storage Manager - Dell Latitude E-Family & Mobile Precision Reimage "How-To" Guide 2.4.2 Installation...
... Memory Card / SmartCard controller - Intel Rapid Storage Technology - Enhances and optimizes video performance 2. Latitude E-Family & Mobile Precision 1st generation 2. Intelligent power sharing across cores 3. Enhances the pointing device features o Free Fall Sensor o Modem - Latitude E-Family & Mobile Precision 2nd, 3rd & 4th generations o Audio - Intel Matrix Storage Manager - Dell Latitude E-Family & Mobile Precision Reimage "How-To" Guide 2.4.2 Installation...
Latitude E-Family Mobile Precision Re-Image Guide
Page 13
... Matrix Storage Manager (IMSM) driver on Dell 1st generation Latitude E-Family & Mobile Precision or Intel Rapid Storage Technology (IRST) driver on 2nd & 3rd generations Latitude E-Family & Mobile Precision is required to Internet once install the driver of Integrated Wired Network Controller. (see more detail in chapter 2.6.22) 2.6.3 Media Memory Card Controller o Microsoft Operating Systems do...
... Matrix Storage Manager (IMSM) driver on Dell 1st generation Latitude E-Family & Mobile Precision or Intel Rapid Storage Technology (IRST) driver on 2nd & 3rd generations Latitude E-Family & Mobile Precision is required to Internet once install the driver of Integrated Wired Network Controller. (see more detail in chapter 2.6.22) 2.6.3 Media Memory Card Controller o Microsoft Operating Systems do...
Owner's manual
Page 4
Removing the Keyboard...24 Installing the Keyboard...26 Removing the Primary Memory...26 Installing the Primary Memory...27 Removing the Secondary Memory...27 Installing the Secondary Memory...28 Removing the Bluetooth Module...28 Installing the Bluetooth Module...29 Removing the Display Bezel...29 Installing the Display Bezel...31 Removing the Camera...31 Installing the Camera...31 Removing the Display Panel...31...
Removing the Keyboard...24 Installing the Keyboard...26 Removing the Primary Memory...26 Installing the Primary Memory...27 Removing the Secondary Memory...27 Installing the Secondary Memory...28 Removing the Bluetooth Module...28 Installing the Bluetooth Module...29 Removing the Display Bezel...29 Installing the Display Bezel...31 Removing the Camera...31 Installing the Camera...31 Removing the Display Panel...31...
Owner's manual
Page 26
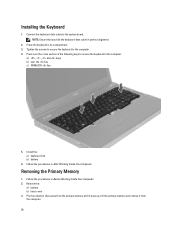
... the retention clips away from the computer. 26 Follow the procedures in After Working Inside Your Computer. Lift the primary memory and remove it from the primary memory until it pops up. Connect the keyboard-data cable to the computer. 4. Tighten the screws to secure the keyboard to the ... 3. Press over the cross section of the following keys to secure the keyboard to the computer: a) , , and keys b) over the key c) NUMLOCK key 5. Install the: a) keyboard trim b) battery 6. Installing the Keyboard 1. Follow the procedures in Before Working Inside Your Computer. 2.
... the retention clips away from the computer. 26 Follow the procedures in After Working Inside Your Computer. Lift the primary memory and remove it from the primary memory until it pops up. Connect the keyboard-data cable to the computer. 4. Tighten the screws to secure the keyboard to the ... 3. Press over the cross section of the following keys to secure the keyboard to the computer: a) , , and keys b) over the key c) NUMLOCK key 5. Install the: a) keyboard trim b) battery 6. Installing the Keyboard 1. Follow the procedures in Before Working Inside Your Computer. 2.

Owner's manual
Page 27
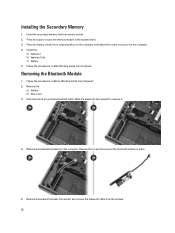
... and remove it pops up. Remove the: a) battery b) keyboard trim c) keyboard 3. Installing the Primary Memory 1. Press the clips to secure the primary memory to the computer and remove the memory shield. 4. Pry the retention clips away from the memory module until it from the computer. 27 Follow the procedures in After Working Inside Your Computer...
... and remove it pops up. Remove the: a) battery b) keyboard trim c) keyboard 3. Installing the Primary Memory 1. Press the clips to secure the primary memory to the computer and remove the memory shield. 4. Pry the retention clips away from the memory module until it from the computer. 27 Follow the procedures in After Working Inside Your Computer...
Owner's manual
Page 28
...the procedures in After Working Inside Your Computer. Remove the bluetooth module from the module. 28 Press the clips to secure the memory module to the computer. 4. Install the: a) keyboard b) keyboard trim c) battery 5. Remove the screw that secures the bluetooth module in its original position on ...the computer and tighten the screw to secure it . 4. Removing the Bluetooth Module 1. Place the memory shield in place. 5. Slide the bluetooth door upward to release it to the system board. 3. Installing the Secondary Memory 1. Remove the bluetooth module.
...the procedures in After Working Inside Your Computer. Remove the bluetooth module from the module. 28 Press the clips to secure the memory module to the computer. 4. Install the: a) keyboard b) keyboard trim c) battery 5. Remove the screw that secures the bluetooth module in its original position on ...the computer and tighten the screw to secure it . 4. Removing the Bluetooth Module 1. Place the memory shield in place. 5. Slide the bluetooth door upward to release it to the system board. 3. Installing the Secondary Memory 1. Remove the bluetooth module.
Owner's manual
Page 51
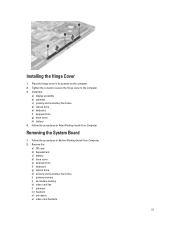
... e) keyboard trim f) keyboard g) optical drive h) primary and secondary hard drive i) primary memory j) secondary memory k) video-card fan l) palmrest m) heatsink n) processor o) video-card heatsink. 51 Tighten the screws to secure the hinge cover to the computer. 3. Installing the Hinge Cover 1. Removing the System Board 1. Install the: a) display assembly b) palmrest c) primary and secondary hard drive d) optical...
... e) keyboard trim f) keyboard g) optical drive h) primary and secondary hard drive i) primary memory j) secondary memory k) video-card fan l) palmrest m) heatsink n) processor o) video-card heatsink. 51 Tighten the screws to secure the hinge cover to the computer. 3. Installing the Hinge Cover 1. Removing the System Board 1. Install the: a) display assembly b) palmrest c) primary and secondary hard drive d) optical...
Owner's manual
Page 55
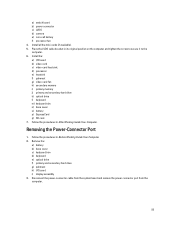
Install all the mini-cards (if available). 5. a) switch board b) power connector c) LVDS d) camera e) coin-cell battery f) processor fan 4. d) processor e) heatsink f) palmrest g) video-card fan h) secondary memory i) primary memory j) primary and secondary hard drive k) optical drive l) keyboard m) keyboard ... keyboard e) optical drive f) primary and secondary hard drive g) palmrest h) I /O board b) video card c) video-card heat sink. Install the: a) I /O board i) display assembly 3. Follow the procedures in its original position on the computer and tighten the screw to secure...
Install all the mini-cards (if available). 5. a) switch board b) power connector c) LVDS d) camera e) coin-cell battery f) processor fan 4. d) processor e) heatsink f) palmrest g) video-card fan h) secondary memory i) primary memory j) primary and secondary hard drive k) optical drive l) keyboard m) keyboard ... keyboard e) optical drive f) primary and secondary hard drive g) palmrest h) I /O board b) video card c) video-card heat sink. Install the: a) I /O board i) display assembly 3. Follow the procedures in its original position on the computer and tighten the screw to secure...

Owner's manual
Page 60
... For the standard graphics browser only. System Setup Options NOTE: Depending on your computer. • System Information • Memory Information • Processor Information • Device Information Battery Information Boot Sequence Displays the charge status of the battery. Table ...System Setup help file. General Option System Information Description This section lists the primary hardware features of your computer and its installed devices, the items listed in which the computer attempts to save any unsaved changes and restarts the system. System Configuration Option...
... For the standard graphics browser only. System Setup Options NOTE: Depending on your computer. • System Information • Memory Information • Processor Information • Device Information Battery Information Boot Sequence Displays the charge status of the battery. Table ...System Setup help file. General Option System Information Description This section lists the primary hardware features of your computer and its installed devices, the items listed in which the computer attempts to save any unsaved changes and restarts the system. System Configuration Option...
Owner's manual
Page 73
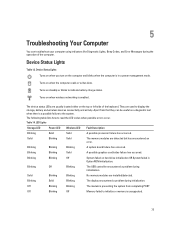
...Storage LED Power LED Wireless LED Fault Description Blinking Solid Solid A possible processor failure has occurred. Solid Blinking Solid The memory modules are usually located either on when wireless networking is in Option ROM initialization. Device Status Lights Table 13. Device Status...OR System failed in a power management mode. The device status LEDs are detected but has encountered an error. They are installed/detected. Off Blinking Blinking The modem is preventing the system from that they can troubleshoot your computer using indicators like Diagnostic ...
...Storage LED Power LED Wireless LED Fault Description Blinking Solid Solid A possible processor failure has occurred. Solid Blinking Solid The memory modules are usually located either on when wireless networking is in Option ROM initialization. Device Status Lights Table 13. Device Status...OR System failed in a power management mode. The device status LEDs are detected but has encountered an error. They are installed/detected. Off Blinking Blinking The modem is preventing the system from that they can troubleshoot your computer using indicators like Diagnostic ...


