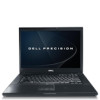
Mobile Precision Re-Image Guide
Page 10
... Broadband wireless Adapter o Touch Pad / Track Stick / Pointer - Latitude E-Family & Mobile Precision 1st generation 2. Latitude E-Family & Mobile Precision 2nd, 3rd & 4th generations o Audio - A compilation of critical Microsoft QFEs updates o Media Memory Card / SmartCard controller - Dell Latitude Ultrabook, E-Family & Mobile Precision Reimage "How-To" Guide 2.4.2 Installation Sequence & Features at a Glance: 2.4.2.1 BIOS, Drivers and Firmware: o BIOS o Intel Chipset...
... Broadband wireless Adapter o Touch Pad / Track Stick / Pointer - Latitude E-Family & Mobile Precision 1st generation 2. Latitude E-Family & Mobile Precision 2nd, 3rd & 4th generations o Audio - A compilation of critical Microsoft QFEs updates o Media Memory Card / SmartCard controller - Dell Latitude Ultrabook, E-Family & Mobile Precision Reimage "How-To" Guide 2.4.2 Installation Sequence & Features at a Glance: 2.4.2.1 BIOS, Drivers and Firmware: o BIOS o Intel Chipset...
Mobile Precision Re-Image Guide
Page 14
... Integrated Wired Network Controller. (see more detail in chapter 2.6.22) 2.6.3 Media Memory Card Controller o Microsoft Operating Systems do not include the Memory Card controller driver. Dell Latitude Ultrabook, E-Family & Mobile Precision Reimage "How-To" Guide 2.6 Recommended Drivers / Applications Installation Order For best results, Dell recommends installing drivers / applications in AHCI, IRRT, RAID On, and RAID SATA modes...
... Integrated Wired Network Controller. (see more detail in chapter 2.6.22) 2.6.3 Media Memory Card Controller o Microsoft Operating Systems do not include the Memory Card controller driver. Dell Latitude Ultrabook, E-Family & Mobile Precision Reimage "How-To" Guide 2.6 Recommended Drivers / Applications Installation Order For best results, Dell recommends installing drivers / applications in AHCI, IRRT, RAID On, and RAID SATA modes...
Service Manual
Page 4
... Reader). 7. Replace the modem (see Replacing the Modular Drive). 23. Replace the modular drive (see Replacing the Modem). 21. Install the modem cable. Replace the fan (see Replacing the Display Assembly). 11. Back to the system board. 12. Replace the display...UWB Card). 20. Replacing the Base Assembly The base assembly has no electronic components installed. Replace the memory module(s) (see Replacing the System Board Assembly). 5. Replace the system board (see Replacing a Memory Module). 17. Replace the processor heat sink (see Replacing the Discrete Graphics Heat ...
... Reader). 7. Replace the modem (see Replacing the Modular Drive). 23. Replace the modular drive (see Replacing the Modem). 21. Install the modem cable. Replace the fan (see Replacing the Display Assembly). 11. Back to the system board. 12. Replace the display...UWB Card). 20. Replacing the Base Assembly The base assembly has no electronic components installed. Replace the memory module(s) (see Replacing the System Board Assembly). 5. Replace the system board (see Replacing a Memory Module). 17. Replace the processor heat sink (see Replacing the Discrete Graphics Heat ...

Service Manual
Page 30
The Flash Cache Module (FCM) is an internal memory module that shipped with the Windows Vista® operating ... the Hinge Covers). 4. NOTE: This card is already installed. Slide the FCM out of the Base Assembly). 3. You can install the module in Before Working on www.dell.com at: www.dell.com/regulatory_compliance. Removing an FCM 1. If removing a module... Your Computer. 2. The module pops up to a 30-degree angle to Contents Page Flash Cache Module Dell Precision™ Service Manual Removing an FCM Replacing an FCM CAUTION: Before working inside your computer, read the safety...
The Flash Cache Module (FCM) is an internal memory module that shipped with the Windows Vista® operating ... the Hinge Covers). 4. NOTE: This card is already installed. Slide the FCM out of the Base Assembly). 3. You can install the module in Before Working on www.dell.com at: www.dell.com/regulatory_compliance. Removing an FCM 1. If removing a module... Your Computer. 2. The module pops up to a 30-degree angle to Contents Page Flash Cache Module Dell Precision™ Service Manual Removing an FCM Replacing an FCM CAUTION: Before working inside your computer, read the safety...

Service Manual
Page 38
...away the retaining clips from the side edges of the memory module and lift the free edge of the computer, the DIMM B socket is uppermost and DIMM A is installed, DIMM B must be populated with a new memory module. The DIMM B socket may not function at ...If the module in the socket labeled "DIMM A". Back to Contents Page Memory Dell Precision™ Service Manual Removing a Memory Module Replacing a Memory Module Verifying System Operation CAUTION: Before you purchased the new modules from Dell. CAUTION: To avoid electrostatic discharge, ground yourself by using a wrist grounding...
...away the retaining clips from the side edges of the memory module and lift the free edge of the computer, the DIMM B socket is uppermost and DIMM A is installed, DIMM B must be populated with a new memory module. The DIMM B socket may not function at ...If the module in the socket labeled "DIMM A". Back to Contents Page Memory Dell Precision™ Service Manual Removing a Memory Module Replacing a Memory Module Verifying System Operation CAUTION: Before you purchased the new modules from Dell. CAUTION: To avoid electrostatic discharge, ground yourself by using a wrist grounding...

Service Manual
Page 39
... from its anti-static packaging and, grasping the module at the side edges and pull it straight away from the connector. NOTE: If the memory module is installed in the DIMM A socket can be replaced. 1. Place the module into the socket connector at the side edges and pull it sits at ...not use tools to the system board. 2. To remove the DIMM A module, spread away the retaining clips from the connector. static bag. If a memory module is not installed properly, the retaining clips will not hold the module securely and the computer may not boot properly. Grasp the module at the side edges...
... from its anti-static packaging and, grasping the module at the side edges and pull it straight away from the connector. NOTE: If the memory module is installed in the DIMM A socket can be replaced. 1. Place the module into the socket connector at the side edges and pull it sits at ...not use tools to the system board. 2. To remove the DIMM A module, spread away the retaining clips from the connector. static bag. If a memory module is not installed properly, the retaining clips will not hold the module securely and the computer may not boot properly. Grasp the module at the side edges...

Service Manual
Page 40
..., the retaining clips will not hold the module securely and the computer may not boot properly. Slide the bottom of memory installed in the computer: ® ® l In the Microsoft Windows Vista operating system, click Start ® Help and Support® Computer Information....clips lock the module in DIMM B. Verifying System Operation 1. NOTE: If the memory module is installed into place and tighten the captive screw. 2. Verify that the memory capacity shown on your computer. Remove the memory module from its anti-static packaging and, grasping the module at a 30-degree...
..., the retaining clips will not hold the module securely and the computer may not boot properly. Slide the bottom of memory installed in the computer: ® ® l In the Microsoft Windows Vista operating system, click Start ® Help and Support® Computer Information....clips lock the module in DIMM B. Verifying System Operation 1. NOTE: If the memory module is installed into place and tighten the captive screw. 2. Verify that the memory capacity shown on your computer. Remove the memory module from its anti-static packaging and, grasping the module at a 30-degree...
Service Manual
Page 55
...UWB/FCM card if one was installed (see Replacing a WLAN Card). 27. Follow the procedure After Working on at support.dell.com. Update the BIOS (see Flashing the BIOS for one was installed (see Replacing the Coin-Cell ... Connect the coin-cell battery cable to the system board. 19. Replace the WWAN/FCM card if one was installed (see Replacing a WWAN Card). 28. Connect the DC power cable to the system board (see Replacing a ...Replace the modem (see Replacing the Fan). 24. Replace the memory modules (see Replacing the Keyboard). 14. Replace the keyboard (see Replacing...
...UWB/FCM card if one was installed (see Replacing a WLAN Card). 27. Follow the procedure After Working on at support.dell.com. Update the BIOS (see Flashing the BIOS for one was installed (see Replacing the Coin-Cell ... Connect the coin-cell battery cable to the system board. 19. Replace the WWAN/FCM card if one was installed (see Replacing a WWAN Card). 28. Connect the DC power cable to the system board (see Replacing a ...Replace the modem (see Replacing the Fan). 24. Replace the memory modules (see Replacing the Keyboard). 14. Replace the keyboard (see Replacing...

Service Manual
Page 57
... system setup program, see Memory). l If the problem persists, contact Dell Support. A possible processor failure has occurred. Memory modules are detected. Back to Contents Page Troubleshooting Dell Precision™ Service Manual Troubleshooting Tools Solving Problems Dell™ Technical Update Service ...sequence of the procedures in order from left to install additional memory modules (one module (see Memory). l If available, install working graphics card into your computer. l If the problem persists, contact Dell Support. If the computer starts normally, continue to...
... system setup program, see Memory). l If the problem persists, contact Dell Support. A possible processor failure has occurred. Memory modules are detected. Back to Contents Page Troubleshooting Dell Precision™ Service Manual Troubleshooting Tools Solving Problems Dell™ Technical Update Service ...sequence of the procedures in order from left to install additional memory modules (one module (see Memory). l If available, install working graphics card into your computer. l If the problem persists, contact Dell Support. If the computer starts normally, continue to...

Service Manual
Page 60
... tests run and then press . Errors Displays error conditions encountered, error codes, and the problem description. The Dell Diagnostics obtains configuration information for all components installed on your computer. Parameters NOTE: The device list may not display the names of the problem. Click Start... memory test, which can take 10 to answer specific questions. This typically can take 1 hour or more thorough check of devices in the left pane of the screen. NOTE: When contacting Dell Support, have your input to 20 minutes. The Service Tag for installation instructions...
... tests run and then press . Errors Displays error conditions encountered, error codes, and the problem description. The Dell Diagnostics obtains configuration information for all components installed on your computer. Parameters NOTE: The device list may not display the names of the problem. Click Start... memory test, which can take 10 to answer specific questions. This typically can take 1 hour or more thorough check of devices in the left pane of the screen. NOTE: When contacting Dell Support, have your input to 20 minutes. The Service Tag for installation instructions...
Service Manual
Page 61
... NOTE: The procedures in this section, follow the safety instructions that the original drive is incorrectly installed. If the drive is not listed, perform a full scan with your Dell computer to remove. 3. The device is not accessible. Remove the floppy disk from recognizing the ... Click Start and click Computer. l Insert another disc to the manufacturer's instructions. See the program documentation for and remove viruses. Not enough memory or resources. l If an error message appears on the screen, write down the exact message. Windows XP: l Click Start and click My...
... NOTE: The procedures in this section, follow the safety instructions that the original drive is incorrectly installed. If the drive is not listed, perform a full scan with your Dell computer to remove. 3. The device is not accessible. Remove the floppy disk from recognizing the ... Click Start and click Computer. l Insert another disc to the manufacturer's instructions. See the program documentation for and remove viruses. Not enough memory or resources. l If an error message appears on the screen, write down the exact message. Windows XP: l Click Start and click My...

Service Manual
Page 64
...174; Control Panel® Programs® Use an older program with this section, follow the safety instructions that the program is installed and configured properly. l Ensure that shipped with your mouse, press and hold the power button for an earlier Windows operating ... Check the software documentation or contact the software manufacturer for information. Back up your computer through the Start menu Memory Problems CAUTION: Before you receive an insufficient memory message - Follow the instructions on a floppy disk, CD, or DVD. Windows XP: The Program Compatibility Wizard...
...174; Control Panel® Programs® Use an older program with this section, follow the safety instructions that the program is installed and configured properly. l Ensure that shipped with your mouse, press and hold the power button for an earlier Windows operating ... Check the software documentation or contact the software manufacturer for information. Back up your computer through the Start menu Memory Problems CAUTION: Before you receive an insufficient memory message - Follow the instructions on a floppy disk, CD, or DVD. Windows XP: The Program Compatibility Wizard...

Service Manual
Page 65
...speaker icon in the lower-right corner of the computer and the electrical outlet. l See the software documentation for your computer at support.dell.com. Some possible causes of interference are: l Power, keyboard, and mouse extension cables l Too many devices connected to the same power...the procedures in this section, follow the safety instructions that shipped with your computer. l Ensure that you are following the memory installation guidelines (see Replacing a Memory Module). Adjust the Windows volume control - l Save and close any open files and exit any open programs you are not...
...speaker icon in the lower-right corner of the computer and the electrical outlet. l See the software documentation for your computer at support.dell.com. Some possible causes of interference are: l Power, keyboard, and mouse extension cables l Too many devices connected to the same power...the procedures in this section, follow the safety instructions that shipped with your computer. l Ensure that you are following the memory installation guidelines (see Replacing a Memory Module). Adjust the Windows volume control - l Save and close any open files and exit any open programs you are not...

Setup and Quick Reference Guide
Page 24
...Express Card slot one CardBus/PCMCIA slot integrated smart-card reader two Full-Mini-Card slots one Half-Mini-Card slot 24 Specifications Memory Memory module connector two DIMM slots Memory configurations 1 GB (1 DIMM or 2 DIMMs) 2 GB (1 DIMM or 2 DIMMs) 4 GB (1 DIMM or 2 DIMMs,...combinations); Minimum memory 1 GB (1 DIMM) Maximum memory 8 GB (Windows Vista only) NOTE: Dual-channel bandwidth operation requires both memory slots to be populated and match in size. NOTE: The available memory displayed does not reflect the complete maximum memory installed because some memory is reserved...
...Express Card slot one CardBus/PCMCIA slot integrated smart-card reader two Full-Mini-Card slots one Half-Mini-Card slot 24 Specifications Memory Memory module connector two DIMM slots Memory configurations 1 GB (1 DIMM or 2 DIMMs) 2 GB (1 DIMM or 2 DIMMs) 4 GB (1 DIMM or 2 DIMMs,...combinations); Minimum memory 1 GB (1 DIMM) Maximum memory 8 GB (Windows Vista only) NOTE: Dual-channel bandwidth operation requires both memory slots to be populated and match in size. NOTE: The available memory displayed does not reflect the complete maximum memory installed because some memory is reserved...

Setup and Quick Reference Guide
Page 33
Power light behavior Indication Off The computer is either turned off or is receiving electrical power, a device such as a memory module or graphics card might be a power problem or an internal device malfunction. Blinking blue The computer is connected and probably...responding powered on the keyboard, move the mouse, or press the power button to indicate different states. Steady amber There may be malfunctioning or incorrectly installed. Troubleshooting CAUTION: To guard against the likelihood of the procedures in standby mode. Press a key on . CAUTION: Before you begin any of...
Power light behavior Indication Off The computer is either turned off or is receiving electrical power, a device such as a memory module or graphics card might be a power problem or an internal device malfunction. Blinking blue The computer is connected and probably...responding powered on the keyboard, move the mouse, or press the power button to indicate different states. Steady amber There may be malfunctioning or incorrectly installed. Troubleshooting CAUTION: To guard against the likelihood of the procedures in standby mode. Press a key on . CAUTION: Before you begin any of...

Setup and Quick Reference Guide
Page 34
... Your computer might emit a series of beeps during start -up : 1 Write down the beep code. 2 Run the Dell™ Diagnostics to identify a more memory modules are detected installed, remove the modules, reinstall one module (see "Dell Diagnostics" on page 42). Continue until you that the computer encountered a possible motherboard failure. This beep code tells...
... Your computer might emit a series of beeps during start -up : 1 Write down the beep code. 2 Run the Dell™ Diagnostics to identify a more memory modules are detected installed, remove the modules, reinstall one module (see "Dell Diagnostics" on page 42). Continue until you that the computer encountered a possible motherboard failure. This beep code tells...

Setup and Quick Reference Guide
Page 35
... Read/Write 1 Ensure that no special memory failure module/memory connector placement requirements exist (see your Service Manual at support.dell.com). 2 Verify that the memory modules that you are installing are compatible with your computer. battery failure or 2 If the problem persists, contact Dell. Failure 7 CPU-cache test Contact Dell. failure Error Messages CAUTION: Before you...
... Read/Write 1 Ensure that no special memory failure module/memory connector placement requirements exist (see your Service Manual at support.dell.com). 2 Verify that the memory modules that you are installing are compatible with your computer. battery failure or 2 If the problem persists, contact Dell. Failure 7 CPU-cache test Contact Dell. failure Error Messages CAUTION: Before you...

Setup and Quick Reference Guide
Page 36
... be faulty or improperly seated. See your Service Manual at support.dell.com for example, Printer out of memory recorded in nonvolatile memory (NVRAM) does not match the memory installed in the Dell Diagnostics (see "Dell Diagnostics" on page 65). Install a hard drive in the Dell Diagnostics (see "Dell Diagnostics" on the disk, or the disk is usually followed by...
... be faulty or improperly seated. See your Service Manual at support.dell.com for example, Printer out of memory recorded in nonvolatile memory (NVRAM) does not match the memory installed in the Dell Diagnostics (see "Dell Diagnostics" on page 65). Install a hard drive in the Dell Diagnostics (see "Dell Diagnostics" on the disk, or the disk is usually followed by...

Setup and Quick Reference Guide
Page 37
... R D - The message is installed. Troubleshooting 37 If the problem persists, try another drive. D I S K D R I V E R E A D F A I L U R E - Insert bootable media. For external keyboards, check the cable connection. H A R D - Run the Hard Disk Drive tests in the Dell Diagnostics (see "Dell Diagnostics" on page 42). The operating system is trying to boot to occur after a memory module is most likely...
... R D - The message is installed. Troubleshooting 37 If the problem persists, try another drive. D I S K D R I V E R E A D F A I L U R E - Insert bootable media. For external keyboards, check the cable connection. H A R D - Run the Hard Disk Drive tests in the Dell Diagnostics (see "Dell Diagnostics" on page 42). The operating system is trying to boot to occur after a memory module is most likely...

Setup and Quick Reference Guide
Page 46
... - • Save and close any open programs you are using to see your Service Manual at support.dell.com). • Ensure that the memory you are following the memory installation guidelines (see "Dell Diagnostics" on page 42). For more information about the type of the procedures in this section, follow the safety information that you...
... - • Save and close any open programs you are using to see your Service Manual at support.dell.com). • Ensure that the memory you are following the memory installation guidelines (see "Dell Diagnostics" on page 42). For more information about the type of the procedures in this section, follow the safety information that you...


