Quick Reference Guide
Page 12
...; Using wireless communications devices, PC Cards, ExpressCards, media memory cards, or USB devices • Using high-brightness display settings, 3D screen savers, or other computers with the AC adapter until the battery is designed to work with the main battery installed at all times. CAUTION... not puncture, incinerate, disassemble, or expose the battery to temperatures above 65°C (149°F). Replace the battery only with your computer. Keep the battery away from Dell. See "Battery Disposal" in the media bay to significantly increase operating time. You can also set ...
...; Using wireless communications devices, PC Cards, ExpressCards, media memory cards, or USB devices • Using high-brightness display settings, 3D screen savers, or other computers with the AC adapter until the battery is designed to work with the main battery installed at all times. CAUTION... not puncture, incinerate, disassemble, or expose the battery to temperatures above 65°C (149°F). Replace the battery only with your computer. Keep the battery away from Dell. See "Battery Disposal" in the media bay to significantly increase operating time. You can also set ...
Service Manual (English Only)
Page 41
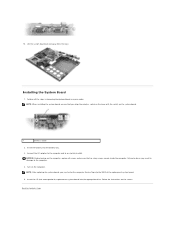
... switch on the base with the switch on the computer, replace all the steps in Removing the System Board in damage to do so may result in reverse order. 16. Failure to the computer. 4. Turn on the screen. Follow the instructions on the computer. Insert the battery into... the BIOS of the replacement system board. 5. Insert the CD that you must enter the computer Service Tag into the battery bay....
... switch on the base with the switch on the computer, replace all the steps in Removing the System Board in damage to do so may result in reverse order. 16. Failure to the computer. 4. Turn on the screen. Follow the instructions on the computer. Insert the battery into... the BIOS of the replacement system board. 5. Insert the CD that you must enter the computer Service Tag into the battery bay....
User's Guide
Page 4
Replacing the Battery 33 Storing a Battery 34 4 Using the Keyboard and Touch Pad Numeric Keypad 35 Key Combinations 35 System Functions 35 Battery 36 Display Functions ... Display Adjusting Brightness 45 Switching the Video Image From Your Computer Display to a Projector. . . . 45 Making Images and Text Look Bigger or Sharper on the Screen: Setting Display Resolution and Refresh Rate 45 Microsoft® Windows® XP 46 Windows Vista 46 2 Contents
Replacing the Battery 33 Storing a Battery 34 4 Using the Keyboard and Touch Pad Numeric Keypad 35 Key Combinations 35 System Functions 35 Battery 36 Display Functions ... Display Adjusting Brightness 45 Switching the Video Image From Your Computer Display to a Projector. . . . 45 Making Images and Text Look Bigger or Sharper on the Screen: Setting Display Resolution and Refresh Rate 45 Microsoft® Windows® XP 46 Windows Vista 46 2 Contents

User's Guide
Page 8
If only part of the display is readable 92 11 System Setup Program Overview 93 Viewing the System Setup Screens 93 System Setup Screens 94 Commonly Used Settings 94 Changing the Boot Sequence 94 Changing COM Ports 95 12 Traveling With Your Computer Identifying Your Computer 97 Packing the ... Windows Vista Operating Systems 102 Restoring Your Operating System 102 Using Microsoft Windows System Restore 103 Using the Operating System Media 104 14 Adding and Replacing Parts Before You Begin 107 Recommended Tools 107 Turning Off Your Computer 107 6 Contents
If only part of the display is readable 92 11 System Setup Program Overview 93 Viewing the System Setup Screens 93 System Setup Screens 94 Commonly Used Settings 94 Changing the Boot Sequence 94 Changing COM Ports 95 12 Traveling With Your Computer Identifying Your Computer 97 Packing the ... Windows Vista Operating Systems 102 Restoring Your Operating System 102 Using Microsoft Windows System Restore 103 Using the Operating System Media 104 14 Adding and Replacing Parts Before You Begin 107 Recommended Tools 107 Turning Off Your Computer 107 6 Contents
User's Guide
Page 31
...• Using wireless communications devices, PC Cards, ExpressCards, media memory cards, or USB devices • Using high-brightness display settings, 3D screen savers, or other computers with your computer. To view battery charge status, access the Control Panel→Power Options, and then click the...separate paper warranty document that you use the computer. CAUTION: Using an incompatible battery may not be fully charged, use a battery from Dell. Replace the battery only with the AC adapter until the battery is used, you may need to a CD or DVD. You can hold...
...• Using wireless communications devices, PC Cards, ExpressCards, media memory cards, or USB devices • Using high-brightness display settings, 3D screen savers, or other computers with your computer. To view battery charge status, access the Control Panel→Power Options, and then click the...separate paper warranty document that you use the computer. CAUTION: Using an incompatible battery may not be fully charged, use a battery from Dell. Replace the battery only with the AC adapter until the battery is used, you may need to a CD or DVD. You can hold...

User's Guide
Page 84
... "Dell Diagnostics" on the screen. 4 See the program documentation for instructions. The computer cannot find a specific track on page 115) and, if necessary, replace them... corrupted. Then immediately exit the program. TI M E - The time or date stored in the Dell Diagnostics (see "Memory" on the hard drive. A memory module may be faulty or improperly seated. N O B O O T S E C T O R O N H A R D D R I N G S YS T E M N O T F O U N D - A chip on page 115) and, if necessary, replace them . N O T E N O U G H M E M O R Y O R R E S O U R C E S . E X I T S O M E P R O G R ...
... "Dell Diagnostics" on the screen. 4 See the program documentation for instructions. The computer cannot find a specific track on page 115) and, if necessary, replace them... corrupted. Then immediately exit the program. TI M E - The time or date stored in the Dell Diagnostics (see "Memory" on the hard drive. A memory module may be faulty or improperly seated. N O B O O T S E C T O R O N H A R D D R I N G S YS T E M N O T F O U N D - A chip on page 115) and, if necessary, replace them . N O T E N O U G H M E M O R Y O R R E S O U R C E S . E X I T S O M E P R O G R ...

User's Guide
Page 147
... surrounding palm rest. Appendix 145 Do not allow water from the electrical outlet and remove any installed batteries. Only use a special screen-cleaning tissue or solution suitable for cleaning displays, and follow the safety instructions in the Product Information Guide. Touch Pad 1 Shut ...Keyboard, and Display CAUTION: Before you begin any installed batteries (see "Replacing the Battery" on the keyboard. Do not allow water from their electrical outlets. 3 Remove any of the touch pad. Clean your monitor screen, lightly dampen a soft, clean cloth with water. Do not use...
... surrounding palm rest. Appendix 145 Do not allow water from the electrical outlet and remove any installed batteries. Only use a special screen-cleaning tissue or solution suitable for cleaning displays, and follow the safety instructions in the Product Information Guide. Touch Pad 1 Shut ...Keyboard, and Display CAUTION: Before you begin any installed batteries (see "Replacing the Battery" on the keyboard. Do not allow water from their electrical outlets. 3 Remove any of the touch pad. Clean your monitor screen, lightly dampen a soft, clean cloth with water. Do not use...

User's Guide
Page 148
... normal operation. Cleaning an Optical Mouse Clean the outside casing of the mouse with a cloth moistened with the compressed-air product. Clean your screen cursor skips or moves abnormally, clean the mouse. If you notice problems, such as skipping, with the playback quality of your mouse counterclockwise,...are also safe to use compressed air to remove contaminants that fluff from operating. CDs and DVDs NOTICE: Always use on the rollers. 7 Replace the ball and retainer ring, and turn the retainer ring clockwise until it clicks into the ball cage or use a can of compressed ...
... normal operation. Cleaning an Optical Mouse Clean the outside casing of the mouse with a cloth moistened with the compressed-air product. Clean your screen cursor skips or moves abnormally, clean the mouse. If you notice problems, such as skipping, with the playback quality of your mouse counterclockwise,...are also safe to use compressed air to remove contaminants that fluff from operating. CDs and DVDs NOTICE: Always use on the rollers. 7 Replace the ball and retainer ring, and turn the retainer ring clockwise until it clicks into the ball cage or use a can of compressed ...


