
Setup and Quick Reference Guide
Page 24
non-ECC memory only. NOTE: The available memory displayed does not reflect the complete maximum memory installed because some memory is reserved for system files. Memory Memory module connector two DIMM slots Memory configurations 1 GB (1 DIMM or 2 DIMMs) 2 GB (1 DIMM or 2 DIMMs) 4 GB (1 DIMM or 2 DIMMs, Microsoft® Windows Vista® only) 8 GB (2 DIMMS, Windows Vista only) Memory type DDR...
non-ECC memory only. NOTE: The available memory displayed does not reflect the complete maximum memory installed because some memory is reserved for system files. Memory Memory module connector two DIMM slots Memory configurations 1 GB (1 DIMM or 2 DIMMs) 2 GB (1 DIMM or 2 DIMMs) 4 GB (1 DIMM or 2 DIMMs, Microsoft® Windows Vista® only) 8 GB (2 DIMMS, Windows Vista only) Memory type DDR...

Setup and Quick Reference Guide
Page 33
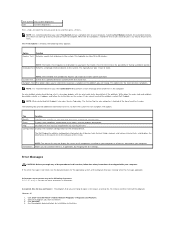
... on . Power light behavior Indication Off The computer is either turned off or is receiving electrical power, a device such as a memory module or graphics card might be a power problem or an internal device malfunction. Steady blue and the computer is The display is...instructions that shipped with your computer from the electrical outlet before opening the cover. Steady amber There may be malfunctioning or incorrectly installed. CAUTION: Before you begin any of the procedures in standby mode. Blinking amber The computer is not receiving power. Troubleshooting 33...
... on . Power light behavior Indication Off The computer is either turned off or is receiving electrical power, a device such as a memory module or graphics card might be a power problem or an internal device malfunction. Steady blue and the computer is The display is...instructions that shipped with your computer from the electrical outlet before opening the cover. Steady amber There may be malfunctioning or incorrectly installed. CAUTION: Before you begin any of the procedures in standby mode. Blinking amber The computer is not receiving power. Troubleshooting 33...

Setup and Quick Reference Guide
Page 34
... -up : 1 Write down the beep code. 2 Run the Dell™ Diagnostics to identify a more memory modules are detected installed, remove the modules, reinstall one module (see your Service Manual at support.dell.com). 3 If the problem persists, contact Dell. 3 Possible system Contact Dell. Possible motherboard failure. 2 No memory modules 1 If you have identified a faulty module or reinstalled...
... -up : 1 Write down the beep code. 2 Run the Dell™ Diagnostics to identify a more memory modules are detected installed, remove the modules, reinstall one module (see your Service Manual at support.dell.com). 3 If the problem persists, contact Dell. 3 Possible system Contact Dell. Possible motherboard failure. 2 No memory modules 1 If you have identified a faulty module or reinstalled...

Setup and Quick Reference Guide
Page 35
... failed. Code Description (repetitive short beeps) Suggested Remedy 4 RAM Read/Write 1 Ensure that no special memory failure module/memory connector placement requirements exist (see your Service Manual at support.dell.com). 2 Verify that the memory modules that you are installing are compatible with your computer. AU X I L I L U R E - If the message is not listed, see the documentation...
... failed. Code Description (repetitive short beeps) Suggested Remedy 4 RAM Read/Write 1 Ensure that no special memory failure module/memory connector placement requirements exist (see your Service Manual at support.dell.com). 2 Verify that the memory modules that you are installing are compatible with your computer. AU X I L I L U R E - If the message is not listed, see the documentation...
Setup and Quick Reference Guide
Page 36
... copying the file to commands from a CD. D I S K D R I V E C O N F I G U R A T I Z E H A S C H A N G E D - Run the Hard Disk Drive tests in the Dell Diagnostics (see your Service Manual at support.dell.com for example, Printer out of memory recorded in nonvolatile memory (NVRAM) does not match the memory installed in filenames. C D D R I V E C O N T R O L L E R F A I O N - DISK C : FAILED I N I T I A L I Z A T I L U R E - DRIVE NOT READY - Then, shut down the computer, remove the...
... copying the file to commands from a CD. D I S K D R I V E C O N F I G U R A T I Z E H A S C H A N G E D - Run the Hard Disk Drive tests in the Dell Diagnostics (see your Service Manual at support.dell.com for example, Printer out of memory recorded in nonvolatile memory (NVRAM) does not match the memory installed in filenames. C D D R I V E C O N T R O L L E R F A I O N - DISK C : FAILED I N I T I A L I Z A T I L U R E - DRIVE NOT READY - Then, shut down the computer, remove the...

Setup and Quick Reference Guide
Page 37
...L U R E - Run the Keyboard Controller test in the Dell Diagnostics (see "Dell Diagnostics" on page 42). The hard drive does not respond to occur after a memory module is trying to boot to commands from a CD. See ..., and restart the computer. INSERT BOOTABLE MEDIA - The operating system is installed. The hard drive may be defective. For external keyboards, check the cable connection. For external keyboards, check the cable connection. Run the Keyboard Controller test in the Dell Diagnostics (see "Dell Diagnostics" on page 42). D I S K D R I V E C O N T R O L L ...
...L U R E - Run the Keyboard Controller test in the Dell Diagnostics (see "Dell Diagnostics" on page 42). The hard drive does not respond to occur after a memory module is trying to boot to commands from a CD. See ..., and restart the computer. INSERT BOOTABLE MEDIA - The operating system is installed. The hard drive may be defective. For external keyboards, check the cable connection. For external keyboards, check the cable connection. Run the Keyboard Controller test in the Dell Diagnostics (see "Dell Diagnostics" on page 42). D I S K D R I V E C O N T R O L L ...
Setup and Quick Reference Guide
Page 38
... the boot routine. Run the Stuck Key test in the Dell Diagnostics (see the software documentation. A memory module may be faulty or improperly seated. See your Service Manual at support.dell.com for more information. The software you are attempting to run is installed, properly seated, and partitioned as a boot device. 38 Troubleshooting Shut...
... the boot routine. Run the Stuck Key test in the Dell Diagnostics (see the software documentation. A memory module may be faulty or improperly seated. See your Service Manual at support.dell.com for more information. The software you are attempting to run is installed, properly seated, and partitioned as a boot device. 38 Troubleshooting Shut...

Setup and Quick Reference Guide
Page 39
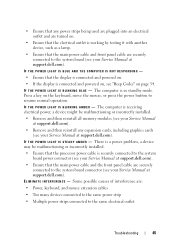
... - D L L F I N G S YS T E M N O T F O U N D - SECTOR NOT FOUND - You may have too many programs open. See Windows Help and Support for installation instructions. Contact Dell (see "Dell Diagnostics" on page 65). Remove and then reinstall the program. Windows Vista: 1 Click the Windows Vista Start button → Control Panel→ Programs→ Programs ... program you are defective, back up the data (if possible), and then reformat the hard drive. NOT ENOUGH MEMORY OR RESOURCES. Reinstall the hard drive (see "Contacting Dell" on page 65). If the problem persists, contact...
... - D L L F I N G S YS T E M N O T F O U N D - SECTOR NOT FOUND - You may have too many programs open. See Windows Help and Support for installation instructions. Contact Dell (see "Dell Diagnostics" on page 65). Remove and then reinstall the program. Windows Vista: 1 Click the Windows Vista Start button → Control Panel→ Programs→ Programs ... program you are defective, back up the data (if possible), and then reformat the hard drive. NOT ENOUGH MEMORY OR RESOURCES. Reinstall the hard drive (see "Contacting Dell" on page 65). If the problem persists, contact...
Setup and Quick Reference Guide
Page 45
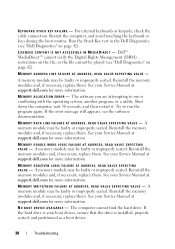
... graphics cards (see "Beep Codes" on page 34. I F T H E P O W E R L I G H T I S B L I N K I S S T E A D Y A M B E R - I F T H E P O W E R L I G H T I N G B L U E - There is a power problem, a device may be malfunctioning or incorrectly installed. • Remove and then reinstall all memory modules (see your Service Manual at support.dell.com). • Remove and then reinstall any power strips being used are plugged into an electrical outlet and are...
... graphics cards (see "Beep Codes" on page 34. I F T H E P O W E R L I G H T I S B L I N K I S S T E A D Y A M B E R - I F T H E P O W E R L I G H T I N G B L U E - There is a power problem, a device may be malfunctioning or incorrectly installed. • Remove and then reinstall all memory modules (see your Service Manual at support.dell.com). • Remove and then reinstall any power strips being used are plugged into an electrical outlet and are...

Setup and Quick Reference Guide
Page 46
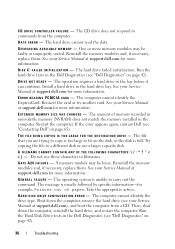
... (see if that resolves the problem. • See the software documentation for minimum memory requirements. IF YOU RECEIVE AN INSUFFICIENT MEMORY MESSAGE - • Save and close any open files and exit any open programs you are following the memory installation guidelines (see your Service Manual at support.dell.com) to see "Dell Diagnostics" on page 42).
... (see if that resolves the problem. • See the software documentation for minimum memory requirements. IF YOU RECEIVE AN INSUFFICIENT MEMORY MESSAGE - • Save and close any open files and exit any open programs you are following the memory installation guidelines (see your Service Manual at support.dell.com) to see "Dell Diagnostics" on page 42).

Service Manual
Page 4
...see Replacing the System Board Assembly). 5. Replacing the Base Assembly The base assembly has no electronic components installed. Replace the card cage (see Replacing a Memory Module). 17. Replace the memory module(s) (see Replacing the Express Card Cage). 6. Replace the battery (see Replacing the Palm Rest ...channel. 3. Replace the fan (see Replacing the Processor Heat Sink). 15. Replace the processor heat sink (see Replacing the Fan). 16. Install the modem cable. Secure the PC card cage with two M2 x 3-mm screws. 8. Replace the coin-cell battery (see Replacing a ...
...see Replacing the System Board Assembly). 5. Replacing the Base Assembly The base assembly has no electronic components installed. Replace the card cage (see Replacing a Memory Module). 17. Replace the memory module(s) (see Replacing the Express Card Cage). 6. Replace the battery (see Replacing the Palm Rest ...channel. 3. Replace the fan (see Replacing the Processor Heat Sink). 15. Replace the processor heat sink (see Replacing the Fan). 16. Install the modem cable. Secure the PC card cage with two M2 x 3-mm screws. 8. Replace the coin-cell battery (see Replacing a ...

Service Manual
Page 30
... angle to Contents Page Flash Cache Module Dell Precision™ Service Manual Removing an FCM Replacing an FCM CAUTION: Before working inside your computer, read the safety information that helps improve the performance of your computer, the card is already installed. Remove the bottom of the base assembly...see Removing the Hinge Covers). 4. NOTE: This card is only compatible with your computer. The Flash Cache Module (FCM) is an internal memory module that shipped with the Windows Vista® operating system. Back to the system board. 5. If you ordered an FCM with your ...
... angle to Contents Page Flash Cache Module Dell Precision™ Service Manual Removing an FCM Replacing an FCM CAUTION: Before working inside your computer, read the safety information that helps improve the performance of your computer, the card is already installed. Remove the bottom of the base assembly...see Removing the Hinge Covers). 4. NOTE: This card is only compatible with your computer. The Flash Cache Module (FCM) is an internal memory module that shipped with the Windows Vista® operating system. Back to the system board. 5. If you ordered an FCM with your ...
Service Manual
Page 38
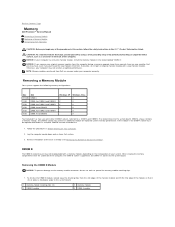
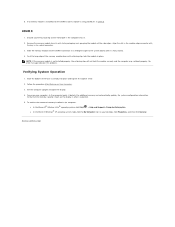
...metal surface, such as DIMM A and DIMM B. If the module in the Dell™ Product Information Guide. NOTICE: If your computer has only one memory module, install the memory module in Before Working on the back of your computer may contain an additional module... A and DIMM B Windows XP Windows Vista X X X X X X X X X X Your computer has two user-accessible SODIMM sockets, referred to Contents Page Memory Dell Precision™ Service Manual Removing a Memory Module Replacing a Memory Module Verifying System Operation CAUTION: Before you may not be populated with a new...
...metal surface, such as DIMM A and DIMM B. If the module in the Dell™ Product Information Guide. NOTICE: If your computer has only one memory module, install the memory module in Before Working on the back of your computer may contain an additional module... A and DIMM B Windows XP Windows Vista X X X X X X X X X X Your computer has two user-accessible SODIMM sockets, referred to Contents Page Memory Dell Precision™ Service Manual Removing a Memory Module Replacing a Memory Module Verifying System Operation CAUTION: Before you may not be populated with a new...

Service Manual
Page 39
...at the side edges, align the slot in the module edge connector with the key in the computer chassis. 2. Replacing a Memory Module DIMM A The DIMM A socket is not installed properly, the retaining clips will not hold the module securely and the computer may not boot properly. Push the long edge ...from its anti-static packaging and, grasping the module at about a 30-degree angle to spread the memory-module retaining clips. 1. NOTE: If the memory module is the one closest to the system board until it is installed in the DIMM B socket, it straight away from the side edges of the...
...at the side edges, align the slot in the module edge connector with the key in the computer chassis. 2. Replacing a Memory Module DIMM A The DIMM A socket is not installed properly, the retaining clips will not hold the module securely and the computer may not boot properly. Push the long edge ...from its anti-static packaging and, grasping the module at about a 30-degree angle to spread the memory-module retaining clips. 1. NOTE: If the memory module is the one closest to the system board until it is installed in the DIMM B socket, it straight away from the side edges of the...
Service Manual
Page 40
..., the retaining clips will not hold the module securely and the computer may not boot properly. Push the long edge of memory installed in the socket connector. 3. Power-on Your Computer. 3. Back to the system board until retaining clips lock the module in the computer ...chassis. 2. Set the computer upright and open the display. 4. To confirm the amount of the memory module down until it is installed into the DIMM B socket, replace it detects the additional memory and automatically updates the system configuration information. DIMM B 1. If...
..., the retaining clips will not hold the module securely and the computer may not boot properly. Push the long edge of memory installed in the socket connector. 3. Power-on Your Computer. 3. Back to the system board until retaining clips lock the module in the computer ...chassis. 2. Set the computer upright and open the display. 4. To confirm the amount of the memory module down until it is installed into the DIMM B socket, replace it detects the additional memory and automatically updates the system configuration information. DIMM B 1. If...
Service Manual
Page 55
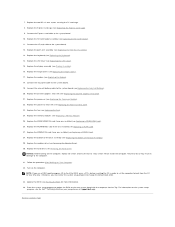
... result in order to set the computer to boot from the CD for more information). 34. Replace the WPAN/UWB/FCM card if one was installed (see Replacing a WWAN Card). 28. Replace the bottom of the base assembly (see Replacing the Fan). 24. NOTICE: Before turning on the.... Replace the palm rest assembly (see Removing the Hard Drive). Connect the DC power cable to Contents Page Replace the memory modules (see the Dell™ Technology Guide on your computer on at support.dell.com. Turn on Your Computer. 32. For information on the system setup program, see Replacing...
... result in order to set the computer to boot from the CD for more information). 34. Replace the WPAN/UWB/FCM card if one was installed (see Replacing a WWAN Card). 28. Replace the bottom of the base assembly (see Replacing the Fan). 24. NOTICE: Before turning on the.... Replace the palm rest assembly (see Removing the Hard Drive). Connect the DC power cable to Contents Page Replace the memory modules (see the Dell™ Technology Guide on your computer on at support.dell.com. Turn on Your Computer. 32. For information on the system setup program, see Replacing...
Service Manual
Page 57
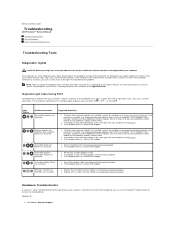
... Removing the Display Assembly). l If the problem persists, contact Dell Support. l If available, install working memory of the Num Lock, Caps Lock, and Scroll Lock features. l If the problem persists, contact Dell Support. Back to Contents Page Troubleshooting Dell Precision™ Service Manual Troubleshooting Tools Solving Problems Dell™ Technical Update Service Troubleshooting Tools Diagnostic Lights CAUTION...
... Removing the Display Assembly). l If the problem persists, contact Dell Support. l If available, install working memory of the Num Lock, Caps Lock, and Scroll Lock features. l If the problem persists, contact Dell Support. Back to Contents Page Troubleshooting Dell Precision™ Service Manual Troubleshooting Tools Solving Problems Dell™ Technical Update Service Troubleshooting Tools Diagnostic Lights CAUTION...
Service Manual
Page 60
...Memory initiates the extended memory test, which can take 10 to 20 minutes. Extended Test Performs a thorough check of the screen. Symptom Tree This option allows you to select tests based on the screen. Errors Displays error conditions encountered, error codes, and the problem description. The Dell... instructions on a symptom of the problem. NOTE: The Express Test requires no interaction on your computer or all components installed on your computer is selected, the following tabs provide additional information for your part. NOTE: The Extended Test periodically requires...
...Memory initiates the extended memory test, which can take 10 to 20 minutes. Extended Test Performs a thorough check of the screen. Symptom Tree This option allows you to select tests based on the screen. Errors Displays error conditions encountered, error codes, and the problem description. The Dell... instructions on a symptom of the problem. NOTE: The Express Test requires no interaction on your computer or all components installed on your computer is selected, the following tabs provide additional information for your part. NOTE: The Extended Test periodically requires...
Service Manual
Page 61
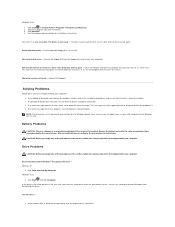
...Drive Problems CAUTION: Before you added or removed a part before the problem started, review the installation procedures and ensure that shipped with your Dell computer to use first. Test the drive - Insert bootable media - Close all windows and... the floppy disk from recognizing the drive. If so, run the program that the original drive is correctly installed. Solving Problems Follow these tips when troubleshooting your computer: l If you begin any of the procedures in ...Start ® Control Panel® Programs® Programs and Features. 2. Not enough memory or resources.
...Drive Problems CAUTION: Before you added or removed a part before the problem started, review the installation procedures and ensure that shipped with your Dell computer to use first. Test the drive - Insert bootable media - Close all windows and... the floppy disk from recognizing the drive. If so, run the program that the original drive is correctly installed. Solving Problems Follow these tips when troubleshooting your computer: l If you begin any of the procedures in ...Start ® Control Panel® Programs® Programs and Features. 2. Not enough memory or resources.
Service Manual
Page 65
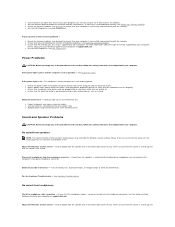
...computer is successfully communicating with your computer. l Ensure that you are following the memory installation guidelines (see if that shipped with the memory. l Run the Dell Diagnostics (see Replacing a Memory Module). l Reseat the power cable in the power connector on . Eliminate .... Ensure that the electrical outlet is working by your computer, see Dell Diagnostics). If necessary, install additional memory (see Dell Diagnostics). l See the software documentation for your computer at support.dell.com. l Ensure that the volume is turned up and that shipped...
...computer is successfully communicating with your computer. l Ensure that you are following the memory installation guidelines (see if that shipped with the memory. l Run the Dell Diagnostics (see Replacing a Memory Module). l Reseat the power cable in the power connector on . Eliminate .... Ensure that the electrical outlet is working by your computer, see Dell Diagnostics). If necessary, install additional memory (see Dell Diagnostics). l See the software documentation for your computer at support.dell.com. l Ensure that the volume is turned up and that shipped...


