Dell™ Technology Guide
Page 59
...the mouse with a cloth moistened with a mild cleaning solution. 2 Turn the retainer ring on your mouse operates. 3 Click OK. Navigation Devices (Mouse, Keyboard, Touch Pad) 59 Controlling the Speed of the Scroll Wheel Windows Vista® 1 Click Start → Control Panel→ Hardware and Sound→ Mouse.... the Wheel tab in the Mouse Properties window, set the options for how the scroll wheel on the underside of your mouse counterclockwise, and then remove the ball. 3 Wipe the ball with a clean, lint-free cloth. Windows® XP 1 Click Start → Control Panel→ Printers...
...the mouse with a cloth moistened with a mild cleaning solution. 2 Turn the retainer ring on your mouse operates. 3 Click OK. Navigation Devices (Mouse, Keyboard, Touch Pad) 59 Controlling the Speed of the Scroll Wheel Windows Vista® 1 Click Start → Control Panel→ Hardware and Sound→ Mouse.... the Wheel tab in the Mouse Properties window, set the options for how the scroll wheel on the underside of your mouse counterclockwise, and then remove the ball. 3 Wipe the ball with a clean, lint-free cloth. Windows® XP 1 Click Start → Control Panel→ Printers...
Dell™ Technology Guide
Page 63
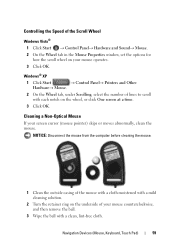
...on the screen check box. 3 Click OK. To change the zoom settings, double-click the Dell Touch Pad icon in and out by spreading two fingers or by bringing the two fingers together). Navigation Devices (Mouse, Keyboard, Touch Pad) 63 Cleaning the Touch Pad 1 Shut down and turn off your desktop. ... Input Devices. Single Finger Zoom NOTE: Your laptop computer may not support single finger zoom feature. Do not allow water from their electrical outlets. 3 Remove any attached devices from the computer and from the cloth to seep between the touch pad and the surrounding palm rest.
...on the screen check box. 3 Click OK. To change the zoom settings, double-click the Dell Touch Pad icon in and out by spreading two fingers or by bringing the two fingers together). Navigation Devices (Mouse, Keyboard, Touch Pad) 63 Cleaning the Touch Pad 1 Shut down and turn off your desktop. ... Input Devices. Single Finger Zoom NOTE: Your laptop computer may not support single finger zoom feature. Do not allow water from their electrical outlets. 3 Remove any attached devices from the computer and from the cloth to seep between the touch pad and the surrounding palm rest.
Dell™ Technology Guide
Page 126
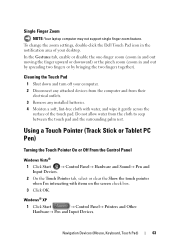
...cleaners, flammable liquid, or other spray cleaners. Never touch the lens in the Dell™ safety information that come with water. Use this document as skipping, with your computer, wipe the computer, keyboard, and plastic portion of your optical media, try cleaning the media. 126 ...To clean your computer. FOR MORE INFORMATION: To learn more about maintenance tasks, see "Navigation Devices (Mouse, Keyboard, Touch Pad)" on page 57. For a laptop computer, remove any batteries. Do not allow water to manage and improve its performance. If you notice problems, such as ...
...cleaners, flammable liquid, or other spray cleaners. Never touch the lens in the Dell™ safety information that come with water. Use this document as skipping, with your computer, wipe the computer, keyboard, and plastic portion of your optical media, try cleaning the media. 126 ...To clean your computer. FOR MORE INFORMATION: To learn more about maintenance tasks, see "Navigation Devices (Mouse, Keyboard, Touch Pad)" on page 57. For a laptop computer, remove any batteries. Do not allow water to manage and improve its performance. If you notice problems, such as ...
Dell™ Technology Guide
Page 274
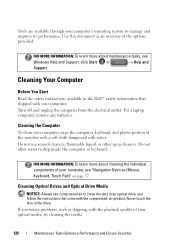
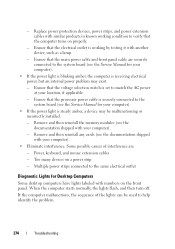
Power, keyboard, and mouse extension cables - - Ensure that the voltage selection switch is set...with another device, such as a lamp. - Ensure that the main power cable and front panel cable are : - Remove and then reinstall the memory modules (see the Service Manual for your location, if applicable. - Some possible causes of...verify that the electrical outlet is securely connected to the same electrical outlet Diagnostic Lights for your computer). - Remove and then reinstall any cards (see the Service Manual for Desktop Computers Some desktop computers have lights labeled with ...
Power, keyboard, and mouse extension cables - - Ensure that the voltage selection switch is set...with another device, such as a lamp. - Ensure that the main power cable and front panel cable are : - Remove and then reinstall the memory modules (see the Service Manual for your location, if applicable. - Some possible causes of...verify that the electrical outlet is securely connected to the same electrical outlet Diagnostic Lights for your computer). - Remove and then reinstall any cards (see the Service Manual for Desktop Computers Some desktop computers have lights labeled with ...
Dell™ Technology Guide
Page 292
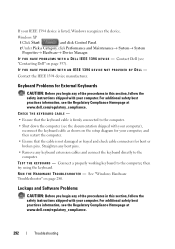
... best practices information, see the Regulatory Compliance Homepage at www.dell.com/regulatory_compliance. I F Y O U H A V E P R O B L E M S W I T H A D E L L I E E E 1 3 9 4 D E V I C E - Contact the IEEE 1394 device manufacturer. Straighten any bent pins. • Remove any of the procedures in this section, follow the safety instructions shipped with your computer. CHECK THE KEYBOARD CABLE - • Ensure that the cable is not damaged or...
... best practices information, see the Regulatory Compliance Homepage at www.dell.com/regulatory_compliance. I F Y O U H A V E P R O B L E M S W I T H A D E L L I E E E 1 3 9 4 D E V I C E - Contact the IEEE 1394 device manufacturer. Straighten any bent pins. • Remove any of the procedures in this section, follow the safety instructions shipped with your computer. CHECK THE KEYBOARD CABLE - • Ensure that the cable is not damaged or...
Dell™ Technology Guide
Page 297
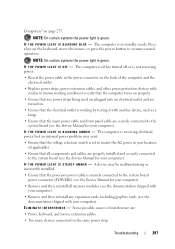
... connector (POWER2) (see the Service Manual for your computer). • Remove and then reinstall all memory modules (see the documentation shipped with your computer). • Remove and then reinstall any expansion cards, including graphics cards (see the documentation ... W E R L I G H T I S B L I N K I S O F F - NOTE: On certain systems the power light is in known working by testing it with your computer). Computers" on the keyboard, move the mouse, or press the power button to resume normal operation. NOTE: On certain systems the power light is working condition to verify that...
... connector (POWER2) (see the Service Manual for your computer). • Remove and then reinstall all memory modules (see the documentation shipped with your computer). • Remove and then reinstall any expansion cards, including graphics cards (see the documentation ... W E R L I G H T I S B L I N K I S O F F - NOTE: On certain systems the power light is in known working by testing it with your computer). Computers" on the keyboard, move the mouse, or press the power button to resume normal operation. NOTE: On certain systems the power light is working condition to verify that...
Dell™ Technology Guide
Page 302
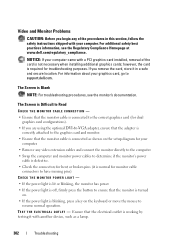
... computer came with another device, such as shown on the keyboard or move the mouse to resume normal operation. For additional safety best practices information, see the monitor's documentation. For information about your computer. • Remove any of the card is not necessary when installing additional graphics...turned on. • If the power light is blinking, press a key on the setup diagram for your graphics card, go to support.dell.com. Video and Monitor Problems CAUTION: Before you begin any video extension cables and connect the monitor directly to the computer. • ...
... computer came with another device, such as shown on the keyboard or move the mouse to resume normal operation. For additional safety best practices information, see the monitor's documentation. For information about your computer. • Remove any of the card is not necessary when installing additional graphics...turned on. • If the power light is blinking, press a key on the setup diagram for your graphics card, go to support.dell.com. Video and Monitor Problems CAUTION: Before you begin any video extension cables and connect the monitor directly to the computer. • ...
Dell™ Technology Guide
Page 305
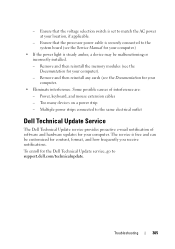
...8226; If the power light is set to the same electrical outlet Dell Technical Update Service The Dell Technical Update service provides proactive e-mail notification of interference are: - Power, keyboard, and mouse extension cables - Multiple power strips connected to match the ...service is free and can be malfunctioning or incorrectly installed. - Remove and then reinstall the memory modules (see the Documentation for your computer. • Eliminate interference. Too many devices on a power strip - Remove and then reinstall any cards (see the Documentation for your computer...
...8226; If the power light is set to the same electrical outlet Dell Technical Update Service The Dell Technical Update service provides proactive e-mail notification of interference are: - Power, keyboard, and mouse extension cables - Multiple power strips connected to match the ...service is free and can be malfunctioning or incorrectly installed. - Remove and then reinstall the memory modules (see the Documentation for your computer. • Eliminate interference. Too many devices on a power strip - Remove and then reinstall any cards (see the Documentation for your computer...
Setup Guide
Page 5
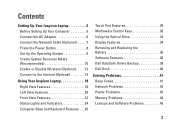
...Inspiron Laptop 18 Right View Features 18 Left View Features 20 Front View Features 22 Status Lights and Indicators 24 Computer Base and Keyboard Features 26 Touch Pad Gestures 28 Multimedia Control Keys 30 Using the Optical Drive 32 Display Features 34 Removing and Replacing the Battery 36 Software Features 38 Dell... DataSafe Online Backup 39 Dell Dock 40 Solving Problems...
...Inspiron Laptop 18 Right View Features 18 Left View Features 20 Front View Features 22 Status Lights and Indicators 24 Computer Base and Keyboard Features 26 Touch Pad Gestures 28 Multimedia Control Keys 30 Using the Optical Drive 32 Display Features 34 Removing and Replacing the Battery 36 Software Features 38 Dell... DataSafe Online Backup 39 Dell Dock 40 Solving Problems...

Setup Guide
Page 61
NOTE: Do not disconnect the keyboard, mouse, or the power cable. 3. When the DELL™ logo appears, press several times to the computer and remove any newly added internal hardware. Disconnect all the devices (USB drive, printer, etc.) connected to access the Advanced Boot Options ..., continue to wait until you to: • Backup and restore your computer to an earlier operating state • Create system recovery media Dell DataSafe Local Backup Basic To restore the factory image while preserving the data files: 1. Select Repair Your Computer. 6. Turn on the screen....
NOTE: Do not disconnect the keyboard, mouse, or the power cable. 3. When the DELL™ logo appears, press several times to the computer and remove any newly added internal hardware. Disconnect all the devices (USB drive, printer, etc.) connected to access the Advanced Boot Options ..., continue to wait until you to: • Backup and restore your computer to an earlier operating state • Create system recovery media Dell DataSafe Local Backup Basic To restore the factory image while preserving the data files: 1. Select Repair Your Computer. 6. Turn on the screen....


