Dell™ Technology Guide
Page 6
... Pointing Device 64 Keyboard 65 Customizing Your Keyboard 66 Backlit Keyboard 66 Changing the Input Language of Your Keyboard 67 Using the Numeric Keypad on a Laptop Computer 68 General Keyboard Shortcuts 69 5 Printers-Settings and Drivers 71 Accessing Printer Information 71 Changing Printer Settings 72 For Windows Vista 72 For Windows...
... Pointing Device 64 Keyboard 65 Customizing Your Keyboard 66 Backlit Keyboard 66 Changing the Input Language of Your Keyboard 67 Using the Numeric Keypad on a Laptop Computer 68 General Keyboard Shortcuts 69 5 Printers-Settings and Drivers 71 Accessing Printer Information 71 Changing Printer Settings 72 For Windows Vista 72 For Windows...
Dell™ Technology Guide
Page 8
... Printing Files 113 Deleting Files 113 8 Contents Ending a Program That is not Responding . . . . 101 Ending a Process That is not Responding . . . . 103 Docking and Undocking Your Laptop Computer. . . . 104 Undocking Your Computer While it Stops Responding and Displays a Solid Blue Screen 106 Starting Your Computer in Safe Mode 107 Restarting Your Computer...
... Printing Files 113 Deleting Files 113 8 Contents Ending a Program That is not Responding . . . . 101 Ending a Process That is not Responding . . . . 103 Docking and Undocking Your Laptop Computer. . . . 104 Undocking Your Computer While it Stops Responding and Displays a Solid Blue Screen 106 Starting Your Computer in Safe Mode 107 Restarting Your Computer...
Dell™ Technology Guide
Page 11
...174; XP 137 Power Protection Devices 140 Surge Protector 140 Power Line Conditioner 140 Uninterruptible Power Supply (UPS 141 Laptop Computer Batteries 141 Using Your Laptop Computer for the First Time 142 Preserving the Life of a Battery 142 Replacing a Battery 143 Checking the Battery... Charge 143 Conserving Battery Power 145 Charging the Battery 145 Storing a Battery 146 US Department of Transportation (DOT) Notebook Battery Restrictions 146 Dell™...
...174; XP 137 Power Protection Devices 140 Surge Protector 140 Power Line Conditioner 140 Uninterruptible Power Supply (UPS 141 Laptop Computer Batteries 141 Using Your Laptop Computer for the First Time 142 Preserving the Life of a Battery 142 Replacing a Battery 143 Checking the Battery... Charge 143 Conserving Battery Power 145 Charging the Battery 145 Storing a Battery 146 US Department of Transportation (DOT) Notebook Battery Restrictions 146 Dell™...
Dell™ Technology Guide
Page 15
...-ray Disc Media . . . . . 204 Copying CD, DVD, or Blu-ray Disc Media . . . . . 205 5.1 Audio 207 Setting up the 5.1 Audio Connections 207 Laptop Media Devices (MP3 Players 208 Connecting a Laptop Media Device (MP3 Player) to Your Computer 208 Setting up the Laptop Media Device to Sync in Windows Media Player 208 Setting up the...
...-ray Disc Media . . . . . 204 Copying CD, DVD, or Blu-ray Disc Media . . . . . 205 5.1 Audio 207 Setting up the 5.1 Audio Connections 207 Laptop Media Devices (MP3 Players 208 Connecting a Laptop Media Device (MP3 Player) to Your Computer 208 Setting up the Laptop Media Device to Sync in Windows Media Player 208 Setting up the...
Dell™ Technology Guide
Page 16
Copying Audio and Video Files to Your Laptop Media Device 209 Playing Media Using the Dell Travel Remote . . . . . 210 Adjusting the Volume on Your Computer 210 Enabling S/PDIF Digital Audio Through the Media Software 210 Enabling S/PDIF Digital Audio in the ...
Copying Audio and Video Files to Your Laptop Media Device 209 Playing Media Using the Dell Travel Remote . . . . . 210 Adjusting the Volume on Your Computer 210 Enabling S/PDIF Digital Audio Through the Media Software 210 Enabling S/PDIF Digital Audio in the ...
Dell™ Technology Guide
Page 19
... or Windows Vista . . . . 269 20 Troubleshooting 271 Troubleshooting Tools 272 Power Lights for Desktop Computers 273 Diagnostic Lights for Desktop Computers . . . . . 274 Diagnostic Lights for Laptop Computers 275 System Messages for Desktop Computers. . . . . 275 System Messages for Laptop Computers . . . . . 276 Windows Hardware Troubleshooter 280 Running the Dell Diagnostics 281 Contents 19
... or Windows Vista . . . . 269 20 Troubleshooting 271 Troubleshooting Tools 272 Power Lights for Desktop Computers 273 Diagnostic Lights for Desktop Computers . . . . . 274 Diagnostic Lights for Laptop Computers 275 System Messages for Desktop Computers. . . . . 275 System Messages for Laptop Computers . . . . . 276 Windows Hardware Troubleshooter 280 Running the Dell Diagnostics 281 Contents 19
Dell™ Technology Guide
Page 20
Dell Support Center 285 Solving Problems 287 Battery Problems 287 Drive Problems 287 Optical Drive Problems 288 E-Mail, Modem, and Internet Problems . . . . . 289 Error Messages 290 ... Power Problems 296 Printer Problems 298 Scanner Problems 299 Sound and Speaker Problems 299 Touch Pad or Mouse Problems for Laptop Computers 301 Video and Monitor Problems 302 Power Lights 304 Dell Technical Update Service 305 21 System Setup 307 Viewing System Settings With the System Setup Program 307 Entering the System...
Dell Support Center 285 Solving Problems 287 Battery Problems 287 Drive Problems 287 Optical Drive Problems 288 E-Mail, Modem, and Internet Problems . . . . . 289 Error Messages 290 ... Power Problems 296 Printer Problems 298 Scanner Problems 299 Sound and Speaker Problems 299 Touch Pad or Mouse Problems for Laptop Computers 301 Video and Monitor Problems 302 Power Lights 304 Dell Technical Update Service 305 21 System Setup 307 Viewing System Settings With the System Setup Program 307 Entering the System...
Dell™ Technology Guide
Page 47
... clean the display screen for your computer. Monitors and Displays FOR MORE INFORMATION: To learn more about your computer's display screen, see the documentation for a laptop computer, wipe the screen with a soft cloth dampened with water. For additional safety best practices information, see the Regulatory Compliance Homepage at www...
... clean the display screen for your computer. Monitors and Displays FOR MORE INFORMATION: To learn more about your computer's display screen, see the documentation for a laptop computer, wipe the screen with a soft cloth dampened with water. For additional safety best practices information, see the Regulatory Compliance Homepage at www...
Dell™ Technology Guide
Page 53
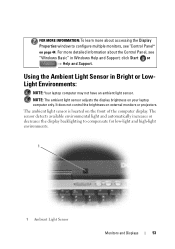
... available environmental light and automatically increases or decreases the display backlighting to configure multiple monitors, see "Windows Basic" in Bright or LowLight Environments: NOTE: Your laptop computer may not have an ambient light sensor. It does not control the brightness on the front of the computer display. The ambient light sensor... Light Sensor in Windows Help and Support: click Start or → Help and Support. NOTE: The ambient light sensor adjusts the display brightness on your laptop computer only.
... available environmental light and automatically increases or decreases the display backlighting to configure multiple monitors, see "Windows Basic" in Bright or LowLight Environments: NOTE: Your laptop computer may not have an ambient light sensor. It does not control the brightness on the front of the computer display. The ambient light sensor... Light Sensor in Windows Help and Support: click Start or → Help and Support. NOTE: The ambient light sensor adjusts the display brightness on your laptop computer only.
Dell™ Technology Guide
Page 62
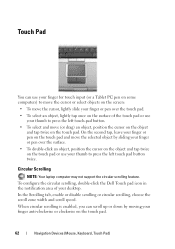
... or clockwise on the touch pad. 62 Navigation Devices (Mouse, Keyboard, Touch Pad) Circular Scrolling NOTE: Your laptop computer may not support the circular scrolling feature. To configure the circular scrolling, double-click the Dell Touch pad icon in the notification area of the touch pad or use your thumb to press...
... or clockwise on the touch pad. 62 Navigation Devices (Mouse, Keyboard, Touch Pad) Circular Scrolling NOTE: Your laptop computer may not support the circular scrolling feature. To configure the circular scrolling, double-click the Dell Touch pad icon in the notification area of the touch pad or use your thumb to press...
Dell™ Technology Guide
Page 63
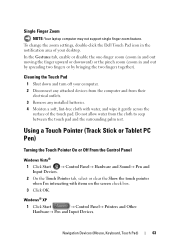
... the computer and from the cloth to seep between the touch pad and the surrounding palm rest. To change the zoom settings, double-click the Dell Touch Pad icon in and out by spreading two fingers or by bringing the two fingers together). Windows® XP 1 Click Start →... Control Panel→ Printers and Other Hardware→ Pen and Input Devices. Single Finger Zoom NOTE: Your laptop computer may not support single finger zoom feature. In the Gestures tab, enable or disable the one-finger zoom (zoom in and out moving the...
... the computer and from the cloth to seep between the touch pad and the surrounding palm rest. To change the zoom settings, double-click the Dell Touch Pad icon in and out by spreading two fingers or by bringing the two fingers together). Windows® XP 1 Click Start →... Control Panel→ Printers and Other Hardware→ Pen and Input Devices. Single Finger Zoom NOTE: Your laptop computer may not support single finger zoom feature. In the Gestures tab, enable or disable the one-finger zoom (zoom in and out moving the...
Dell™ Technology Guide
Page 65
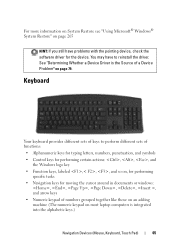
... ,< F2>, , and so on, for performing specific tasks • Navigation keys for the device. Keyboard Your keyboard provides different sets of a Device Problem" on most laptop computers is the Source of keys to reinstall the driver. You may have problems with the pointing device, check the software driver for moving the...
... ,< F2>, , and so on, for performing specific tasks • Navigation keys for the device. Keyboard Your keyboard provides different sets of a Device Problem" on most laptop computers is the Source of keys to reinstall the driver. You may have problems with the pointing device, check the software driver for moving the...

Dell™ Technology Guide
Page 68
The 9 light indicates that the keypad is active. • To disable the numeric keypad, press again. 68 Navigation Devices (Mouse, Keyboard, Touch Pad) The keypad corresponds to the keypad of an extended keyboard. • To type a number or symbol, press and hold and press the desired key. • To enable the numeric keypad, press . Using the Numeric Keypad on a Laptop Computer numeric keypad Your laptop computer may have a numeric keypad integrated into the keyboard.
The 9 light indicates that the keypad is active. • To disable the numeric keypad, press again. 68 Navigation Devices (Mouse, Keyboard, Touch Pad) The keypad corresponds to the keypad of an extended keyboard. • To type a number or symbol, press and hold and press the desired key. • To enable the numeric keypad, press . Using the Numeric Keypad on a Laptop Computer numeric keypad Your laptop computer may have a numeric keypad integrated into the keyboard.
Dell™ Technology Guide
Page 73
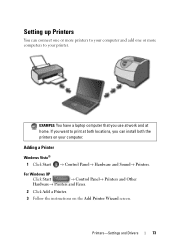
...; Printers and Other Hardware→ Printers and Faxes. 2 Click Add a Printer. 3 Follow the instructions on your printer. Printers-Settings and Drivers 73 EXAMPLE: You have a laptop computer that you can connect one or more printers to your computer and add one or more computers to print at home. Setting up Printers...
...; Printers and Other Hardware→ Printers and Faxes. 2 Click Add a Printer. 3 Follow the instructions on your printer. Printers-Settings and Drivers 73 EXAMPLE: You have a laptop computer that you can connect one or more printers to your computer and add one or more computers to print at home. Setting up Printers...
Dell™ Technology Guide
Page 104
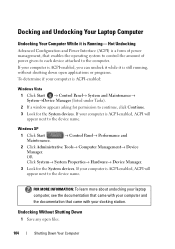
...applications or programs. To determine if your computer is ACPI-enabled, ACPI will appear next to the computer. Docking and Undocking Your Laptop Computer Undocking Your Computer While it is still running, without shutting down open files. 104 Shutting Down Your Computer Hot Undocking Advanced ... is a form of power management, that came with your docking station. FOR MORE INFORMATION: To learn more about undocking your laptop computer, see the documentation that came with your computer and the documentation that enables the operating system to control the amount of ...
...applications or programs. To determine if your computer is ACPI-enabled, ACPI will appear next to the computer. Docking and Undocking Your Laptop Computer Undocking Your Computer While it is still running, without shutting down open files. 104 Shutting Down Your Computer Hot Undocking Advanced ... is a form of power management, that came with your docking station. FOR MORE INFORMATION: To learn more about undocking your laptop computer, see the documentation that came with your computer and the documentation that enables the operating system to control the amount of ...
Dell™ Technology Guide
Page 107
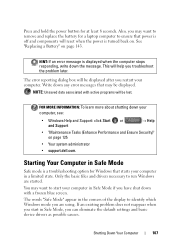
... Only the basic files and drivers necessary to run Windows are using. See "Replacing a Battery" on page 125 • Your system administrator • support.dell.com. The words "Safe Mode" appear in Safe Mode, you restart your computer, see: • Windows Help and Support: click Start or and Support ... not reappear when you start your computer in Safe Mode if you troubleshoot the problem later. Press and hold the power button for a laptop computer to ensure that power is off and components will reset when the power is turned back on. Starting Your Computer in Safe Mode ...
... Only the basic files and drivers necessary to run Windows are using. See "Replacing a Battery" on page 125 • Your system administrator • support.dell.com. The words "Safe Mode" appear in Safe Mode, you restart your computer, see: • Windows Help and Support: click Start or and Support ... not reappear when you start your computer in Safe Mode if you troubleshoot the problem later. Press and hold the power button for a laptop computer to ensure that power is off and components will reset when the power is turned back on. Starting Your Computer in Safe Mode ...
Dell™ Technology Guide
Page 126
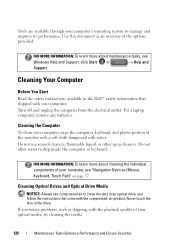
... Media NOTICE: Always use aerosol cleaners, flammable liquid, or other spray cleaners. Cleaning Your Computer Before You Start Read the safety instructions available in the Dell™ safety information that come with the playback quality of the options provided. Do not use compressed air to clean the lens in the drive...Support: click Start or → Help and Support. Never touch the lens in an optical drive, and follow the instructions that shipped with water. For a laptop computer, remove any batteries. Use this document as skipping, with the compressed-air product.
... Media NOTICE: Always use aerosol cleaners, flammable liquid, or other spray cleaners. Cleaning Your Computer Before You Start Read the safety instructions available in the Dell™ safety information that come with the playback quality of the options provided. Do not use compressed air to clean the lens in the drive...Support: click Start or → Help and Support. Never touch the lens in an optical drive, and follow the instructions that shipped with water. For a laptop computer, remove any batteries. Use this document as skipping, with the compressed-air product.
Dell™ Technology Guide
Page 128
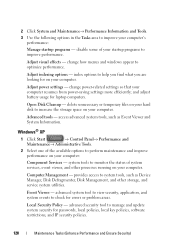
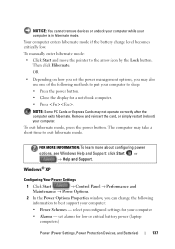
... area to improve your computer resumes from power-saving settings more efficiently; change how menus and windows appear to manage and update system security for laptop computers. Advanced tools - Windows® XP 1 Click Start → Control Panel→ Performance and Maintenance→ Administrative Tools. 2 Select one of system services, event viewer...
... area to improve your computer resumes from power-saving settings more efficiently; change how menus and windows appear to manage and update system security for laptop computers. Advanced tools - Windows® XP 1 Click Start → Control Panel→ Performance and Maintenance→ Administrative Tools. 2 Select one of system services, event viewer...
Dell™ Technology Guide
Page 136
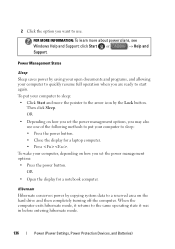
... to a reserved area on how you are ready to start again. Hibernate Hibernate conserves power by the Lock button. OR • Open the display for a laptop computer. • Press .
... to a reserved area on how you are ready to start again. Hibernate Hibernate conserves power by the Lock button. OR • Open the display for a laptop computer. • Press .
Dell™ Technology Guide
Page 137
... Hibernate. Remove and reinsert the card, or simply restart (reboot) your computer is in hibernate mode. select preconfigured settings for low or critical battery power (laptop computers) Power (Power Settings, Power Protection Devices, and Batteries) 137 FOR MORE INFORMATION: To learn more about configuring power options, see Windows Help and Support...
... Hibernate. Remove and reinsert the card, or simply restart (reboot) your computer is in hibernate mode. select preconfigured settings for low or critical battery power (laptop computers) Power (Power Settings, Power Protection Devices, and Batteries) 137 FOR MORE INFORMATION: To learn more about configuring power options, see Windows Help and Support...


