
Me and My Dell
Page 27
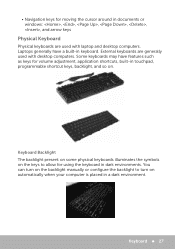
... illuminates the symbols on automatically when your computer is placed in touchpad, programmable shortcut keys, backlight, and so on. You can turn on the backlight manually or configure the backlight to turn on the keys to allow for volume adjustment, application shortcuts, built-in a dark environment.
... illuminates the symbols on automatically when your computer is placed in touchpad, programmable shortcut keys, backlight, and so on. You can turn on the backlight manually or configure the backlight to turn on the keys to allow for volume adjustment, application shortcuts, built-in a dark environment.

Me and My Dell
Page 29
... up to dell.com/support. 2. For more information, see "My Dell". • Dell support website at dell.com/support • BIOS setup program Locating the Label on Your Computer Laptops - Service Tag and Express-Service Code 29 Turn on your device, see the Service Manual of the label... on (or restart) your computer and try again. 3. Navigate to enter BIOS setup program. For more information about System Setup, see the Quick Start Guide that shipped with your computer or at dell.com/support. Dell Support Website 1. Back...
... up to dell.com/support. 2. For more information, see "My Dell". • Dell support website at dell.com/support • BIOS setup program Locating the Label on Your Computer Laptops - Service Tag and Express-Service Code 29 Turn on your device, see the Service Manual of the label... on (or restart) your computer and try again. 3. Navigate to enter BIOS setup program. For more information about System Setup, see the Quick Start Guide that shipped with your computer or at dell.com/support. Dell Support Website 1. Back...

Me and My Dell
Page 30
... Discs, DVDs, and CDs. • Blu-ray reader + DVD RW combo - Storage devices can be internal or external. Most storage devices store data till you manually delete the data. The most common internal storage devices are : • Blu-ray writer - This makes SSDs faster, quieter, energy efficient, and shock resistant. Reads...
... Discs, DVDs, and CDs. • Blu-ray reader + DVD RW combo - Storage devices can be internal or external. Most storage devices store data till you manually delete the data. The most common internal storage devices are : • Blu-ray writer - This makes SSDs faster, quieter, energy efficient, and shock resistant. Reads...

Me and My Dell
Page 67
... system. -- Detailed System Information - Downloading or Upgrading My Dell To download or upgrade to dell.com/support. View Dell Technical Support options, Customer Support, Tours and Training, Online Tools, Service Manual, Warranty Information, FAQs, and so on the Start screen. My Dell 67 My Dell My Dell is recommended to find your service contracts, warranty information...
... system. -- Detailed System Information - Downloading or Upgrading My Dell To download or upgrade to dell.com/support. View Dell Technical Support options, Customer Support, Tours and Training, Online Tools, Service Manual, Warranty Information, FAQs, and so on the Start screen. My Dell 67 My Dell My Dell is recommended to find your service contracts, warranty information...

Me and My Dell
Page 74
... the search result list. 74 Dell Backup and Recovery Access the Search charm. 3. Dell Backup and Recovery has two versions: • Dell Backup and Recovery Basic • Dell Backup and Recovery Premium Features Restore your computer. 2. Turn on your system back to factory state Backup files manually Restore files from backup Backup and restore...
... the search result list. 74 Dell Backup and Recovery Access the Search charm. 3. Dell Backup and Recovery has two versions: • Dell Backup and Recovery Basic • Dell Backup and Recovery Premium Features Restore your computer. 2. Turn on your system back to factory state Backup files manually Restore files from backup Backup and restore...
Me and My Dell
Page 91
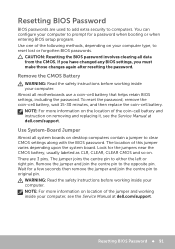
... instructions before working inside your computer. Almost all data from the CMOS. NOTE: For more information on removing and replacing it, see the Service Manual at dell.com/support. The jumper joins the centre pin to clear CMOS settings along with the BIOS password. To reset the password, remove the coin‑... seconds then remove the jumper and join the centre pin to reset lost or forgotten BIOS passwords. You can configure your computer, see the Service Manual at dell.com/support.
... instructions before working inside your computer. Almost all data from the CMOS. NOTE: For more information on removing and replacing it, see the Service Manual at dell.com/support. The jumper joins the centre pin to clear CMOS settings along with the BIOS password. To reset the password, remove the coin‑... seconds then remove the jumper and join the centre pin to reset lost or forgotten BIOS passwords. You can configure your computer, see the Service Manual at dell.com/support.

Me and My Dell
Page 93
... more information about your purchase invoice, packing slip, bill, or Dell product catalog. Getting Help and Contacting Dell Getting Help You can find contact information on For more information about Dell products and services For troubleshooting information, user manuals, technical help blogs, driver, software updates, and so on your..., and some services may not be available in the search box and press . Windows 7 Click Start → Help and Support. dell.com dell.com/support microsoft.com Contacting Dell To contact Dell for sales, technical support, or customer service issues, see...
... more information about your purchase invoice, packing slip, bill, or Dell product catalog. Getting Help and Contacting Dell Getting Help You can find contact information on For more information about Dell products and services For troubleshooting information, user manuals, technical help blogs, driver, software updates, and so on your..., and some services may not be available in the search box and press . Windows 7 Click Start → Help and Support. dell.com dell.com/support microsoft.com Contacting Dell To contact Dell for sales, technical support, or customer service issues, see...
Inspiron 14z N411z Owners Manual
Page 1
Dell Inspiron 14z-N411z Owner's Manual Regulatory Model: P23G Regulatory Type: P23G001
Dell Inspiron 14z-N411z Owner's Manual Regulatory Model: P23G Regulatory Type: P23G001

Inspiron 14z N411z Owners Manual
Page 9
...tools: • Phillips screwdriver • Small flat-blade screwdriver • Plastic scribe • BIOS executable update program available at support.dell.com Turning Off Your Computer CAUTION: To avoid losing data, save and close all open files and exit all open programs before you turn... Computer" on page 10. • You have read the safety information that the computer is turned off . 1 Before You Begin This manual provides instructions for removing and installing components in your computer. • A component can be replaced or-if purchased separately-installed by performing the...
...tools: • Phillips screwdriver • Small flat-blade screwdriver • Plastic scribe • BIOS executable update program available at support.dell.com Turning Off Your Computer CAUTION: To avoid losing data, save and close all open files and exit all open programs before you turn... Computer" on page 10. • You have read the safety information that the computer is turned off . 1 Before You Begin This manual provides instructions for removing and installing components in your computer. • A component can be replaced or-if purchased separately-installed by performing the...

Inspiron 14z N411z Owners Manual
Page 22
... result in damage to the computer. 10 Connect your computer, as needed . 12 Install the drivers and utilities for your computer, see Me and My Dell at support.dell.com\manuals. 22 Hard-Drive Assembly
... result in damage to the computer. 10 Connect your computer, as needed . 12 Install the drivers and utilities for your computer, see Me and My Dell at support.dell.com\manuals. 22 Hard-Drive Assembly
Inspiron 14z N411z Owners Manual
Page 27
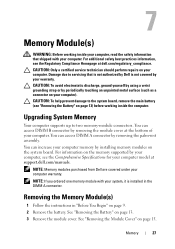
Damage due to servicing that shipped with your computer. For additional safety best practices information, see the Regulatory Compliance Homepage at support.dell.com/manuals. You can increase your computer. Removing the Memory Module(s) 1 Follow the instructions in the DIMM A connector. See "Removing...Your computer supports up to the system board, remove the main battery (see the Comprehensive Specifications for your computer model at dell.com/regulatory_compliance. NOTE: If you ordered one memory module with your computer. You can access DIMM B connector by removing ...
Damage due to servicing that shipped with your computer. For additional safety best practices information, see the Regulatory Compliance Homepage at support.dell.com/manuals. You can increase your computer. Removing the Memory Module(s) 1 Follow the instructions in the DIMM A connector. See "Removing...Your computer supports up to the system board, remove the main battery (see the Comprehensive Specifications for your computer model at dell.com/regulatory_compliance. NOTE: If you ordered one memory module with your computer. You can access DIMM B connector by removing ...

Inspiron 14z N411z Owners Manual
Page 43
... cable into the connectors on the USB board and the system board, and press down the securing latches. For more information, see Me and My Dell on the system board, and realign the mini-card. CAUTION: To avoid damage to the mini-card, never place cables under the minicard. 3 Insert the... page 25. 11 Replace the module cover. If you use excessive force, you feel resistance, check the connectors on the mini-card and on support.dell.com/manuals. CAUTION: The connectors are keyed to ensure correct insertion. See "Replacing the Battery" on page 16. 12 Replace the battery.
... cable into the connectors on the USB board and the system board, and press down the securing latches. For more information, see Me and My Dell on the system board, and realign the mini-card. CAUTION: To avoid damage to the mini-card, never place cables under the minicard. 3 Insert the... page 25. 11 Replace the module cover. If you use excessive force, you feel resistance, check the connectors on the mini-card and on support.dell.com/manuals. CAUTION: The connectors are keyed to ensure correct insertion. See "Replacing the Battery" on page 16. 12 Replace the battery.


