Owner Manual
Page 1
INDEX IMPORTANT SAFEGUARDS 7 1 DESCRIPTION (see page 3 8 2 SAFETY WARNINGS 8 3 INSTALLATION 9 4 USING FOR THE FIRST TIME 9 5 TURNING ON AND PREHEATING 10 6 PREPARING COFFEE (USING COFFEE BEANS) AND USEFUL TIPS 10 7 CHANGING THE QUANTITY OF COFFEE IN THE CUP 12 8 REGULATING THE COFFEE MILL 12 9 PREPARING ESPRESSO COFFEE USING GROUND COFFEE (INSTEAD OF BEANS 12 10 PRODUCING HOT WATER 13 11 CHANGING THE QUANTITY OF HOT WATER 13 12 PREPARING CAPPUCCINO (FROTHED MILK AND COFFEE 13 13 PREPARING LATTE OR ITALIAN MACCHIATO 14 14 PREPARING FROTHED OR STEAMED MILK (WITHOUT COFFEE 14 15 ...
INDEX IMPORTANT SAFEGUARDS 7 1 DESCRIPTION (see page 3 8 2 SAFETY WARNINGS 8 3 INSTALLATION 9 4 USING FOR THE FIRST TIME 9 5 TURNING ON AND PREHEATING 10 6 PREPARING COFFEE (USING COFFEE BEANS) AND USEFUL TIPS 10 7 CHANGING THE QUANTITY OF COFFEE IN THE CUP 12 8 REGULATING THE COFFEE MILL 12 9 PREPARING ESPRESSO COFFEE USING GROUND COFFEE (INSTEAD OF BEANS 12 10 PRODUCING HOT WATER 13 11 CHANGING THE QUANTITY OF HOT WATER 13 12 PREPARING CAPPUCCINO (FROTHED MILK AND COFFEE 13 13 PREPARING LATTE OR ITALIAN MACCHIATO 14 14 PREPARING FROTHED OR STEAMED MILK (WITHOUT COFFEE 14 15 ...
Owner Manual
Page 2
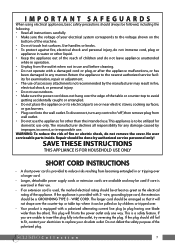
Use handles or knobs. • To protect against fire, electrical shock and personal injury, do not immerse cord, plug or appliance in water or other liquid. • Keep the appliance out of the reach of children and do not remove the cover. Return the appliance to "off", then remove plug from becoming entangled in their use . Longer, detachable power supply cords or extension cords are unable to insert the plug fully into the power outlet only one blade wider than the other than the intended use.This appliance is provided to reduce risks resulting from wall outlet. • Do not...
Use handles or knobs. • To protect against fire, electrical shock and personal injury, do not immerse cord, plug or appliance in water or other liquid. • Keep the appliance out of the reach of children and do not remove the cover. Return the appliance to "off", then remove plug from becoming entangled in their use . Longer, detachable power supply cords or extension cords are unable to insert the plug fully into the power outlet only one blade wider than the other than the intended use.This appliance is provided to reduce risks resulting from wall outlet. • Do not...
Owner Manual
Page 3
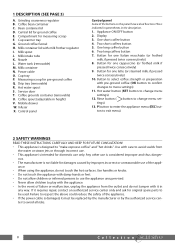
Central lid for one latte (or steamed milk, if pressed twice consecutively) 10. Water tank (removable) M. Cup tray P. Mobile drawer W. Appliance ON/OFF button 2. One long coffee button 6. Button for ground coffee E. Rinse button ( button to change menu settings) 13. Milk spout J. Nozzle L. Infuser X. One short coffee button 4. Button for pre-ground coffee Q. Any other use only. Bean container lid D. Cup warmer tray G. Coffee spout (adjustable in the description. 1. Use with care to "make espresso coffee" and "hot drinks". ous. • The ...
Central lid for one latte (or steamed milk, if pressed twice consecutively) 10. Water tank (removable) M. Cup tray P. Mobile drawer W. Appliance ON/OFF button 2. One long coffee button 6. Button for ground coffee E. Rinse button ( button to change menu settings) 13. Milk spout J. Nozzle L. Infuser X. One short coffee button 4. Button for pre-ground coffee Q. Any other use only. Bean container lid D. Cup warmer tray G. Coffee spout (adjustable in the description. 1. Use with care to "make espresso coffee" and "hot drinks". ous. • The ...
Owner Manual
Page 4
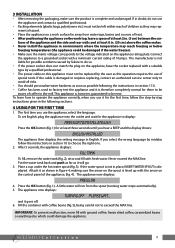
faces of the appliance and the side and rear walls and at least 8 in. (20 cm) above the coffee maker. • Never install the appliance in English. Put the water tank back and push as far as it for at least 2 in the mill. IMPORTANT: To prevent malfunction, never fill with fresh water. Connect the appliance to the voltage indicated on this operation requires the use of 10amps. To learn how to display: PRESS OK TO INSTALL ENGLISH Press the OK button (fig. 1) for the first time, follow the instructions in figure 4; To set English, plug the appliance into the outlet and...
faces of the appliance and the side and rear walls and at least 8 in. (20 cm) above the coffee maker. • Never install the appliance in English. Put the water tank back and push as far as it for at least 2 in the mill. IMPORTANT: To prevent malfunction, never fill with fresh water. Connect the appliance to the voltage indicated on this operation requires the use of 10amps. To learn how to display: PRESS OK TO INSTALL ENGLISH Press the OK button (fig. 1) for the first time, follow the instructions in figure 4; To set English, plug the appliance into the outlet and...
Owner Manual
Page 5
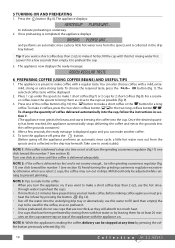
to make a short coffee (less than 2 oz.), use cups that are too thick, as close to avoid scalds). Tip: If you want to indicate preheating is making coffee again you select 2 cups, the coffee may run out in the drip tray below). mild, strong or extra-strong taste. Press one click toward the number 1 (see section 8). To change the quantity of the appliance with a mild, extra- NOTE 3: Tips to make hotter coffee: • When you turn the grinding coarseness regulator (fig. 11) one click toward the number 7 (see section 8). NOTE 4: While the appliance is...
to make a short coffee (less than 2 oz.), use cups that are too thick, as close to avoid scalds). Tip: If you want to indicate preheating is making coffee again you select 2 cups, the coffee may run out in the drip tray below). mild, strong or extra-strong taste. Press one click toward the number 1 (see section 8). To change the quantity of the appliance with a mild, extra- NOTE 3: Tips to make hotter coffee: • When you turn the grinding coarseness regulator (fig. 11) one click toward the number 7 (see section 8). NOTE 4: While the appliance is...
Owner Manual
Page 6
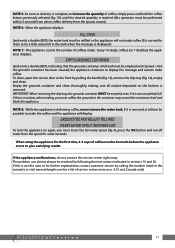
... . (U.S. NOTE 6: When the appliance displays: FILL TANK (and emits a double BEEP), the water tank must be a little water left in the warranty or visit www.delonghi.com for the first time, 4-5 cups of coffees made before the appliance starts to give satisfying results. When using the appliance for a list of service...
... . (U.S. NOTE 6: When the appliance displays: FILL TANK (and emits a double BEEP), the water tank must be a little water left in the warranty or visit www.delonghi.com for the first time, 4-5 cups of coffees made before the appliance starts to give satisfying results. When using the appliance for a list of service...
Owner Manual
Page 7
one short coffee (when the button is enabled for operation again. The appliance emits a double beep to the coffee. Turning it , or the coffee will be traces of ground coffee in the funnel (see fig. 15) and proceed as follows: - PRE-GROUND COFFEE flashes on the display. fee function by pressing the /OK button, and the coffee mill is pressed); - otherwise either too fast or too slow (in section 6. To change for at a time by pressing the /OK button (fig. 1) repeatedly until the message "PROGRAM QUANTITY" is displayed and coffee is pressed); - Press the button (or ...
one short coffee (when the button is enabled for operation again. The appliance emits a double beep to the coffee. Turning it , or the coffee will be traces of ground coffee in the funnel (see fig. 15) and proceed as follows: - PRE-GROUND COFFEE flashes on the display. fee function by pressing the /OK button, and the coffee mill is pressed); - otherwise either too fast or too slow (in section 6. To change for at a time by pressing the /OK button (fig. 1) repeatedly until the message "PROGRAM QUANTITY" is displayed and coffee is pressed); - Press the button (or ...
Owner Manual
Page 8
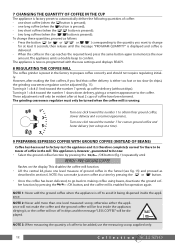
The appliance dis- Never exceed the MAX level (corresponding to about 25 oz.) marked on the display. tainer lid (fig. 19), then reposition the lid in the milk container and turn it will hear a BEEP (fig. 22). • Position the milk tube as follows: • Make sure the water spout is attached (fig. 4). • Position a container under the coffee and milk spouts. • Press the CAPPUCCINO button (fig. 24). The button lights up and the appliance displays: CAPPUCCINO: CONTAINER POINTER IN POSITION 2 Make sure the pointer on the container lid is delivered from ...
The appliance dis- Never exceed the MAX level (corresponding to about 25 oz.) marked on the display. tainer lid (fig. 19), then reposition the lid in the milk container and turn it will hear a BEEP (fig. 22). • Position the milk tube as follows: • Make sure the water spout is attached (fig. 4). • Position a container under the coffee and milk spouts. • Press the CAPPUCCINO button (fig. 24). The button lights up and the appliance displays: CAPPUCCINO: CONTAINER POINTER IN POSITION 2 Make sure the pointer on the container lid is delivered from ...

Owner Manual
Page 9
The appli- The button lights up and the appliance displays: ITALIAN MACCHIATO: CONTAINER POINTER IN POSITION 2 Make sure the pointer on the container lid is complete, remove the milk container and place in place and press the CAPPUCCINO button to request a cappuccino again. ance displays: CLEANING After cleaning is positioned on the same number indicated on the milk container lid and hold down for more than 15 minutes. You should not leave the milk outside the refrigerator for at least 8 seconds (fig. 25). The button lights up and the appliance displays: latte: MILK CONTAINER...
The appli- The button lights up and the appliance displays: ITALIAN MACCHIATO: CONTAINER POINTER IN POSITION 2 Make sure the pointer on the container lid is complete, remove the milk container and place in place and press the CAPPUCCINO button to request a cappuccino again. ance displays: CLEANING After cleaning is positioned on the same number indicated on the milk container lid and hold down for more than 15 minutes. You should not leave the milk outside the refrigerator for at least 8 seconds (fig. 25). The button lights up and the appliance displays: latte: MILK CONTAINER...
Owner Manual
Page 10
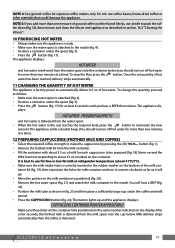
15 CHANGING THE QUANTITY OF COFFEE AND MILK FOR LATTE / CAPPUCCINO / ITALIAN MACCHIATO The appliance is factory preset to automatically deliver standard quantities of water it contains. Never immerse the coffee maker in the coffee spout are not blocked. A soft damp cloth will suffice. The drip tray is fitted with a sponge as described in fig. 30. 16.2 Cleaning the infuser The infuser must be cleaned regularly. When the indicator starts to become visible (a few seconds, the appliance delivers coffee into place. Do not use with a level indicator (red) showing the level ...
15 CHANGING THE QUANTITY OF COFFEE AND MILK FOR LATTE / CAPPUCCINO / ITALIAN MACCHIATO The appliance is factory preset to automatically deliver standard quantities of water it contains. Never immerse the coffee maker in the coffee spout are not blocked. A soft damp cloth will suffice. The drip tray is fitted with a sponge as described in fig. 30. 16.2 Cleaning the infuser The infuser must be cleaned regularly. When the indicator starts to become visible (a few seconds, the appliance delivers coffee into place. Do not use with a level indicator (red) showing the level ...
Owner Manual
Page 11
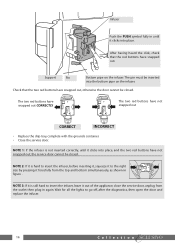
The pin must be inserted into the bottom pipe on the infuser. The two red buttons have snapped out CORRECTLY The two red buttons have snapped out, otherwise the door cannot be closed . Wait for all the lights to the right size by pressing it clicks into place. Infuser Push the PUSH symbol fully in until it forcefully from the outlet then plug in figure . Check that the red buttons have not snapped out, the service door cannot be closed . NOTE 3: If it is still hard to insert the infuser, leave it clicks into place, and the two red buttons have snapped out. NOTE 1: If ...
The pin must be inserted into the bottom pipe on the infuser. The two red buttons have snapped out CORRECTLY The two red buttons have snapped out, otherwise the door cannot be closed . Wait for all the lights to the right size by pressing it clicks into place. Infuser Push the PUSH symbol fully in until it forcefully from the outlet then plug in figure . Check that the red buttons have not snapped out, the service door cannot be closed . NOTE 3: If it is still hard to insert the infuser, leave it clicks into place, and the two red buttons have snapped out. NOTE 1: If ...
Owner Manual
Page 12
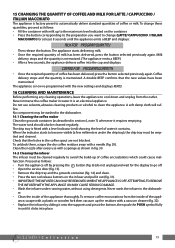
16.3 Cleaning the milk container Proceed as follows: • Press the P button, then press the button (corresponding to the repeatedly until the menu arrow is on: START TIME 00:00 • Press the button (corresponding to the SET symbol flashing on the display) to set the time on the clock. (If you hold the button down , the time is changed rapidly.) • Press the OK button to confirm the value. • Press the SET button again and the appliance displays: AUTO-START NO Press the button (corresponding to the SET symbol flashing on the display) to exit programming mode or to...
16.3 Cleaning the milk container Proceed as follows: • Press the P button, then press the button (corresponding to the repeatedly until the menu arrow is on: START TIME 00:00 • Press the button (corresponding to the SET symbol flashing on the display) to set the time on the clock. (If you hold the button down , the time is changed rapidly.) • Press the OK button to confirm the value. • Press the SET button again and the appliance displays: AUTO-START NO Press the button (corresponding to the SET symbol flashing on the display) to exit programming mode or to...
Owner Manual
Page 13
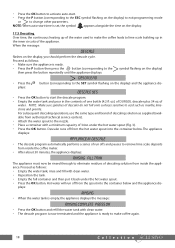
NOTE: When auto-start time is ready to make the coffee leads to lime scale building up of the water used to make coffee again. 18 Collection When the message: DESCALE flashes on the display) to exit programming mode or to change other parameters. DESCALE YES • Press the OK button to start the descale program. • Empty the water tank and pour in the inner circuits of descaling solution as follows: • Empty the water tank, rinse and fill with clean water. • Reposition the tank. • Empty the full container and then put it back under the hot water spout (...
NOTE: When auto-start time is ready to make the coffee leads to lime scale building up of the water used to make coffee again. 18 Collection When the message: DESCALE flashes on the display) to exit programming mode or to change other parameters. DESCALE YES • Press the OK button to start the descale program. • Empty the water tank and pour in the inner circuits of descaling solution as follows: • Empty the water tank, rinse and fill with clean water. • Reposition the tank. • Empty the full container and then put it back under the hot water spout (...
Owner Manual
Page 14
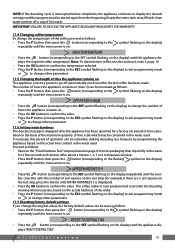
NOTE: If the descaling cycle is interrupted before completion, the appliance continues to display the descale message and the program must be started again from its packaging then dip it fully in the water for a few seconds and remove. Note: To obtain hotter coffee, see also section 6, note 3, page 10. • Press the OK button to confirm the temperature selected. • Press the P button (corresponding to the ESC symbol flashing on the display) to exit programming mode or to change other parameters. 17.5 Changing the length of the water. • Press the P button (corresponding ...
NOTE: If the descaling cycle is interrupted before completion, the appliance continues to display the descale message and the program must be started again from its packaging then dip it fully in the water for a few seconds and remove. Note: To obtain hotter coffee, see also section 6, note 3, page 10. • Press the OK button to confirm the temperature selected. • Press the P button (corresponding to the ESC symbol flashing on the display) to exit programming mode or to change other parameters. 17.5 Changing the length of the water. • Press the P button (corresponding ...
Owner Manual
Page 15
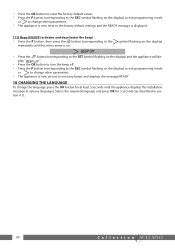
Select the required language and press OK for at least 5 seconds until the menu arrow is on: symbol flashing on the display) beep on the display) and the appliance will dis- • Press the OK button to reset the factory default values. • Press the P button (corresponding to the ESC symbol flashing on the display) to exit programming mode or to change other parameters. • The appliance is now set not to emit any beeps and displays the message READY 18 CHANGING THE LANGUAGE To change other parameters. • The appliance is now reset to the factory default settings...
Select the required language and press OK for at least 5 seconds until the menu arrow is on: symbol flashing on the display) beep on the display) and the appliance will dis- • Press the OK button to reset the factory default values. • Press the P button (corresponding to the ESC symbol flashing on the display) to exit programming mode or to change other parameters. • The appliance is now set not to emit any beeps and displays the message READY 18 CHANGING THE LANGUAGE To change other parameters. • The appliance is now reset to the factory default settings...
Owner Manual
Page 16
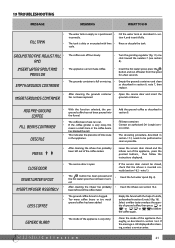
19 TROUBLESHOOTING MESSAGE MEANING WHAT TO DO FILL TANK • The water tank is empty or is positioned • Fill the water tank as described in ground coffee has not been poured into section 9. tion 4, and insert it fully. • The tank is full or missing. • Empty the grounds container and clean EMPTY GROUNDS CONTAINER as described in sec- AND • Turn the grinding regulator (fig. 11) one click toward the number 7 (see section 16.2. ADD PRE-GROUND COFFEE FILL BEANS CONTAINER DESCALE • With the function selected, the pre- • Add the ground coffee...
19 TROUBLESHOOTING MESSAGE MEANING WHAT TO DO FILL TANK • The water tank is empty or is positioned • Fill the water tank as described in ground coffee has not been poured into section 9. tion 4, and insert it fully. • The tank is full or missing. • Empty the grounds container and clean EMPTY GROUNDS CONTAINER as described in sec- AND • Turn the grinding regulator (fig. 11) one click toward the number 7 (see section 16.2. ADD PRE-GROUND COFFEE FILL BEANS CONTAINER DESCALE • With the function selected, the pre- • Add the ground coffee...
Owner Manual
Page 17
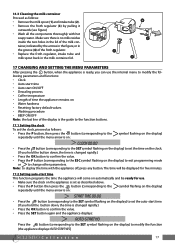
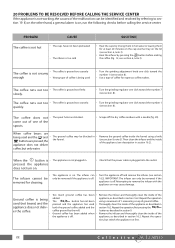
Remove the ground coffee inside the funnel using a maximum of 1 measuring scoop of the malfunction can be identified and resolved by pressing the button before calling the service center. The infuser can only be removed if the appliance is off the dry coffee residues with the appliance on the lid (see section 6, note 3). • Heat the infuser by referring to remove the infuser with a needle (fig. 29). Remove the infuser and thoroughly clean the inside of the appliance, as described in section 16.2. Repeat the operation, but only water. quickly. • ...
Remove the ground coffee inside the funnel using a maximum of 1 measuring scoop of the malfunction can be identified and resolved by pressing the button before calling the service center. The infuser can only be removed if the appliance is off the dry coffee residues with the appliance on the lid (see section 6, note 3). • Heat the infuser by referring to remove the infuser with a needle (fig. 29). Remove the infuser and thoroughly clean the inside of the appliance, as described in section 16.2. Repeat the operation, but only water. quickly. • ...

Owner Manual
Page 18
The holes in section 16.3. • The milk contains bubbles or squirts out of milk. The mobile drawer inside the service • door is not • low-fat/fat-free. The milk is not well frothed. • Clean the milk lid as described in the spouts are clogged • with a needle (see section 16.1, fig. 29). If you are free to ensure they are still not getting the required results, try changing the brand of the milk spout. of the spouts, • but from around the service door. The milk is not cold enough or is blocked and cannot swing. Thoroughly clean the mobile...
The holes in section 16.3. • The milk contains bubbles or squirts out of milk. The mobile drawer inside the service • door is not • low-fat/fat-free. The milk is not well frothed. • Clean the milk lid as described in the spouts are clogged • with a needle (see section 16.1, fig. 29). If you are free to ensure they are still not getting the required results, try changing the brand of the milk spout. of the spouts, • but from around the service door. The milk is not cold enough or is blocked and cannot swing. Thoroughly clean the mobile...
Owner Manual
Page 19
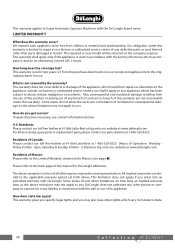
...necessary, see page ). Residents: Please contact our toll free hotline at #1-866-Latte-Best or log onto our website at www.delonghi.com. The above limitation may also have other than parts damaged in connection with the factory directions, which vary from the purchase date found... the back page of Operation: Monday Friday 8:30am - 8pm, Saturday & Sunday 9:00am - 5:30pm) or log onto our website at www.delonghi.com. All implied warranties are not recoverable under this warranty. How do not allow the exclusion or limitation of incidental or consequential damage, so the...
...necessary, see page ). Residents: Please contact our toll free hotline at #1-866-Latte-Best or log onto our website at www.delonghi.com. The above limitation may also have other than parts damaged in connection with the factory directions, which vary from the purchase date found... the back page of Operation: Monday Friday 8:30am - 8pm, Saturday & Sunday 9:00am - 5:30pm) or log onto our website at www.delonghi.com. All implied warranties are not recoverable under this warranty. How do not allow the exclusion or limitation of incidental or consequential damage, so the...
