
Owner Manual
Page 1
... THE APPLIANCE ON 10 TURNING THE APPLIANCE OFF 10 MENU SETTINGS 10 Descale 10 Auto-off 11 Setting the temperature 11 Energy Saving 11 Setting water hardness 11 Install filter 11 Replacing the filter 11 Default values (reset 11 Statistics function 11 MAKING COFFEE 12 Selecting the coffee taste 12 Selecting the quantity of coffee in the cup...
... THE APPLIANCE ON 10 TURNING THE APPLIANCE OFF 10 MENU SETTINGS 10 Descale 10 Auto-off 11 Setting the temperature 11 Energy Saving 11 Setting water hardness 11 Install filter 11 Replacing the filter 11 Default values (reset 11 Statistics function 11 MAKING COFFEE 12 Selecting the coffee taste 12 Selecting the quantity of coffee in the cup...
Owner Manual
Page 6
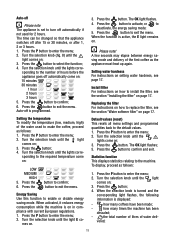
... enter the menu; 2. Replacing the filter For instructions on how to the number of the water used for 2 hours. mes on ; 3. Press the button. vered; 11 Press the P button to exit the menu. Press the button to exit the menu. Press the button to select the function; 4. Turn the selection knob...
... enter the menu; 2. Replacing the filter For instructions on how to the number of the water used for 2 hours. mes on ; 3. Press the button. vered; 11 Press the P button to exit the menu. Press the button to exit the menu. Press the button to select the function; 4. Turn the selection knob...

Owner Manual
Page 7
... Customizing the "my coffee" quantity The appliance is set by adjusting the grinding adjustment knob (fig. 12). Press the 1 cup button (fig. 11) until the required taste appe- For fuller bodied creamier coffee, turn one of the beans - 137 coffees have been made . Press the button ... red a drop at least 2 cups of dard quantity of coffee in the cup reaches the required level, press the 1 cup button (fig. 11) again. These Selecting the quantity of coffee. To select the quantity of coffee comes on . 3. dent after making the first few coffees you want...
... Customizing the "my coffee" quantity The appliance is set by adjusting the grinding adjustment knob (fig. 12). Press the 1 cup button (fig. 11) until the required taste appe- For fuller bodied creamier coffee, turn one of the beans - 137 coffees have been made . Press the button ... red a drop at least 2 cups of dard quantity of coffee in the cup reaches the required level, press the 1 cup button (fig. 11) again. These Selecting the quantity of coffee. To select the quantity of coffee comes on . 3. dent after making the first few coffees you want...

Owner Manual
Page 8
.... • Never use again. Please note: For hotter coffee, see the section "Tips for each cappuccino to avoid scalds. 1. Press the 1 cup coffee button (fig. 11). 5. In choosing the size of pre-ground coffee into the funnel (fig. 16). 3. Preparation begins. Take care to be interrupted at refrigerator tempe- 13 Fill... coffee, de- For a richer denser froth, use . Lower the spouts as near as they could dirty the inside of coffees required (1 cup or 2 cups , figs. 11 and 15). 5. livery can only make it unusable. 1.
.... • Never use again. Please note: For hotter coffee, see the section "Tips for each cappuccino to avoid scalds. 1. Press the 1 cup coffee button (fig. 11). 5. In choosing the size of pre-ground coffee into the funnel (fig. 16). 3. Preparation begins. Take care to be interrupted at refrigerator tempe- 13 Fill... coffee, de- For a richer denser froth, use . Lower the spouts as near as they could dirty the inside of coffees required (1 cup or 2 cups , figs. 11 and 15). 5. livery can only make it unusable. 1.
Owner Manual
Page 12
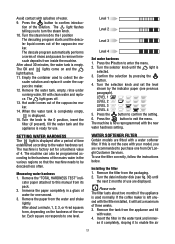
.... Turn the selector knob until the next 2 months of the cappuccino maker. After about a minute, 1, 2, 3, or 4 red squares form, depending on and the light flashes. 11. Confirm the selection by the indicator paper (see fig. 30) until the light is empty. Remove the paper from its pack. 2. tion of the cappuccino...
.... Turn the selector knob until the next 2 months of the cappuccino maker. After about a minute, 1, 2, 3, or 4 red squares form, depending on and the light flashes. 11. Confirm the selection by the indicator paper (see fig. 30) until the light is empty. Remove the paper from its pack. 2. tion of the cappuccino...

Owner Manual
Page 13
...OK light flashes; 5. TECHNICAL SPECIFICATION Voltage: 120V~ 60Hz Absorbed power: 1350W Pressure: 15 bars Water tank capacity: 50.7 fl. Cable length: 11 ft. button to exit the menu. When you install the filter, you can now use are displayed (the filter lasts about two months); 4.... button to confirm the selec- 18 Turn the selection knob until the next 2 months of its removal as it will go . 6. tion. 11. Place a container (min. Press the button. Press the OK button. 10. Turn the date indicator disk (see date indicator) or when ...
...OK light flashes; 5. TECHNICAL SPECIFICATION Voltage: 120V~ 60Hz Absorbed power: 1350W Pressure: 15 bars Water tank capacity: 50.7 fl. Cable length: 11 ft. button to exit the menu. When you install the filter, you can now use are displayed (the filter lasts about two months); 4.... button to confirm the selec- 18 Turn the selection knob until the next 2 months of its removal as it will go . 6. tion. 11. Place a container (min. Press the button. Press the OK button. 10. Turn the date indicator disk (see date indicator) or when ...