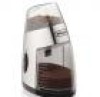
Owner Manual
Page 2
... and should always be cleaned with a damp cloth. 13. Check coffee bean container for examination, repair or adjustment. 6. Unplug from outlet when not in any appliance with moving parts. 14. To protect against electrical shock, do not place cord, plug or coffee grinder in heated oven. 10. This coffee grinder is used by the manufacturer.
... and should always be cleaned with a damp cloth. 13. Check coffee bean container for examination, repair or adjustment. 6. Unplug from outlet when not in any appliance with moving parts. 14. To protect against electrical shock, do not place cord, plug or coffee grinder in heated oven. 10. This coffee grinder is used by the manufacturer.
Owner Manual
Page 3
... wider than the other liquid. Rinse and dry thoroughly. Dry thoroughly. Do not use . This appliance has a polarized plug. Do not immerse the coffee grinder in water or other . BEFORE FIRST USE Place the box on the bottom of this plug will not drape over the countertop or table top... where it will fit in their use harsh or abrasive cleaners. (See "Cleaning Your Coffee Grinder" section of the unit. Longer detachable power supply cords are available and may wipe the unit with warm water and mild detergent. Remove any ...
... wider than the other liquid. Rinse and dry thoroughly. Dry thoroughly. Do not use . This appliance has a polarized plug. Do not immerse the coffee grinder in water or other . BEFORE FIRST USE Place the box on the bottom of this plug will not drape over the countertop or table top... where it will fit in their use harsh or abrasive cleaners. (See "Cleaning Your Coffee Grinder" section of the unit. Longer detachable power supply cords are available and may wipe the unit with warm water and mild detergent. Remove any ...
Owner Manual
Page 4
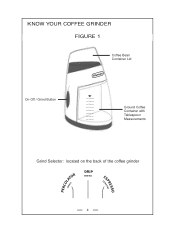
KNOW YOUR COFFEE GRINDER FIGURE 1 Coffee Bean Container Lid On-Off / Grind Button Ground Coffee Container with Tablespoon Measurements Grind Selector: located on the back of the coffee grinder 4
KNOW YOUR COFFEE GRINDER FIGURE 1 Coffee Bean Container Lid On-Off / Grind Button Ground Coffee Container with Tablespoon Measurements Grind Selector: located on the back of the coffee grinder 4
Owner Manual
Page 5
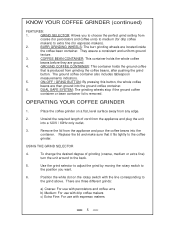
... unit around to the position you to extra fine (for espresso makers). 2. Replace the lid and make sure that is removed. KNOW YOUR COFFEE GRINDER (continued) FEATURES: 1. Place the coffee grinder on the rotary switch with espresso makers 5 BURR GRINDING WHEELS: The burr grinding wheels are ground. 4. ON-OFF / GRIND BUTTON: By pressing this...
... unit around to the position you to extra fine (for espresso makers). 2. Replace the lid and make sure that is removed. KNOW YOUR COFFEE GRINDER (continued) FEATURES: 1. Place the coffee grinder on the rotary switch with espresso makers 5 BURR GRINDING WHEELS: The burr grinding wheels are ground. 4. ON-OFF / GRIND BUTTON: By pressing this...
Owner Manual
Page 6
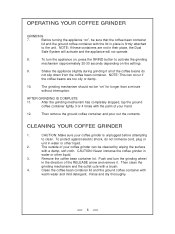
... before attempting to the unit. NOTE: This can be cleaned by wiping the surface with a damp, soft cloth. AFTER GRINDING IS COMPLETE 11. CLEANING YOUR COFFEE GRINDER 1. Then clean the grinding mechanism and the outlet cute with warm water and mild detergent. The outside of the RELEASE arrow and remove it. Rinse...
... before attempting to the unit. NOTE: This can be cleaned by wiping the surface with a damp, soft cloth. AFTER GRINDING IS COMPLETE 11. CLEANING YOUR COFFEE GRINDER 1. Then clean the grinding mechanism and the outlet cute with warm water and mild detergent. The outside of the RELEASE arrow and remove it. Rinse...

