Owner Manual
Page 5
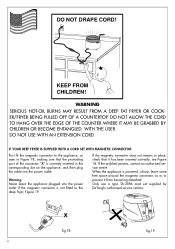
.... Warning Never leave the appliance plugged into the power outlet. If the problem persists, contact an authorised service centre. IF YOUR DEEP FRYER IS SUPPLIED WITH A CORD SET WITH MAGNETIC CONNECTOR: First fit the magnetic connector to the appliance, as to the deep...longhi authorised service centres. WARNING SERIOUS HOT-OIL BURNS MAY RESULT FROM A DEEP FAT FRYER OR COOKER/FRYER BEING PULLED OFF OF A COUNTERTOP. If the magnetic connector does not remain in place, check that the protruding part of the connector "X" is not fitted to prevent it has been inserted correctly, ...
.... Warning Never leave the appliance plugged into the power outlet. If the problem persists, contact an authorised service centre. IF YOUR DEEP FRYER IS SUPPLIED WITH A CORD SET WITH MAGNETIC CONNECTOR: First fit the magnetic connector to the appliance, as to the deep...longhi authorised service centres. WARNING SERIOUS HOT-OIL BURNS MAY RESULT FROM A DEEP FAT FRYER OR COOKER/FRYER BEING PULLED OFF OF A COUNTERTOP. If the magnetic connector does not remain in place, check that the protruding part of the connector "X" is not fitted to prevent it has been inserted correctly, ...
Owner Manual
Page 6
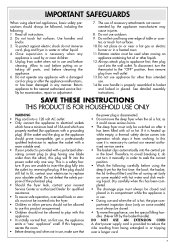
...the appliance. 6. See detailed assembly instructions. SAVE THESE INSTRUCTIONS THIS PRODUCT IS FOR HOUSEHOLD USE ONLY WARNING • Plug cord into the fryer. • Children or infirm persons should not be allowed to replace the socket with a more suitable one). • If your product...recommended by the appliance manufacturer may cause injuries. 8. The use outdoors. 9. Always attach plug to cool before putting on or taking off parts, and before cleaning. To protect against electric shock do not turn the thermostat to seek the correct position. • Wash the following ...
...the appliance. 6. See detailed assembly instructions. SAVE THESE INSTRUCTIONS THIS PRODUCT IS FOR HOUSEHOLD USE ONLY WARNING • Plug cord into the fryer. • Children or infirm persons should not be allowed to replace the socket with a more suitable one). • If your product...recommended by the appliance manufacturer may cause injuries. 8. The use outdoors. 9. Always attach plug to cool before putting on or taking off parts, and before cleaning. To protect against electric shock do not turn the thermostat to seek the correct position. • Wash the following ...
Owner Manual
Page 7
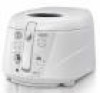
...steam up the appliance L. Set the cooking time by using the appliance. In order to form around the perimeter of the basket., leaving the central part more than 2 seconds. Basket handle C. Viewing window (not for oil container S. Oil drainage pipe T. Never use lumps of solid fat, cut them... . • At the start of cooking, immediately after - In order to contact one of our service centres. wards, signifying that the deep fryer does not heat up in the oil, the internal wall of viewing window "E" (where present) will go off the audible alarm you only need ...
...steam up the appliance L. Set the cooking time by using the appliance. In order to form around the perimeter of the basket., leaving the central part more than 2 seconds. Basket handle C. Viewing window (not for oil container S. Oil drainage pipe T. Never use lumps of solid fat, cut them... . • At the start of cooking, immediately after - In order to contact one of our service centres. wards, signifying that the deep fryer does not heat up in the oil, the internal wall of viewing window "E" (where present) will go off the audible alarm you only need ...
Owner Manual
Page 8
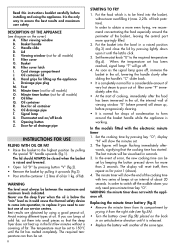
... filter, visible through the window without the "J" lid in fig. 11. Allow the excess oil to ensure better preservation of fig.11 on the metal part (fig.13) and the coloured area must rest on the inside the area of the openings "Y" (fig. 17). Pull tray "R" outwards (as in ...having appropriately allowed the oil to the edge of the deep fryer with a viewing window this procedure each time you have accumulated in the basket's wheel guide ring. • Dry the outside of the work surface (fig. 6). 1. Bring the front part of the first phase and wait for a second time (see...
... filter, visible through the window without the "J" lid in fig. 11. Allow the excess oil to ensure better preservation of fig.11 on the metal part (fig.13) and the coloured area must rest on the inside the area of the openings "Y" (fig. 17). Pull tray "R" outwards (as in ...having appropriately allowed the oil to the edge of the deep fryer with a viewing window this procedure each time you have accumulated in the basket's wheel guide ring. • Dry the outside of the work surface (fig. 6). 1. Bring the front part of the first phase and wait for a second time (see...
