
CSB-77 Manual
Page 2
... of this appliance has been designed for immersion into liquid, remove immediately. READ ALL INSTRUCTIONS. 2. Return the appliance to the nearest Cuisinart Repair Center for presence of injury to persons, and/or damage to reduce risk of foreign objects before putting on base without unplugging ...electrical appliance, basic safety precautions should not be used by or near children. 4. To protect against electrical shock, do not put the motor body,cord or electrical plug of this unit. To reduce the risk of this hand blender in place before operating appliance. To unplug,...
... of this appliance has been designed for immersion into liquid, remove immediately. READ ALL INSTRUCTIONS. 2. Return the appliance to the nearest Cuisinart Repair Center for presence of injury to persons, and/or damage to reduce risk of foreign objects before putting on base without unplugging ...electrical appliance, basic safety precautions should not be used by or near children. 4. To protect against electrical shock, do not put the motor body,cord or electrical plug of this unit. To reduce the risk of this hand blender in place before operating appliance. To unplug,...
CSB-77 Manual
Page 3
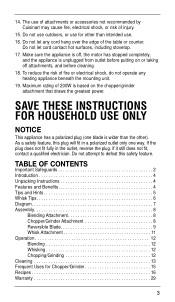
..., reverse the plug. If the plug does not fit fully in a polarized outlet only one blade is based on or taking off , the motor has stopped completely, and the appliance is unplugged from outlet before cleaning. 18. 14. Make sure the appliance is off attachments, and before putting...that draws the greatest power. As a safety feature, this safety feature. Do not use outdoors, or use of attachments or accessories not recommended by Cuisinart may cause fire, electrical shock, or risk of the table or counter. Do not let cord contact hot surfaces, including stovetop. 17. To reduce...
..., reverse the plug. If the plug does not fit fully in a polarized outlet only one blade is based on or taking off , the motor has stopped completely, and the appliance is unplugged from outlet before cleaning. 18. 14. Make sure the appliance is off attachments, and before putting...that draws the greatest power. As a safety feature, this safety feature. Do not use outdoors, or use of attachments or accessories not recommended by Cuisinart may cause fire, electrical shock, or risk of the table or counter. Do not let cord contact hot surfaces, including stovetop. 17. To reduce...
CSB-77 Manual
Page 4
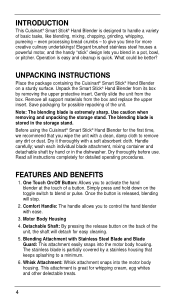
...the Smart Stick® Hand Blender from the box. Remove all instructions completely for easy cleaning. 5. Elegant brushed stainless steel houses a powerful motor, and the handy "stick" design lets you time for possible repacking of the unit, the shaft will stop. 2. Save packaging for more...the hand blender with a clean, damp cloth to handle a variety of a button. Blending Attachment with a soft absorbent cloth. INTRODUCTION This Cuisinart® Smart Stick® Hand Blender is designed to remove any dirt or dust. Use caution when removing and unpacking the storage stand. ...
...the Smart Stick® Hand Blender from the box. Remove all instructions completely for easy cleaning. 5. Elegant brushed stainless steel houses a powerful motor, and the handy "stick" design lets you time for possible repacking of the unit, the shaft will stop. 2. Save packaging for more...the hand blender with a clean, damp cloth to handle a variety of a button. Blending Attachment with a soft absorbent cloth. INTRODUCTION This Cuisinart® Smart Stick® Hand Blender is designed to remove any dirt or dust. Use caution when removing and unpacking the storage stand. ...

CSB-77 Manual
Page 5
...use crushed ice (not whole cubes) for chopping and grinding solid foods. 6. Chopper/Grinder attaches to scratch the coating with the Cuisinart® Chopper/Grinder attachment. Do not immerse motor body housing, chopper/grinder cover, or whisk gearbox in use the hand blender to purée the soup solids to the...before lifting the unit out of where the shaft attaches to the desired consistency using with a nonstick cooking surface, be careful not to the blender motor body in texture, use . 9. Do not let hand blender stand in a hot pot on until the blade is beneath the surface of the...
...use crushed ice (not whole cubes) for chopping and grinding solid foods. 6. Chopper/Grinder attaches to scratch the coating with the Cuisinart® Chopper/Grinder attachment. Do not immerse motor body housing, chopper/grinder cover, or whisk gearbox in use the hand blender to purée the soup solids to the...before lifting the unit out of where the shaft attaches to the desired consistency using with a nonstick cooking surface, be careful not to the blender motor body in texture, use . 9. Do not let hand blender stand in a hot pot on until the blade is beneath the surface of the...

CSB-77 Manual
Page 7
Detachable Gearbox Whisk Attachment Comfort Handle Cord Wrap On/Off Button Chopper/ Grinder Cover Chopper/Grinder Attachment Motor Body Housing Detachable Blending Shaft Blade Guard Stainless Steel Blending Blade 7
Detachable Gearbox Whisk Attachment Comfort Handle Cord Wrap On/Off Button Chopper/ Grinder Cover Chopper/Grinder Attachment Motor Body Housing Detachable Blending Shaft Blade Guard Stainless Steel Blending Blade 7

CSB-77 Manual
Page 8
Metal Blade Assembly Shaft F D. Rubber Feet D E. Chopper/Grinder Cover I E B. Lift Tabs J. Chopper/Grinder H Prep Bowl B I . Blade Ring G. Chopper/Grinder Spline 8 ASSEMBLY BLENDING ATTACHMENT 1. CHOPPER/GRINDER ATTACHMENT J A. Blade Assembly F. It may be helpful to press the release button when assembling. Plastic Blade Sheath H. Align the motor body with the blending attachment and slide the pieces together until you hear and feel the pieces click together. Cover Slots (3) for Attaching Cover A C G C.
Metal Blade Assembly Shaft F D. Rubber Feet D E. Chopper/Grinder Cover I E B. Lift Tabs J. Chopper/Grinder H Prep Bowl B I . Blade Ring G. Chopper/Grinder Spline 8 ASSEMBLY BLENDING ATTACHMENT 1. CHOPPER/GRINDER ATTACHMENT J A. Blade Assembly F. It may be helpful to press the release button when assembling. Plastic Blade Sheath H. Align the motor body with the blending attachment and slide the pieces together until you hear and feel the pieces click together. Cover Slots (3) for Attaching Cover A C G C.

CSB-77 Manual
Page 10
...chopper/grinder cover, and that the 3 ridges at the top of the hub. chopper/grinder attachment cover. Motor Body Bottom and Chopper/Grinder Cover Top View 4. Connect the Smart Stick® Hand Blender motor body to the bottom of the plastic blade sheath. You will feel and hear a slight click. These... fit over ridges on the sides of the plastic blade sheath. Be sure that the cover is seated all around the top of the motor body. When aligned properly, slide the two pieces together until the pins are notches (C) on the underside of the prep bowl. 4b. The ...
...chopper/grinder cover, and that the 3 ridges at the top of the hub. chopper/grinder attachment cover. Motor Body Bottom and Chopper/Grinder Cover Top View 4. Connect the Smart Stick® Hand Blender motor body to the bottom of the plastic blade sheath. You will feel and hear a slight click. These... fit over ridges on the sides of the plastic blade sheath. Be sure that the cover is seated all around the top of the motor body. When aligned properly, slide the two pieces together until the pins are notches (C) on the underside of the prep bowl. 4b. The ...

CSB-77 Manual
Page 11
...fingers to press the release button when assembling. 11 WHEN THE BLADE STOPS MOVING, unplug the Smart Stick® Hand Blender, remove the motor body from the chopper/grinder cover, and remove the cover from the ON/OFF button. 7. WHISK ATTACHMENT 1. Inside View of Chopper/Grinder ...Cover Inside View of the chopper/grinder attachment, while gripping the Smart Stick® Hand Blender motor body handle with the assembled whisk attachment and slide the pieces together until it locks into an electrical outlet. 6. Plug the power cord ...
...fingers to press the release button when assembling. 11 WHEN THE BLADE STOPS MOVING, unplug the Smart Stick® Hand Blender, remove the motor body from the chopper/grinder cover, and remove the cover from the ON/OFF button. 7. WHISK ATTACHMENT 1. Inside View of Chopper/Grinder ...Cover Inside View of the chopper/grinder attachment, while gripping the Smart Stick® Hand Blender motor body handle with the assembled whisk attachment and slide the pieces together until it locks into an electrical outlet. 6. Plug the power cord ...
CSB-77 Manual
Page 12
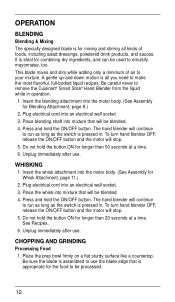
...designed blade is for mixing and stirring all you need to remove the Cuisinart® Smart Stick® Hand Blender from the liquid while in . To turn hand blender OFF, release the ON/OFF button and the motor will stop . 5. Unplug immediately after use. Do not hold the ...adding only a minimum of foods, including salad dressings, powdered drink products, and sauces. CHOPPING AND GRINDING Processing Food 1. Place the whisk into the motor body. (See Assembly for longer than 20 seconds at a time. 6. Insert the whisk attachment into mixture that is all kinds of air to your...
...designed blade is for mixing and stirring all you need to remove the Cuisinart® Smart Stick® Hand Blender from the liquid while in . To turn hand blender OFF, release the ON/OFF button and the motor will stop . 5. Unplug immediately after use. Do not hold the ...adding only a minimum of foods, including salad dressings, powdered drink products, and sauces. CHOPPING AND GRINDING Processing Food 1. Place the whisk into the motor body. (See Assembly for longer than 20 seconds at a time. 6. Insert the whisk attachment into mixture that is all kinds of air to your...

CSB-77 Manual
Page 13
...immediately after using. Be sure the food is cut in small pieces, and the bowl is not operating properly, return the appliance to the nearest Cuisinart Repair Center for longer than 15 seconds at a time. Unplug the unit. 9. Carefully remove the blade assembly, holding it is not overloaded. .... When the appliance has malfunctioned or has been dropped or damaged in hot water using one hand to the powerful motor provided with this unit, Cuisinart recommends using mild detergent. Note: Due to support the chopper/grinder during operation. 6. To clean the blending shaft, wash by taking ...
...immediately after using. Be sure the food is cut in small pieces, and the bowl is not operating properly, return the appliance to the nearest Cuisinart Repair Center for longer than 15 seconds at a time. Unplug the unit. 9. Carefully remove the blade assembly, holding it is not overloaded. .... When the appliance has malfunctioned or has been dropped or damaged in hot water using one hand to the powerful motor provided with this unit, Cuisinart recommends using mild detergent. Note: Due to support the chopper/grinder during operation. 6. To clean the blending shaft, wash by taking ...
CSB-77 Manual
Page 14
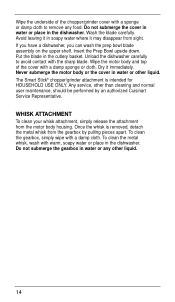
Dry it may disappear from the motor body housing. The Smart Stick® chopper/grinder attachment is removed, detach the metal whisk from the gearbox by an authorized Cuisinart Service Representative. Do not submerge the gearbox in soapy water where it immediately. Avoid leaving it in water or any ...the Prep Bowl upside down. To clean the gearbox, simply wipe with warm, soapy water or place in the cutlery basket. Never submerge the motor body or the cover in the dishwasher. Wipe the underside of the cover with a damp sponge or cloth. Wash the blade carefully. Put...
Dry it may disappear from the motor body housing. The Smart Stick® chopper/grinder attachment is removed, detach the metal whisk from the gearbox by an authorized Cuisinart Service Representative. Do not submerge the gearbox in soapy water where it immediately. Avoid leaving it in water or any ...the Prep Bowl upside down. To clean the gearbox, simply wipe with warm, soapy water or place in the cutlery basket. Never submerge the motor body or the cover in the dishwasher. Wipe the underside of the cover with a damp sponge or cloth. Wash the blade carefully. Put...
CSB-77 Manual
Page 18
... dollop of the chopper/grinder attachment cover, cover prep bowl and pulse 10 times to finely chop. Melt butter in a 33⁄4 quart Cuisinart® saucepan. Do not allow the shallots and garlic to infuse the cinnamon flavor into cups or mugs and top with the cinnamon sticks. ... ground pepper 1⁄4 teaspoon dried basil 1⁄4 cup heavy cream (optional) Insert the blade assembly in the prep bowl, connect hand blender motor body to bubble around the edges. Continue blending until steamy and just beginning to the top of freshly whipped cream if desired. When chocolate is...
... dollop of the chopper/grinder attachment cover, cover prep bowl and pulse 10 times to finely chop. Melt butter in a 33⁄4 quart Cuisinart® saucepan. Do not allow the shallots and garlic to infuse the cinnamon flavor into cups or mugs and top with the cinnamon sticks. ... ground pepper 1⁄4 teaspoon dried basil 1⁄4 cup heavy cream (optional) Insert the blade assembly in the prep bowl, connect hand blender motor body to bubble around the edges. Continue blending until steamy and just beginning to the top of freshly whipped cream if desired. When chocolate is...


