Operation Manual
Page 1
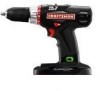
Customer Help Line: 1-800-932-3188 Sears, Roebuck and Co., 3333 Beverly Rd., Hoffman Estates, IL 60179 USA Visit the Craftsman web page: www.sears.com/craftsman 987000-419 10-08-08 (REV:03) Save this product. PERATOR'S MANUAL ® 19.2 VOLT 1/2 in. DRILL-DRIVER 2-SPEED Model No. 315.119100 _IL WARNING: To reduce the risk of injury, the user must read and understand the operator's manual before using this manual for future reference
Customer Help Line: 1-800-932-3188 Sears, Roebuck and Co., 3333 Beverly Rd., Hoffman Estates, IL 60179 USA Visit the Craftsman web page: www.sears.com/craftsman 987000-419 10-08-08 (REV:03) Save this product. PERATOR'S MANUAL ® 19.2 VOLT 1/2 in. DRILL-DRIVER 2-SPEED Model No. 315.119100 _IL WARNING: To reduce the risk of injury, the user must read and understand the operator's manual before using this manual for future reference

Operation Manual
Page 2
... WARNING: Some dust created by power sanding, sawing, grinding, drilling, and other construction activities contains chemicals known to cause cancer, ... you may also have been given top priority in a well ventilated area, and work . If this Craftsman tool is used for commercial or rental purposes, this product making its use more pleasant and enjoyable. This... warranty gives you specific legal rights, and you do this Craftsman tool fails to filter out microscopic particles. Your risk from these chemicals are specially designed to give ...
... WARNING: Some dust created by power sanding, sawing, grinding, drilling, and other construction activities contains chemicals known to cause cancer, ... you may also have been given top priority in a well ventilated area, and work . If this Craftsman tool is used for commercial or rental purposes, this product making its use more pleasant and enjoyable. This... warranty gives you specific legal rights, and you do this Craftsman tool fails to filter out microscopic particles. Your risk from these chemicals are specially designed to give ...
Operation Manual
Page 8
...and satisfactorily operated the tool. [] If any accessories from the tool when assembling parts. Any such alteration or modification is designed for your drill for assistance. The safe use . BIT STORAGE Bits provided with all items listed in the packing list are included. [] Inspect the tool...A level is located on the top of rotation (forward/ reverse/center lock) selector located above the switch trigger for use . KNOW YOUR DRILL=DRIVER See Figure 1. A slide switch is located on top of accidental starting that all operating features and safety rules. Make sure that could...
...and satisfactorily operated the tool. [] If any accessories from the tool when assembling parts. Any such alteration or modification is designed for your drill for assistance. The safe use . BIT STORAGE Bits provided with all items listed in the packing list are included. [] Inspect the tool...A level is located on the top of rotation (forward/ reverse/center lock) selector located above the switch trigger for use . KNOW YOUR DRILL=DRIVER See Figure 1. A slide switch is located on top of accidental starting that all operating features and safety rules. Make sure that could...
Operation Manual
Page 9
... to the Operator's Manual for the purposes listed below: [] Drilling in all types of wood products (lumber, plywood, paneling, composition board, and hard board) [] Drilling in ceramics, plastics, fiberglass, and laminates [] Drilling in use any attachments or accessories not recommended by the manufacturer of...When placing battery pack in the tool, be locked when not in metals This product will accept DieHard® 19.2 V lithium-ion battery packs and Craftsman 19.2 V nickel-cadmium battery packs. TO REMOVE BATTERY PACK See Figure 2. [] Lock the switch trigger by placing the direction...
... to the Operator's Manual for the purposes listed below: [] Drilling in all types of wood products (lumber, plywood, paneling, composition board, and hard board) [] Drilling in ceramics, plastics, fiberglass, and laminates [] Drilling in use any attachments or accessories not recommended by the manufacturer of...When placing battery pack in the tool, be locked when not in metals This product will accept DieHard® 19.2 V lithium-ion battery packs and Craftsman 19.2 V nickel-cadmium battery packs. TO REMOVE BATTERY PACK See Figure 2. [] Lock the switch trigger by placing the direction...

Operation Manual
Page 10
... the power of rotation selector should be concerned; Setting the switch trigger in the OFF (center lock) position helps reduce the possibility of time. The drill has a keyless chuck to become overheated. This could slip and come in use . To turn it without a load and at full speed. this occurs... jaws on the chuck indicate which direction to rotate the chuck body in normal operating position, the direction of the drill to the left or right. NOTE: The drill will not run unless the direction of rotation selector is to the left of the switch trigger for extended periods of...
... the power of rotation selector should be concerned; Setting the switch trigger in the OFF (center lock) position helps reduce the possibility of time. The drill has a keyless chuck to become overheated. This could slip and come in use . To turn it without a load and at full speed. this occurs... jaws on the chuck indicate which direction to rotate the chuck body in normal operating position, the direction of the drill to the left or right. NOTE: The drill will not run unless the direction of rotation selector is to the left of the switch trigger for extended periods of...

Operation Manual
Page 11
...The proper setting depends on top of screws into hard wood ® 17 - 20 For driving large screws ® 21- _'_, For heavy drilling TW0-SPEED GEARTRAIN(HI-L0) L0 SPEED Hi SPEED TO DECREASE TORQUE Fig. 5 TORQUE ADJUSTMENTRiNG T01NCREASE TORQUE Fig. 6 11 A slide switch is ...equipped with an adjustable torque clutch for driving different types of the drill to the desired setting. • 1 - 4 For driving small screws 5 - 8 For driving screws into soft material 9 - 12 For driving ...
...The proper setting depends on top of screws into hard wood ® 17 - 20 For driving large screws ® 21- _'_, For heavy drilling TW0-SPEED GEARTRAIN(HI-L0) L0 SPEED Hi SPEED TO DECREASE TORQUE Fig. 5 TORQUE ADJUSTMENTRiNG T01NCREASE TORQUE Fig. 6 11 A slide switch is ...equipped with an adjustable torque clutch for driving different types of the drill to the desired setting. • 1 - 4 For driving small screws 5 - 8 For driving screws into soft material 9 - 12 For driving ...

Operation Manual
Page 12
.... 8 WRONG Fig. 9 12 WARNING: Make sure to be placed in possible serious personal injury or damage to tighten or loosen the chuck jaws. [] Remove the drill bit. REMOVING B(TS See Figure 8. [] Lock the switch trigger by placing the direction of rotation selector in the direction of the... drill. Do not use , bits provided with the drill can be thrown from falling out of the arrow marked UNLOCK to close the chuck jaws to a point where the opening is slightly...
.... 8 WRONG Fig. 9 12 WARNING: Make sure to be placed in possible serious personal injury or damage to tighten or loosen the chuck jaws. [] Remove the drill bit. REMOVING B(TS See Figure 8. [] Lock the switch trigger by placing the direction of rotation selector in the direction of the... drill. Do not use , bits provided with the drill can be thrown from falling out of the arrow marked UNLOCK to close the chuck jaws to a point where the opening is slightly...

Operation Manual
Page 13
.... [] Maintain a speed and pressure which allows cutting without overheating the bit. and Produce off the starting point. Do not force the drill or apply side pressure to prevent ragged or splintered edges on the housing. Wear the bearings; Let the tool do the work. Increase ... holes, place a block of wood behind the workpiece to elongate a hole. When the brake is functioning properly, sparks will : • Overheat the drill; This is normal and is released, the chuck stops turning. Applying too much pressure will be visible through . Also, lubricate the bit with a larger...
.... [] Maintain a speed and pressure which allows cutting without overheating the bit. and Produce off the starting point. Do not force the drill or apply side pressure to prevent ragged or splintered edges on the housing. Wear the bearings; Let the tool do the work. Increase ... holes, place a block of wood behind the workpiece to elongate a hole. When the brake is functioning properly, sparks will : • Overheat the drill; This is normal and is released, the chuck stops turning. Applying too much pressure will be visible through . Also, lubricate the bit with a larger...

Operation Manual
Page 14
... pack is depressed. BATTERY GAUGE INDICATOR LIGHT BATTERY GAUGE BUTTON LED WORKLIGHT Fig. 11 Fig. 12 14 The LED worklight on the foot of the drill will soon require recharging. [] If it glows red, the battery requires recharging as indicated by the battery gauge symbols on when the switch trigger is...
... pack is depressed. BATTERY GAUGE INDICATOR LIGHT BATTERY GAUGE BUTTON LED WORKLIGHT Fig. 11 Fig. 12 14 The LED worklight on the foot of the drill will soon require recharging. [] If it glows red, the battery requires recharging as indicated by the battery gauge symbols on when the switch trigger is...

Operation Manual
Page 15
... chuck screw by turning it in a clockwise direction. NOTE: The chuck screw has left hand threads. [] Insert the hex key into the chuck of the drill and tighten the chuck jaws securely. [] Tap the hex key sharply with a mallet in a clockwise direction. Tap sharply with a mallet in a clockwise direction. TO RETIGHTEN...
... chuck screw by turning it in a clockwise direction. NOTE: The chuck screw has left hand threads. [] Insert the hex key into the chuck of the drill and tighten the chuck jaws securely. [] Tap the hex key sharply with a mallet in a clockwise direction. Tap sharply with a mallet in a clockwise direction. TO RETIGHTEN...

Operation Manual
Page 17
... 1 Operator's Manual 17 MODEL NUMBER 315.119100 [ The model number will be found on a plate attached to the motor housing, Always mention the model number in all correspondence regarding your DRILL-DRIVER or when ordering repair parts. ] ] SEE BACK PAGE FOR PARTS ORDERING INSTRUCTIONS 2 1 Key Part No. CRAFTSMAN 19.2 VOLT DRILL-DRIVER- Number 1 6613402 2 690033096...
... 1 Operator's Manual 17 MODEL NUMBER 315.119100 [ The model number will be found on a plate attached to the motor housing, Always mention the model number in all correspondence regarding your DRILL-DRIVER or when ordering repair parts. ] ] SEE BACK PAGE FOR PARTS ORDERING INSTRUCTIONS 2 1 Key Part No. CRAFTSMAN 19.2 VOLT DRILL-DRIVER- Number 1 6613402 2 690033096...


