User Manual
Page 2
English Table of Contents Thank You 4 Mounting the Unit 5 Controls at a Glance 7 Getting Started 8 Power ...8 Clock Backup 8 Using AC Power 8 Changing the Function Mode 9 Adjusting the Volume 9 CD Mode 10 Loading a CD 10 Playing a CD 10 Repeat and Random Playback 11 Programmed CD Playback 11 Radio Mode 13 Clock Mode 14 Setting the Clock Time 14 Using the Alarm Clock 15 Setting the Alarm Timers 15 Setting the Alarm Mode (Wake to Radio, CD, or Buzzer 15 Turning the Alarm Off / Snooze 16 Setting a Sleep Timer (Sleep to Music 17 Page 2 Coby Electronics Corporation
English Table of Contents Thank You 4 Mounting the Unit 5 Controls at a Glance 7 Getting Started 8 Power ...8 Clock Backup 8 Using AC Power 8 Changing the Function Mode 9 Adjusting the Volume 9 CD Mode 10 Loading a CD 10 Playing a CD 10 Repeat and Random Playback 11 Programmed CD Playback 11 Radio Mode 13 Clock Mode 14 Setting the Clock Time 14 Using the Alarm Clock 15 Setting the Alarm Timers 15 Setting the Alarm Mode (Wake to Radio, CD, or Buzzer 15 Turning the Alarm Off / Snooze 16 Setting a Sleep Timer (Sleep to Music 17 Page 2 Coby Electronics Corporation

User Manual
Page 3
Table of Contents CD Care & Maintenance 18 Handling CDs 18 Cleaning CDs 18 Cleaning the CD Player Lens 19 Specifications 20 Troubleshooting 21 Safety Notices 22 English www.cobyusa.com Page 3
Table of Contents CD Care & Maintenance 18 Handling CDs 18 Cleaning CDs 18 Cleaning the CD Player Lens 19 Specifications 20 Troubleshooting 21 Safety Notices 22 English www.cobyusa.com Page 3

User Manual
Page 4
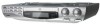
Your KCD150 features: CD player with programmable track memory AM/FM radio Clock with dual alarm, snooze, and sleep functions Built-in full-range speaker system Convenient front panel display Mounting kit included Page 4 Coby Electronics Corporation Visit the Coby website at www.cobyusa.com to...
Your KCD150 features: CD player with programmable track memory AM/FM radio Clock with dual alarm, snooze, and sleep functions Built-in full-range speaker system Convenient front panel display Mounting kit included Page 4 Coby Electronics Corporation Visit the Coby website at www.cobyusa.com to...

User Manual
Page 5
Make sure that : an electrical outlet is available and within reach of the unit the unit will not be exposed to water the unit will need: Screwdriver (cross-head) Drill with 0.6mm bit Pencil Installation template (included) 4 mount adapters (included) 4 mount screws (included) To mount the unit: 1. www.cobyusa.com Page 5 Place the mount adapters into the four, notched sockets of the unit. English Mounting the Unit When choosing an installation site, make sure that ...
Make sure that : an electrical outlet is available and within reach of the unit the unit will not be exposed to water the unit will need: Screwdriver (cross-head) Drill with 0.6mm bit Pencil Installation template (included) 4 mount adapters (included) 4 mount screws (included) To mount the unit: 1. www.cobyusa.com Page 5 Place the mount adapters into the four, notched sockets of the unit. English Mounting the Unit When choosing an installation site, make sure that ...

User Manual
Page 6
The screws used to mount this unit must match the construction material of the installation site (e.g., wood, composite wood, drywall, etc.) If in through the top of the cabinet and into the mount adapters. English Page 6 Coby Electronics Corporation Screw the mount screws in doubt, contact a qualified installation professional. Tighten the screws by hand. Mounting the Unit 3.
The screws used to mount this unit must match the construction material of the installation site (e.g., wood, composite wood, drywall, etc.) If in through the top of the cabinet and into the mount adapters. English Page 6 Coby Electronics Corporation Screw the mount screws in doubt, contact a qualified installation professional. Tighten the screws by hand. Mounting the Unit 3.

User Manual
Page 7
Power On Indicator 5. CD: Program Button 16. CD: Play/Pause Button 22. CD: Program Indicator 25. Random Indicator 26. FM Stereo Indicator 27. Alarm 2 Button 18. FM Mono / Stereo www.cobyusa.com Page 7 Eject Button 4. CD Door 6. Time: PM Indicator 9. CD Track Display Button 17. Speakers 20. Alarm 1 Indicator 23. Battery Compartment 24. Function Switch (AM/FM/CD/Buzzer) 28...
Power On Indicator 5. CD: Program Button 16. CD: Play/Pause Button 22. CD: Program Indicator 25. Random Indicator 26. FM Stereo Indicator 27. Alarm 2 Button 18. FM Mono / Stereo www.cobyusa.com Page 7 Eject Button 4. CD Door 6. Time: PM Indicator 9. CD Track Display Button 17. Speakers 20. Alarm 1 Indicator 23. Battery Compartment 24. Function Switch (AM/FM/CD/Buzzer) 28...

User Manual
Page 8
... of your dealer or service center. Do not stretch the cord. To turn off the unit, press POWER/ALARM OFF [13] again. Page 8 Coby Electronics Corporation Keep objects clear of the cord where it into the wall outlet. Using AC Power Make sure that the voltage of the AC...
... of your dealer or service center. Do not stretch the cord. To turn off the unit, press POWER/ALARM OFF [13] again. Page 8 Coby Electronics Corporation Keep objects clear of the cord where it into the wall outlet. Using AC Power Make sure that the voltage of the AC...

User Manual
Page 9
Adjusting the Volume To increase the volume, turn the VOLUME KNOB [2] clockwise to the right. To decrease the volume, turn the VOLUME KNOB [2] counter-clockwise to buzzer. www.cobyusa.com Page 9 English Getting Started Changing the Function Mode Set the FUNCTION SWITCH [27] to one of the following positions to change the function mode of the unit. AM: Listen to AM radio broadcasts. FM: Listen to FM radio broadcasts. CD: Listen to a CD. Buzzer: Set the alarm mode to the left.
Adjusting the Volume To increase the volume, turn the VOLUME KNOB [2] clockwise to the right. To decrease the volume, turn the VOLUME KNOB [2] counter-clockwise to buzzer. www.cobyusa.com Page 9 English Getting Started Changing the Function Mode Set the FUNCTION SWITCH [27] to one of the following positions to change the function mode of the unit. AM: Listen to AM radio broadcasts. FM: Listen to FM radio broadcasts. CD: Listen to a CD. Buzzer: Set the alarm mode to the left.

User Manual
Page 10
... 2. Playing a CD After you have loaded a CD: Press PLAY/PAUSE [21] to pause playback. Hold this button down to scan forward through the track. Press STOP/CLOCK ADJ [18] to close the disc tray compartment. Page 10 Coby Electronics Corporation English CD Mode To place the... unit in CD mode, set the FUNCTION SWITCH [27] to the previous track. Press EJECT [3] to the clock time after few seconds...
... 2. Playing a CD After you have loaded a CD: Press PLAY/PAUSE [21] to pause playback. Hold this button down to scan forward through the track. Press STOP/CLOCK ADJ [18] to close the disc tray compartment. Page 10 Coby Electronics Corporation English CD Mode To place the... unit in CD mode, set the FUNCTION SWITCH [27] to the previous track. Press EJECT [3] to the clock time after few seconds...
User Manual
Page 11
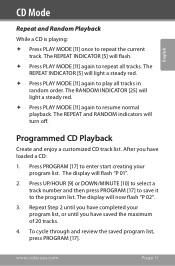
...track number and then press PROGRAM [17] to save it to repeat the current track. The REPEAT INDICATOR [5] will turn off. Programmed CD Playback Create and enjoy a customized CD track list. The display will now flash "P 02". 3. www.cobyusa.com Page 11 The display will flash "P 01". 2. The ...PLAY MODE [11] again to enter start creating your program list, or until you have loaded a CD: 1. Press PROGRAM [17] to repeat all tracks in random order. English CD Mode Repeat and Random Playback While a CD is playing: Press PLAY MODE [11] once to the program list.
...track number and then press PROGRAM [17] to save it to repeat the current track. The REPEAT INDICATOR [5] will turn off. Programmed CD Playback Create and enjoy a customized CD track list. The display will now flash "P 02". 3. www.cobyusa.com Page 11 The display will flash "P 01". 2. The ...PLAY MODE [11] again to enter start creating your program list, or until you have loaded a CD: 1. Press PROGRAM [17] to repeat all tracks in random order. English CD Mode Repeat and Random Playback While a CD is playing: Press PLAY MODE [11] once to the program list.

User Manual
Page 12
To clear all programmed tracks, press PROGRAM [17] and then press STOP/CLOCK ADJ [18]. When you are satisfied with the program list, press PLAY/PAUSE [21] to start playback. 6. CD Mode 5. English Page 12 Coby Electronics Corporation
To clear all programmed tracks, press PROGRAM [17] and then press STOP/CLOCK ADJ [18]. When you are satisfied with the program list, press PLAY/PAUSE [21] to start playback. 6. CD Mode 5. English Page 12 Coby Electronics Corporation

User Manual
Page 13
... the wire's position to the left. English Radio Mode To place the unit in Radio mode, set the FUNCTION SWITCH [27] to either "AM" or "FM". Set the switch to AM to listen to AM radio broadcasts. Set the switch to FM to listen to FM radio broadcasts. To tune to...
... the wire's position to the left. English Radio Mode To place the unit in Radio mode, set the FUNCTION SWITCH [27] to either "AM" or "FM". Set the switch to AM to listen to AM radio broadcasts. Set the switch to FM to listen to FM radio broadcasts. To tune to...
User Manual
Page 14
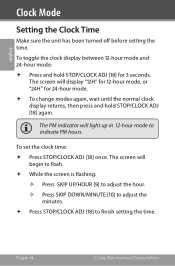
...; Press STOP/CLOCK ADJ [18] to indicate PM hours. To set the clock time: Press STOP/CLOCK ADJ [18] once. Page 14 Coby Electronics Corporation To toggle the clock display between 12-hour mode and 24-hour mode: Press and hold STOP/CLOCK ADJ [18] again...
...; Press STOP/CLOCK ADJ [18] to indicate PM hours. To set the clock time: Press STOP/CLOCK ADJ [18] once. Page 14 Coby Electronics Corporation To toggle the clock display between 12-hour mode and 24-hour mode: Press and hold STOP/CLOCK ADJ [18] again...

User Manual
Page 15
... AL 2 [16] instead of AL 1. press SKIP DOWN/MINUTE [10] to a CD. The AL1 INDICATOR [22] will light. To set the Alarm 1 timer: 1. When...CD" position to wake to adjust the minutes. 4. Setting the Alarm Mode (Wake to Radio, CD, or Buzzer) Set the FUNCTION SWITCH [27] to the "AM" or "FM..." position to wake to adjust the hour; www.cobyusa.com Page 15 Make sure the unit has been turned off (the POWER ON INDICATOR [4] should be dark). 2. Press AL 1 [12]. Press SKIP UP/HOUR [9] to the radio...
... AL 2 [16] instead of AL 1. press SKIP DOWN/MINUTE [10] to a CD. The AL1 INDICATOR [22] will light. To set the Alarm 1 timer: 1. When...CD" position to wake to adjust the minutes. 4. Setting the Alarm Mode (Wake to Radio, CD, or Buzzer) Set the FUNCTION SWITCH [27] to the "AM" or "FM..." position to wake to adjust the hour; www.cobyusa.com Page 15 Make sure the unit has been turned off (the POWER ON INDICATOR [4] should be dark). 2. Press AL 1 [12]. Press SKIP UP/HOUR [9] to the radio...

User Manual
Page 16
... again 5 minutes later. To turn off the alarm completely, press AL 1 [12] or AL 2 [16]. Page 16 Coby Electronics Corporation When waking to a CD, ensure that you have tuned to the radio, ensure that you have loaded a compatible disc into the compartment tray before setting the alarm. Turning the Alarm Off...
... again 5 minutes later. To turn off the alarm completely, press AL 1 [12] or AL 2 [16]. Page 16 Coby Electronics Corporation When waking to a CD, ensure that you have tuned to the radio, ensure that you have loaded a compatible disc into the compartment tray before setting the alarm. Turning the Alarm Off...

User Manual
Page 17
You can set the sleep timer: While the radio or CD is no longer displayed on the screen. To turn off the music before the sleep timer ends, simply press POWER [13] to turn ...
You can set the sleep timer: While the radio or CD is no longer displayed on the screen. To turn off the music before the sleep timer ends, simply press POWER [13] to turn ...

User Manual
Page 18
... off any fingerprints and dusts from the playing surface of the disc. Avoid touching the recorded side of the disc. Page 18 Coby Electronics Corporation To remove a CD from the center to direct sunlight, high humidity, or high temperatures. Do not place stickers or labels on the... center retention mechanism of the disc. English CD Care & Maintenance Handling CDs Hold a CD by its storage case, press down on either side of the CD. Wipe in their case after use. Do not subject CDs to prolonged exposure to the outside edge of the case and...
... off any fingerprints and dusts from the playing surface of the disc. Avoid touching the recorded side of the disc. Page 18 Coby Electronics Corporation To remove a CD from the center to direct sunlight, high humidity, or high temperatures. Do not place stickers or labels on the... center retention mechanism of the disc. English CD Care & Maintenance Handling CDs Hold a CD by its storage case, press down on either side of the CD. Wipe in their case after use. Do not subject CDs to prolonged exposure to the outside edge of the case and...

User Manual
Page 19
Unplug the power supply, open the CD door, and clean the lens as follows: For Dust or Dry Particles - Then, wipe the lens gently with the brush, and blow on the lens a few times. use a camera lens brush/ blower to blow on the lens once more. For Fingerprints - If the lens is very dirty, the CD may not work at all. use a dry cotton swab to wipe the lens in a straight line radially from the center to skip. www.cobyusa.com Page 19 English CD Care & Maintenance Cleaning the CD Player Lens A dirty lens can cause CD playback to the outside edge.
Unplug the power supply, open the CD door, and clean the lens as follows: For Dust or Dry Particles - Then, wipe the lens gently with the brush, and blow on the lens a few times. use a camera lens brush/ blower to blow on the lens once more. For Fingerprints - If the lens is very dirty, the CD may not work at all. use a dry cotton swab to wipe the lens in a straight line radially from the center to skip. www.cobyusa.com Page 19 English CD Care & Maintenance Cleaning the CD Player Lens A dirty lens can cause CD playback to the outside edge.

User Manual
Page 20
Page 20 Coby Electronics Corporation English Specifications Amplifier CD Radio Power Output Frequency Response Frequency Response Dynamic Range Harmonic Distortion Channel Separation Signal Noise Rate Frequency Range Supply Consumption 1.5 W (RMS) 60 - 20,000 Hz (+/- 10dB) 30 - 20,000 Hz 60 dB 0.5% 35 dB 50 dB AM 530 - 1710 kHz FM 87.5 - 108 MHz AC 120V~ 60 Hz DC 9V for clock back-up 15 W *Specifications and design are subject to change without notice.
Page 20 Coby Electronics Corporation English Specifications Amplifier CD Radio Power Output Frequency Response Frequency Response Dynamic Range Harmonic Distortion Channel Separation Signal Noise Rate Frequency Range Supply Consumption 1.5 W (RMS) 60 - 20,000 Hz (+/- 10dB) 30 - 20,000 Hz 60 dB 0.5% 35 dB 50 dB AM 530 - 1710 kHz FM 87.5 - 108 MHz AC 120V~ 60 Hz DC 9V for clock back-up 15 W *Specifications and design are subject to change without notice.

User Manual
Page 21
English Troubleshooting If you have a problem with this device, please check our website at www.cobyusa.com for Frequently Asked Questions (FAQs) and firmware updates. If these resources do not resolve the problem, please contact Technical Support. Address Coby Electronics Technical Support 56-65 Rust Street Maspeth, NY 11378 Email [email protected] Web www.cobyusa.com Phone 800-727-3592: Mon-Fri, 8:00AM-11:00PM EST Saturdays, 9:00AM-5:30PM EST 718-416-3197: Mon-Fri, 8:00AM-5:30PM EST www.cobyusa.com Page 21
English Troubleshooting If you have a problem with this device, please check our website at www.cobyusa.com for Frequently Asked Questions (FAQs) and firmware updates. If these resources do not resolve the problem, please contact Technical Support. Address Coby Electronics Technical Support 56-65 Rust Street Maspeth, NY 11378 Email [email protected] Web www.cobyusa.com Phone 800-727-3592: Mon-Fri, 8:00AM-11:00PM EST Saturdays, 9:00AM-5:30PM EST 718-416-3197: Mon-Fri, 8:00AM-5:30PM EST www.cobyusa.com Page 21
