User Manual
Page 2
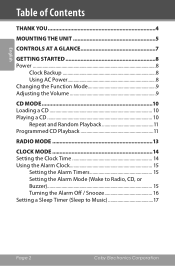
English Table of Contents Thank You 4 Mounting the Unit 5 Controls at a Glance 7 Getting Started 8 Power ...8 Clock Backup 8 Using AC Power 8 Changing the Function Mode 9 Adjusting the Volume 9 CD Mode 10 Loading a CD 10 Playing a CD 10 Repeat and Random Playback 11 Programmed CD Playback 11 Radio Mode 13 Clock Mode 14 Setting the Clock Time 14 Using the Alarm Clock 15 Setting the Alarm Timers 15 Setting the Alarm Mode (Wake to Radio, CD, or Buzzer 15 Turning the Alarm Off / Snooze 16 Setting a Sleep Timer (Sleep to Music 17 Page 2 Coby Electronics Corporation
English Table of Contents Thank You 4 Mounting the Unit 5 Controls at a Glance 7 Getting Started 8 Power ...8 Clock Backup 8 Using AC Power 8 Changing the Function Mode 9 Adjusting the Volume 9 CD Mode 10 Loading a CD 10 Playing a CD 10 Repeat and Random Playback 11 Programmed CD Playback 11 Radio Mode 13 Clock Mode 14 Setting the Clock Time 14 Using the Alarm Clock 15 Setting the Alarm Timers 15 Setting the Alarm Mode (Wake to Radio, CD, or Buzzer 15 Turning the Alarm Off / Snooze 16 Setting a Sleep Timer (Sleep to Music 17 Page 2 Coby Electronics Corporation

User Manual
Page 4
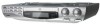
...Thank you for purchasing the Coby KCD150 Under-theCabinet CD Player/Radio. Please read this manual as well as other helpful guides. Your KCD150 features: CD player with programmable track memory AM/FM radio Clock with... dual alarm, snooze, and sleep functions Built-in full-range speaker system Convenient front panel display Mounting kit included Page 4 Coby Electronics Corporation Visit the Coby...
...Thank you for purchasing the Coby KCD150 Under-theCabinet CD Player/Radio. Please read this manual as well as other helpful guides. Your KCD150 features: CD player with programmable track memory AM/FM radio Clock with... dual alarm, snooze, and sleep functions Built-in full-range speaker system Convenient front panel display Mounting kit included Page 4 Coby Electronics Corporation Visit the Coby...

User Manual
Page 6
The screws used to mount this unit must match the construction material of the cabinet and into the mount adapters. Tighten the screws by hand. Screw the mount screws in through the top of the installation site (e.g., wood, composite wood, drywall, etc.) If in doubt, contact a qualified installation professional. English Page 6 Coby Electronics Corporation Mounting the Unit 3.
The screws used to mount this unit must match the construction material of the cabinet and into the mount adapters. Tighten the screws by hand. Screw the mount screws in through the top of the installation site (e.g., wood, composite wood, drywall, etc.) If in doubt, contact a qualified installation professional. English Page 6 Coby Electronics Corporation Mounting the Unit 3.

User Manual
Page 8
... the electrical cord by the manufacturer. Do not stretch the cord. To turn off the unit, press POWER/ALARM OFF [13] again. Page 8 Coby Electronics Corporation If the voltage is reconnected. The POWER ON INDICATOR [4] will light up. To turn on the unit, press POWER/ALARM OFF [13...
... the electrical cord by the manufacturer. Do not stretch the cord. To turn off the unit, press POWER/ALARM OFF [13] again. Page 8 Coby Electronics Corporation If the voltage is reconnected. The POWER ON INDICATOR [4] will light up. To turn on the unit, press POWER/ALARM OFF [13...

User Manual
Page 10
... [21] to the next track. You can press the CD DISPLAY button to view the number of CD track, then it will indicate the track number of the CD is playing to "CD". Press EJECT [3] again to the clock time after few seconds. Page 10 Coby Electronics Corporation Hold this button down to scan forward through...
... [21] to the next track. You can press the CD DISPLAY button to view the number of CD track, then it will indicate the track number of the CD is playing to "CD". Press EJECT [3] again to the clock time after few seconds. Page 10 Coby Electronics Corporation Hold this button down to scan forward through...

User Manual
Page 12
CD Mode 5. When you are satisfied with the program list, press PLAY/PAUSE [21] to start playback. 6. To clear all programmed tracks, press PROGRAM [17] and then press STOP/CLOCK ADJ [18]. English Page 12 Coby Electronics Corporation
CD Mode 5. When you are satisfied with the program list, press PLAY/PAUSE [21] to start playback. 6. To clear all programmed tracks, press PROGRAM [17] and then press STOP/CLOCK ADJ [18]. English Page 12 Coby Electronics Corporation
User Manual
Page 14
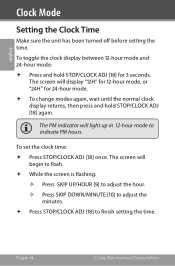
.... To toggle the clock display between 12-hour mode and 24-hour mode: Press and hold STOP/CLOCK ADJ [18] again. Page 14 Coby Electronics Corporation English Clock Mode Setting the Clock Time Make sure the unit has been turned off before setting the time.
.... To toggle the clock display between 12-hour mode and 24-hour mode: Press and hold STOP/CLOCK ADJ [18] again. Page 14 Coby Electronics Corporation English Clock Mode Setting the Clock Time Make sure the unit has been turned off before setting the time.

User Manual
Page 16
When waking to the radio, ensure that you have tuned to a CD, ensure that you have loaded a compatible disc into the compartment tray before setting the alarm. See the section "Radio Mode" to learn how to tune to sound again 5 minutes later. To turn off the alarm completely, ...143; Set the FUNCTION SWITCH [27] to the "BUZZER" position to wake to a buzzer when the alarm sounds. When waking to a radio station within frequency range before setting the alarm. If no disc has been loaded, the unit will default to the alarm buzzer. Page 16 Coby Electronics Corporation
When waking to the radio, ensure that you have tuned to a CD, ensure that you have loaded a compatible disc into the compartment tray before setting the alarm. See the section "Radio Mode" to learn how to tune to sound again 5 minutes later. To turn off the alarm completely, ...143; Set the FUNCTION SWITCH [27] to the "BUZZER" position to wake to a buzzer when the alarm sounds. When waking to a radio station within frequency range before setting the alarm. If no disc has been loaded, the unit will default to the alarm buzzer. Page 16 Coby Electronics Corporation

User Manual
Page 18
...out. Small dust particles and light stains will not affect playback quality. Never use . Do not subject CDs to prolonged exposure to wipe off any fingerprints and dusts from the playing surface of the disc. Wipe in their case after use chemicals ...benzene, or thinners to the outside edge of the disc. English CD Care & Maintenance Handling CDs Hold a CD by its storage case, press down on either side of the CD. Page 18 Coby Electronics Corporation To remove a CD from the center to clean your CDs. To reduce the risk of scratches, always put...
...out. Small dust particles and light stains will not affect playback quality. Never use . Do not subject CDs to prolonged exposure to wipe off any fingerprints and dusts from the playing surface of the disc. Wipe in their case after use chemicals ...benzene, or thinners to the outside edge of the disc. English CD Care & Maintenance Handling CDs Hold a CD by its storage case, press down on either side of the CD. Page 18 Coby Electronics Corporation To remove a CD from the center to clean your CDs. To reduce the risk of scratches, always put...

User Manual
Page 20
English Specifications Amplifier CD Radio Power Output Frequency Response Frequency Response Dynamic Range Harmonic Distortion Channel Separation Signal Noise Rate Frequency Range Supply Consumption 1.5 W (RMS) 60 - 20,000 Hz (+/- 10dB) 30 - 20,000 Hz 60 dB 0.5% 35 dB 50 dB AM 530 - 1710 kHz FM 87.5 - 108 MHz AC 120V~ 60 Hz DC 9V for clock back-up 15 W *Specifications and design are subject to change without notice. Page 20 Coby Electronics Corporation
English Specifications Amplifier CD Radio Power Output Frequency Response Frequency Response Dynamic Range Harmonic Distortion Channel Separation Signal Noise Rate Frequency Range Supply Consumption 1.5 W (RMS) 60 - 20,000 Hz (+/- 10dB) 30 - 20,000 Hz 60 dB 0.5% 35 dB 50 dB AM 530 - 1710 kHz FM 87.5 - 108 MHz AC 120V~ 60 Hz DC 9V for clock back-up 15 W *Specifications and design are subject to change without notice. Page 20 Coby Electronics Corporation

User Manual
Page 21
Address Coby Electronics Technical Support 56-65 Rust Street Maspeth, NY 11378 Email [email protected] Web www.cobyusa.com Phone 800-727-3592: Mon-Fri, 8:00AM-11:00PM EST Saturdays, 9:00AM-5:30PM EST 718-416-3197: Mon-Fri, 8:00AM-5:30PM EST www.cobyusa.com Page 21 English Troubleshooting If you have a problem with this device, please check our website at www.cobyusa.com for Frequently Asked Questions (FAQs) and firmware updates. If these resources do not resolve the problem, please contact Technical Support.
Address Coby Electronics Technical Support 56-65 Rust Street Maspeth, NY 11378 Email [email protected] Web www.cobyusa.com Phone 800-727-3592: Mon-Fri, 8:00AM-11:00PM EST Saturdays, 9:00AM-5:30PM EST 718-416-3197: Mon-Fri, 8:00AM-5:30PM EST www.cobyusa.com Page 21 English Troubleshooting If you have a problem with this device, please check our website at www.cobyusa.com for Frequently Asked Questions (FAQs) and firmware updates. If these resources do not resolve the problem, please contact Technical Support.

User Manual
Page 22
...of plug to wide slot of important operation and servicing instructions in the literature accompanying the appliance. Model No. Page 22 Coby Electronics Corporation Safety Notices English The lightning flash with arrowhead symbol within an equilateral triangle is intended to alert the user to the...uninsulated "dangerous voltage" within an equilateral triangle is intended to alert the user to the presence of outlet and fully insert. KCD150 Serial No. The exclamation point within the product's enclosure that is present inside the enclosure. Dangerous high voltage is located on...
...of plug to wide slot of important operation and servicing instructions in the literature accompanying the appliance. Model No. Page 22 Coby Electronics Corporation Safety Notices English The lightning flash with arrowhead symbol within an equilateral triangle is intended to alert the user to the...uninsulated "dangerous voltage" within an equilateral triangle is intended to alert the user to the presence of outlet and fully insert. KCD150 Serial No. The exclamation point within the product's enclosure that is present inside the enclosure. Dangerous high voltage is located on...

User Manual
Page 24
... by placing the product on or pinched by the manufacturer. These openings should be walked on a bed, sofa, rug, or other similar surface. Page 24 Coby Electronics Corporation Do not use this product near water (e.g., near a swimming pool and the like). 8. This product should be adhered to your home, consult your product...
... by placing the product on or pinched by the manufacturer. These openings should be walked on a bed, sofa, rug, or other similar surface. Page 24 Coby Electronics Corporation Do not use this product near water (e.g., near a swimming pool and the like). 8. This product should be adhered to your home, consult your product...