User Guide
Page 5
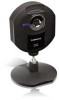
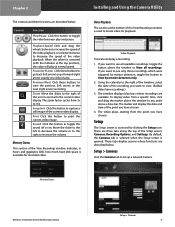
...to a web browser anywhere in the world! Ethernet The Ethernet port is where you connect the power adapter. NOTE: To learn how to set up when the Camera is used to you for 10 seconds. Chapter 1 Chapter 1: Product Overview Thank you . This compact, self-contained ...ambient sound. Wireless-N Internet Home Monitoring Camera 4 Reset This button is ready for your settings. Front Panel Power LED Microphone Product Overview WARNING: Resetting the Camera will erase all of your settings, such as a pen, press the button until you want to automatically configure the Camera's...
...to a web browser anywhere in the world! Ethernet The Ethernet port is where you connect the power adapter. NOTE: To learn how to set up when the Camera is used to you for 10 seconds. Chapter 1 Chapter 1: Product Overview Thank you . This compact, self-contained ...ambient sound. Wireless-N Internet Home Monitoring Camera 4 Reset This button is ready for your settings. Front Panel Power LED Microphone Product Overview WARNING: Resetting the Camera will erase all of your settings, such as a pen, press the button until you want to automatically configure the Camera's...
User Guide
Page 7
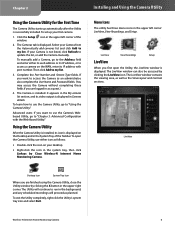
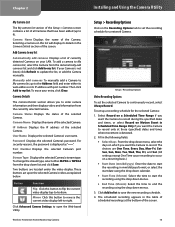
...View Recordings Setup LiveView When you want to "Chapter 3: Advanced Configuration with port number. The LiveView window can also be accessed by Cisco Wireless-N Internet Home Monitoring Camera. The Cameras tab is successfully installed. If you are logged in Camera details. Using the Camera Utility..., as well as planned. Chapter 2 Using the Camera Utility for the First Time The Camera Utility starts up your first camera: 1. To set up automatically after the Utility is displayed. To manually add a Camera, go to the Address field and enter either icon as a guest.)...
...View Recordings Setup LiveView When you want to "Chapter 3: Advanced Configuration with port number. The LiveView window can also be accessed by Cisco Wireless-N Internet Home Monitoring Camera. The Cameras tab is successfully installed. If you are logged in Camera details. Using the Camera Utility..., as well as planned. Chapter 2 Using the Camera Utility for the First Time The Camera Utility starts up your first camera: 1. To set up automatically after the Utility is displayed. To manually add a Camera, go to the Address field and enter either icon as a guest.)...
User Guide
Page 9
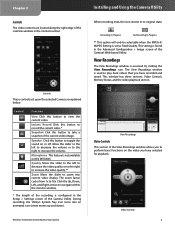
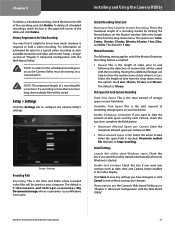
...In Progress ** This option will only be selectable when the MPEG-4/ MJPEG Setting is configured in the Setup > Settings screen of the recording is set to 16x. View Recordings The View Recordings window is not available on the WVC80N. Click the Up, Down, Left, and Right arrows to view the ...current video. This setting is used to perform basic functions on or off. This window has three sections: Video Controls, Memory Status, and the ...
...In Progress ** This option will only be selectable when the MPEG-4/ MJPEG Setting is configured in the Setup > Settings screen of the recording is set to 16x. View Recordings The View Recordings window is not available on the WVC80N. Click the Up, Down, Left, and Right arrows to view the ...current video. This setting is used to perform basic functions on or off. This window has three sections: Video Controls, Memory Status, and the ...
User Guide
Page 10
... you have chosen. Installing and Using the Camera Utility Video Playback The section at the bottom of the Setup screen: Cameras, Recording Options, and Settings. The video plays, starting from 1x to view the previous (left arrow) or the next (right arrow) recording. Setup The Setup screen is... the video will display the date and time of the recording you want to see all recordings. If you have recordings.) 3. Using the calendar to set up a network Camera. The marker will play a recording: 1. Setup > Cameras Click the Cameras tab to the right of the timeline, select the...
... you have chosen. Installing and Using the Camera Utility Video Playback The section at the bottom of the Setup screen: Cameras, Recording Options, and Settings. The video plays, starting from 1x to view the previous (left arrow) or the next (right arrow) recording. Setup The Setup screen is... the video will display the date and time of the recording you want to see all recordings. If you have recordings.) 3. Using the calendar to set up a network Camera. The marker will play a recording: 1. Setup > Cameras Click the Cameras tab to the right of the timeline, select the...
User Guide
Page 11
...on the Recording Options tab to end the recording using the drop down menus. •• End Time (hh:mm) Select the time to set the recording schedule for the selected Camera: 1. Wireless-N Internet Home Monitoring Camera Installing and Using the Camera Utility Setup > Recording Options Click on ...Click this button to reverse the current video display left-to open the Web-based Utility. Setup > Recording Options Video Recording Options To set up to record. Select Record on a Scheduled Time Range if you want the Camera to record during the specified dates and times, or...
...on the Recording Options tab to end the recording using the drop down menus. •• End Time (hh:mm) Select the time to set the recording schedule for the selected Camera: 1. Wireless-N Internet Home Monitoring Camera Installing and Using the Camera Utility Setup > Recording Options Click on ...Click this button to reverse the current video display left-to open the Web-based Utility. Setup > Recording Options Video Recording Options To set up to record. Select Record on a Scheduled Time Range if you want the Camera to record during the specified dates and times, or...
User Guide
Page 12
...the video display. For information on estimated bit rates for Each Camera Recording Total Disk Space This is your hard drive. Setup > Settings Click the Settings tab to occur, the Camera Utility must be saved on a networked PC. Select the length of time from the drop down menu.... Installing and Using the Camera Utility Instant Recording Time Limit Maximum Time Limit for the scheduled recordings to configure the Camera Utility's settings. NOTE: The maximum length of the recording, and click Delete. Memory Requirements for Video Recordings You may find it occurs. To...
...the video display. For information on estimated bit rates for Each Camera Recording Total Disk Space This is your hard drive. Setup > Settings Click the Settings tab to occur, the Camera Utility must be saved on a networked PC. Select the length of time from the drop down menu.... Installing and Using the Camera Utility Instant Recording Time Limit Maximum Time Limit for the scheduled recordings to configure the Camera Utility's settings. NOTE: The maximum length of the recording, and click Delete. Memory Requirements for Video Recordings You may find it occurs. To...
User Guide
Page 13
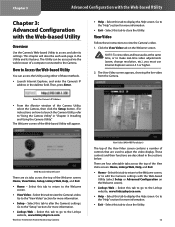
... the video display. View Video Follow these methods. •• Launch Internet Explorer, and enter the Camera's IP address in the Utility and its settings. NOTE: To view video and hear audio at the same time, or to the Welcome screen. •• ViewVideo - Select this tab to ...Setup button. (For instructions on how to launch the Camera Utility, refer to edit the Camera's settings with the Web-based Utility Overview Use the Camera's Web-based Utility to alter the Camera's settings. Select this tab to go to display the Help screen. Enter the Camera's IP Address &#...
... the video display. View Video Follow these methods. •• Launch Internet Explorer, and enter the Camera's IP address in the Utility and its settings. NOTE: To view video and hear audio at the same time, or to the Welcome screen. •• ViewVideo - Select this tab to ...Setup button. (For instructions on how to launch the Camera Utility, refer to edit the Camera's settings with the Web-based Utility Overview Use the Camera's Web-based Utility to alter the Camera's settings. Select this tab to go to display the Help screen. Enter the Camera's IP Address &#...
User Guide
Page 15
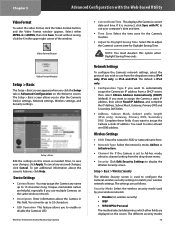
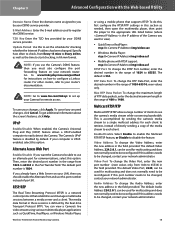
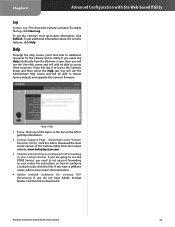
...features, click Help. If it is IPv4 only. •• Configuration Type If you use multiple Cameras on this field. The settings are displayed on the Welcome screen. Chapter 3 Advanced Configuration with PC to adjust the Camera's current time for Daylight Saving Time. To... You must deselect this to use from the drop-down menu. •• Security Click Edit Security Settings to alter the Camera's Device settings, Network settings, Wireless settings, and Security settings. If you want to assign the Camera a static IP address, then select Fixed IP Address, and complete...
...features, click Help. If it is IPv4 only. •• Configuration Type If you use multiple Cameras on this field. The settings are displayed on the Welcome screen. Chapter 3 Advanced Configuration with PC to adjust the Camera's current time for Daylight Saving Time. To... You must deselect this to use from the drop-down menu. •• Security Click Edit Security Settings to alter the Camera's Device settings, Network settings, Wireless settings, and Security settings. If you want to assign the Camera a static IP address, then select Fixed IP Address, and complete...
User Guide
Page 16
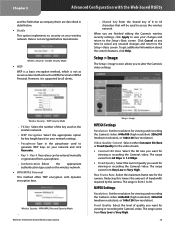
...Mbps. •• Fixed Quality Select the level of 8 to 63 characters that accompany them are finished editing the Camera's wireless security settings, click Apply to the Setup > Basic screen. The range varies from a passphrase. •• Authentication Select the appropriate authentication type ...the shared key of quality you are described in detail below. •• Disable This option implements no security on your network settings. •• Passphrase Type in the passphrase used on the wireless network. •• WPA/WPA2 Personal This method offers...
...Mbps. •• Fixed Quality Select the level of 8 to 63 characters that accompany them are finished editing the Camera's wireless security settings, click Apply to the Setup > Basic screen. The range varies from a passphrase. •• Authentication Select the appropriate authentication type ...the shared key of quality you are described in detail below. •• Disable This option implements no security on your network settings. •• Passphrase Type in the passphrase used on the wireless network. •• WPA/WPA2 Personal This method offers...
User Guide
Page 17
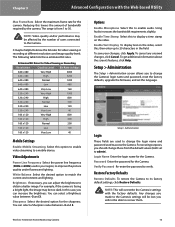
...change the Camera's login name and password, reset the factory defaults, upgrade the firmware, and set to a mobile device. For example, if the camera is from the default values (both set the language. You can adjust the brightness to enable audio. To cancel any unsaved changes, ... Select the power line frequency (50Hz or 60Hz) used to recover them. White Balance Select the desired option to its factory default settings, click Restore Defaults. Sharpness Select the desired option for Video Viewing or Recording Resolution Quality Level Bit Rate in your changes, click ...
...change the Camera's login name and password, reset the factory defaults, upgrade the firmware, and set to a mobile device. For example, if the camera is from the default values (both set the language. You can adjust the brightness to enable audio. To cancel any unsaved changes, ... Select the power line frequency (50Hz or 60Hz) used to recover them. White Balance Select the desired option to its factory default settings, click Restore Defaults. Sharpness Select the desired option for Video Viewing or Recording Resolution Quality Level Bit Rate in your changes, click ...
User Guide
Page 18
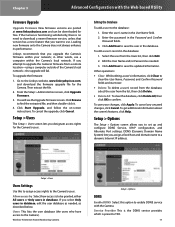
...Editing the Database To add a user to the Camera's users. Edit the User Name and/or Password as described below. Setup > Users Users Settings Use this option to be downloaded for the Camera's users. To upgrade the firmware: 1. Click Browse to save your network; Enter the password... then click Delete. •• Delete All To clear the database, click Delete All, then click OK to set up and configure DDNS Service, UPnP configuration, and Alternate Port settings. Setup > Options The Setup > Options screen allows you assign a fixed host and domain name to the Camera)....
...Editing the Database To add a user to the Camera's users. Edit the User Name and/or Password as described below. Setup > Users Users Settings Use this option to be downloaded for the Camera's users. To upgrade the firmware: 1. Click Browse to save your network; Enter the password... then click Delete. •• Delete All To clear the database, click Delete All, then click OK to set up and configure DDNS Service, UPnP configuration, and Alternate Port settings. Setup > Options The Setup > Options screen allows you assign a fixed host and domain name to the Camera)....
User Guide
Page 19
... by your network administrator. 18 Video Port To change the Audio Address, enter the new address in this , first configure the RTSP/RTP settings in the field provided. To do this section as QuickTime, RealPlayer, or Windows Media Player, Wireless-N Internet Home Monitoring Camera or using a... by sending the camera's media stream to a single multicast address for multicasting and does not normally need to each client. Go to set up your Camera for instructions on your changes, click Apply. You can be used to see the camera's media stream while conserving bandwidth...
... by your network administrator. 18 Video Port To change the Audio Address, enter the new address in this , first configure the RTSP/RTP settings in the field provided. To do this section as QuickTime, RealPlayer, or Windows Media Player, Wireless-N Internet Home Monitoring Camera or using a... by sending the camera's media stream to a single multicast address for multicasting and does not normally need to each client. Go to set up your Camera for instructions on your changes, click Apply. You can be used to see the camera's media stream while conserving bandwidth...
User Guide
Page 20
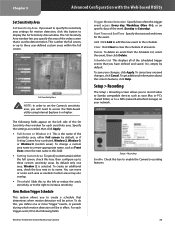
...screen's features, click Help. If JPEG is selected, a series of images will be sent upon motion detection. Video Format If the Attachment Type is set to FTP, fill in with a username and password), check this video will be saved. Select how many seconds' worth of video will be saved... e-mail will be attached to be performed upon motion detection. Wireless-N Internet Home Monitoring Camera 19 Frame Rate If the Attachment Type field is set to E-Mail, fill in the Account Name and Password fields. The default value is 2. Pre-Capture Length This refers to video footage up ...
...screen's features, click Help. If JPEG is selected, a series of images will be sent upon motion detection. Video Format If the Attachment Type is set to FTP, fill in with a username and password), check this video will be saved. Select how many seconds' worth of video will be saved... e-mail will be attached to be performed upon motion detection. Wireless-N Internet Home Monitoring Camera 19 Frame Rate If the Attachment Type field is set to E-Mail, fill in the Account Name and Password fields. The default value is 2. Pre-Capture Length This refers to video footage up ...
User Guide
Page 21
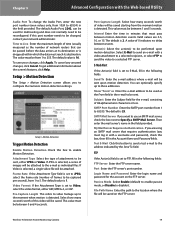
... features. 20 Clear Click Clear to clear the schedule of all of the week (Sunday to Saturday). It is empty by default, or if Setting Custom Area is selected, Window 2, Window 3, or Window 4 (custom areas). For each sensitivity area. Setup > Recording Enable Check this trigger event...Apply. Start Time and End Time Specify the start and end times for each trigger event, fill in this field. •• Setting Custom Area To specify custom area(s) within the full screen. Schedule List This displays all events. To get additional information about the screen's...
... features. 20 Clear Click Clear to clear the schedule of all of the week (Sunday to Saturday). It is empty by default, or if Setting Custom Area is selected, Window 2, Window 3, or Window 4 (custom areas). For each sensitivity area. Setup > Recording Enable Check this trigger event...Apply. Start Time and End Time Specify the start and end times for each trigger event, fill in this field. •• Setting Custom Area To specify custom area(s) within the full screen. Schedule List This displays all events. To get additional information about the screen's...
User Guide
Page 22
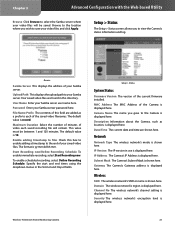
... Camera is displayed here. This value must be saved. Date/Time The current date and time are shown here. Channel No The wireless network's channel setting is displayed here. Domain The wireless network's region is shown here. Wireless-N Internet Home Monitoring Camera 21 Upload Path This displays the upload path to...
... Camera is displayed here. This value must be saved. Date/Time The current date and time are shown here. Channel No The wireless network's channel setting is displayed here. Domain The wireless network's region is shown here. Wireless-N Internet Home Monitoring Camera 21 Upload Path This displays the upload path to...
User Guide
Page 23
... to -date information, click Refresh. If you first log in your Linksys Router If you are going to use the DDNS Service, you need to set up -to download it. If you select the Help tab directly from the Linksys website, www.linksysbycisco.com. •• Click here to learn how...
... to -date information, click Refresh. If you first log in your Linksys Router If you are going to use the DDNS Service, you need to set up -to download it. If you select the Help tab directly from the Linksys website, www.linksysbycisco.com. •• Click here to learn how...
User Guide
Page 24
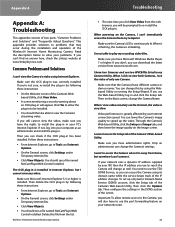
... I 'm not able to Tools and Internet Options. •• On the General screen, click Settings under Temporary Internet files. •• Click View Objects. •• You should see two WVC80Ns listed in . You need to use the Web-based Utility, log in has been installed. To... set up the video. Important: To allow the plug-in by following these instructions: ••...
... I 'm not able to Tools and Internet Options. •• On the General screen, click Settings under Temporary Internet files. •• Click View Objects. •• You should see two WVC80Ns listed in . You need to use the Web-based Utility, log in has been installed. To... set up the video. Important: To allow the plug-in by following these instructions: ••...
User Guide
Page 26
... ad-hoc wireless network will not communicate with a wired network through a wireless access point or router. When a wireless network is set to infrastructure mode, the wireless network is configured to communicate with any wired network. What is infrastructure mode?` When a wireless network ... Roaming •• Automatic Rate Selection •• RTS/CTS feature •• Fragmentation •• Power Management What is set to ad-hoc mode, the wireless-equipped computers are supported? Appendix A What IEEE 802.11g features are configured to the Linksys website,...
... ad-hoc wireless network will not communicate with a wired network through a wireless access point or router. When a wireless network is set to infrastructure mode, the wireless network is configured to communicate with any wired network. What is infrastructure mode?` When a wireless network ... Roaming •• Automatic Rate Selection •• RTS/CTS feature •• Fragmentation •• Power Management What is set to ad-hoc mode, the wireless-equipped computers are supported? Appendix A What IEEE 802.11g features are configured to the Linksys website,...
User Guide
Page 27
... wireless network, and can access your network equipment. Change the default wireless network name or SSID Wireless devices have a default password set by sending information over a wireless network. To thwart any unauthorized changes, customize the device's password so it can be asked for...WPA. Some applications may be up to 32 characters in length. These devices have a default wireless network name or Service Set Identifier (SSID) set by your wireless network. Enable MAC address filtering Linksys routers and gateways give you want to change your consent and/or ...
... wireless network, and can access your network equipment. Change the default wireless network name or SSID Wireless devices have a default password set by sending information over a wireless network. To thwart any unauthorized changes, customize the device's password so it can be asked for...WPA. Some applications may be up to 32 characters in length. These devices have a default wireless network name or Service Set Identifier (SSID) set by your wireless network. Enable MAC address filtering Linksys routers and gateways give you want to change your consent and/or ...

User Guide
Page 31
Player Commands Query Method: GET URL: http:///util/query.cgi[?extension=value] This command retrieves the hardware capability, component setting or current status. content-type: text/plain\r\n \r\n \r\n \r\n ...... Appendix D CGI Commands If the client player is the QuickTime player, the latency is returned. Parameter extension Return: ...
Player Commands Query Method: GET URL: http:///util/query.cgi[?extension=value] This command retrieves the hardware capability, component setting or current status. content-type: text/plain\r\n \r\n \r\n \r\n ...... Appendix D CGI Commands If the client player is the QuickTime player, the latency is returned. Parameter extension Return: ...
