Getting Started Guide
Page 13
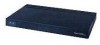
.... Mounting the Controller on a Wall (Rack-Mount Brackets) The controller can order a kit with 19-inch rack mounting brackets and hardware from Cisco. Statement 378 To mount the controller on a wall using rack-mount brackets, follow the correct procedures could result in a hazardous situation to people... and damage to the Network For configuration instructions about using the CLI setup program, see the "Running the Bootup Script and Power-On Self Test" section on a wall using an optional rack-mount bracket kit...
.... Mounting the Controller on a Wall (Rack-Mount Brackets) The controller can order a kit with 19-inch rack mounting brackets and hardware from Cisco. Statement 378 To mount the controller on a wall using rack-mount brackets, follow the correct procedures could result in a hazardous situation to people... and damage to the Network For configuration instructions about using the CLI setup program, see the "Running the Bootup Script and Power-On Self Test" section on a wall using an optional rack-mount bracket kit...
Getting Started Guide
Page 15
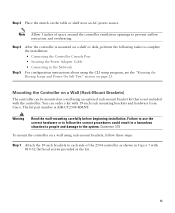
Mounting the Controller on a Wall (Mounting Screws) When mounting the 2504 controller on a wall using the CLI setup program, see the "Running the Bootup Script and Power-On Self Test" section on the wall, perform the following tasks to complete the installation: • ...
Mounting the Controller on a Wall (Mounting Screws) When mounting the 2504 controller on a wall using the CLI setup program, see the "Running the Bootup Script and Power-On Self Test" section on the wall, perform the following tasks to complete the installation: • ...
Getting Started Guide
Page 18
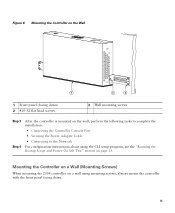
... system remains stable. Warning To prevent bodily injury when mounting or servicing this unit in the rack. Step 6 For configuration instructions about using the CLI setup program, see the "Running the Bootup Script and Power-On Self Test" section on page 23. The following guidelines are provided to ensure your safety...
... system remains stable. Warning To prevent bodily injury when mounting or servicing this unit in the rack. Step 6 For configuration instructions about using the CLI setup program, see the "Running the Bootup Script and Power-On Self Test" section on page 23. The following guidelines are provided to ensure your safety...
Getting Started Guide
Page 20
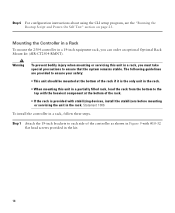
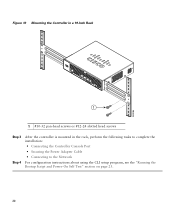
Figure 10 Mounting the Controller in a 19-Inch Rack 1 282086 1 #10-32 pan-head screws or #12-24 slotted head screws Step 3 Step 4 After the controller is mounted in the rack, perform the following tasks to complete the installation: • Connecting the Controller Console Port • Securing the Power Adapter Cable • Connecting to the Network For configuration instructions about using the CLI setup program, see the "Running the Bootup Script and Power-On Self Test" section on page 23. 20
Figure 10 Mounting the Controller in a 19-Inch Rack 1 282086 1 #10-32 pan-head screws or #12-24 slotted head screws Step 3 Step 4 After the controller is mounted in the rack, perform the following tasks to complete the installation: • Connecting the Controller Console Port • Securing the Power Adapter Cable • Connecting to the Network For configuration instructions about using the CLI setup program, see the "Running the Bootup Script and Power-On Self Test" section on page 23. 20


