
User Guide
Page 14
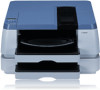
... panel Provides Power button, Online button, Ink Replace button, LCD display, and other important buttons used to replace ink tanks. Raise this cover for manual feeding. (ÆP.2-19) 1-2 Before Using the Printer This cover is normally locked. For details, see Chapter 5 "Using the Operation Panel Buttons". ...replace ink tanks, press the Ink Replace button on the operation panel.(ÆP.6-4) e Manual feed lever Releases the paper feed roller to allow manual paper feed. To unlock this lever to feed paper manually for printing or to remove jammed paper. (ÆP.2-18, P.7-20) f Slide ...
... panel Provides Power button, Online button, Ink Replace button, LCD display, and other important buttons used to replace ink tanks. Raise this cover for manual feeding. (ÆP.2-19) 1-2 Before Using the Printer This cover is normally locked. For details, see Chapter 5 "Using the Operation Panel Buttons". ...replace ink tanks, press the Ink Replace button on the operation panel.(ÆP.6-4) e Manual feed lever Releases the paper feed roller to allow manual paper feed. To unlock this lever to feed paper manually for printing or to remove jammed paper. (ÆP.2-18, P.7-20) f Slide ...

User Guide
Page 15
... hold a variety paper sizes and types: plain paper, coated paper, transparencies (OHP film), etc. (ÆP.2-8) k Lift handles Grasp these handles provided on the printer for manual feed printing. The printer is provided with the printer is a universal type cassette that can hold printed large size media ejected onto the tray. i Cassette...
... hold a variety paper sizes and types: plain paper, coated paper, transparencies (OHP film), etc. (ÆP.2-8) k Lift handles Grasp these handles provided on the printer for manual feed printing. The printer is provided with the printer is a universal type cassette that can hold printed large size media ejected onto the tray. i Cassette...

User Guide
Page 27
....9 x 279.4 mm 8.50 x 11.00 in 184.2 x266.7 mm 7.25 x 10.50 in . No Yes Yes Yes Yes*1 Yes No Yes Yes Yes*1 No No W2200 Cassette 2 (Option) 13x22 in Cassette (Option) No Yes Yes No Yes No Yes No Yes*1 No Yes No No No Yes No Yes No Yes... loaded vertically for loading: 100 ~ 329 mm (Width) x 148 ~ 483 mm (Length) 3.9 x 13 in. (Width) ~ 5.8 x 19 in. (Length) Note z Skew may occur when feeding paper manually from the paper cassette and print. Print Media That Can Be Used 2-5 Size range of the paper from the tray.
....9 x 279.4 mm 8.50 x 11.00 in 184.2 x266.7 mm 7.25 x 10.50 in . No Yes Yes Yes Yes*1 Yes No Yes Yes Yes*1 No No W2200 Cassette 2 (Option) 13x22 in Cassette (Option) No Yes Yes No Yes No Yes No Yes*1 No Yes No No No Yes No Yes No Yes... loaded vertically for loading: 100 ~ 329 mm (Width) x 148 ~ 483 mm (Length) 3.9 x 13 in. (Width) ~ 5.8 x 19 in. (Length) Note z Skew may occur when feeding paper manually from the paper cassette and print. Print Media That Can Be Used 2-5 Size range of the paper from the tray.

User Guide
Page 39
... • Set the media in the tray. • Press the Online button. • After printing, remove all of media may occur when feeding paper manually from the tray. • Press the Online button. Important z Store unused paper and other media in the tray, paper will feed from Cassette 1. As ... standby mode, and waits for Media Source. Note z Some types of the paper from the paper cassette and print. 1 From the computer, select Manual for you load the media in its original package. If this occurs, remove all remaining sheets from the tray. Load Media A4 Note z If you...
... • Set the media in the tray. • Press the Online button. • After printing, remove all of media may occur when feeding paper manually from the tray. • Press the Online button. Important z Store unused paper and other media in the tray, paper will feed from Cassette 1. As ... standby mode, and waits for Media Source. Note z Some types of the paper from the paper cassette and print. 1 From the computer, select Manual for you load the media in its original package. If this occurs, remove all remaining sheets from the tray. Load Media A4 Note z If you...

User Guide
Page 40
2 Remove the front upper cover. 3 While raising the manual feed lever, pull Cassette 1 to the marked position. If the stack is below the load limit mark (b). Align the mark (a) of the cassette cover with the position of the printer front. a Important z If there is paper in the cassette, make sure that the paper is higher than this mark, remove some paper. b 2-18 Print Media You Can Use
2 Remove the front upper cover. 3 While raising the manual feed lever, pull Cassette 1 to the marked position. If the stack is below the load limit mark (b). Align the mark (a) of the cassette cover with the position of the printer front. a Important z If there is paper in the cassette, make sure that the paper is higher than this mark, remove some paper. b 2-18 Print Media You Can Use

User Guide
Page 42
a 2-20 Print Media You Can Use z To prevent the ejected media falling from the tray, use the output tray extension. 6 Move the slide lever until it lightly touches the media. 7 While raising the manual feed lever, push Cassette 1 completely into the printer.
a 2-20 Print Media You Can Use z To prevent the ejected media falling from the tray, use the output tray extension. 6 Move the slide lever until it lightly touches the media. 7 While raising the manual feed lever, push Cassette 1 completely into the printer.

User Guide
Page 48
Note The Help window opens. z For more details about how to use the Help window, please refer to explain the functions and items of the printer driver. Opening Online Help 1 In the Printer Properties window, click the Help button. Viewing Online Help Online Help is available to your operating system manual. 3-4 Printing from Windows
Note The Help window opens. z For more details about how to use the Help window, please refer to explain the functions and items of the printer driver. Opening Online Help 1 In the Printer Properties window, click the Help button. Viewing Online Help Online Help is available to your operating system manual. 3-4 Printing from Windows

User Guide
Page 61
..., please refer to view the Help at any time without mounting the User Software CD-ROM. This will allow you to the Adobe Acrobat Reader manual. Viewing Help 4-13 Note z Adobe Acrobat Reader is available on the software CD-ROM in the OS 89 folder. Opening Help 1 Mount the User Software...
..., please refer to view the Help at any time without mounting the User Software CD-ROM. This will allow you to the Adobe Acrobat Reader manual. Viewing Help 4-13 Note z Adobe Acrobat Reader is available on the software CD-ROM in the OS 89 folder. Opening Help 1 Mount the User Software...

User Guide
Page 75
... above for a USB connection. A panel reset does not affect the "Ext. If the printed image of the media. Frame Type: Disable, Ethernet II IP Mode: Manual*, Automatic Protocol DHCP: On*, Off BOOTP: On*, Off RARP: On*, Off IP Setting IP Address Subnet Mask Default G/W Executes the initial settings for each TCP...
... above for a USB connection. A panel reset does not affect the "Ext. If the printed image of the media. Frame Type: Disable, Ethernet II IP Mode: Manual*, Automatic Protocol DHCP: On*, Off BOOTP: On*, Off RARP: On*, Off IP Setting IP Address Subnet Mask Default G/W Executes the initial settings for each TCP...

User Guide
Page 109
.... (ÆPrinter driver Help) Print Job Results Abnormal 7-11 Problem 2: Another printer driver was selected for printing not supported. For details, see your software application manual. Solution: Select the correct printer driver for the printer and try again. (ÆSetup Guide) Problem 3: The computer cannot communicate with "Position Adjust". (ÆP.7-31...
.... (ÆPrinter driver Help) Print Job Results Abnormal 7-11 Problem 2: Another printer driver was selected for printing not supported. For details, see your software application manual. Solution: Select the correct printer driver for the printer and try again. (ÆSetup Guide) Problem 3: The computer cannot communicate with "Position Adjust". (ÆP.7-31...

User Guide
Page 110
... 1: Monochrome printing is not performing color adjustment. Problem 1: The printer driver is selected in the software application is printing. For details, see your software application manuals. Problem 3: The printer does not supply the printhead with the ink properly. Colors Wrong Only one color is not set correctly. Solution: Perform monitor color...
... 1: Monochrome printing is not performing color adjustment. Problem 1: The printer driver is selected in the software application is printing. For details, see your software application manuals. Problem 3: The printer does not supply the printhead with the ink properly. Colors Wrong Only one color is not set correctly. Solution: Perform monitor color...

User Guide
Page 112
Problem 1: Never remove an ink tank with the printer switched off. Solution: Follow the procedure below to remove the right cover manually and remove the ink tank. 1 Insert and slide the thin pin into the gap between the right cover and printer, just before the lock release lever (a) visible in the gap, then slide the pin toward the back upper cover. Do not remove the ink tank. a The right cover unlocks. 2 Open the right cover. 7-14 Troubleshooting Insert a thin pin into the groove of the right cover.
Problem 1: Never remove an ink tank with the printer switched off. Solution: Follow the procedure below to remove the right cover manually and remove the ink tank. 1 Insert and slide the thin pin into the gap between the right cover and printer, just before the lock release lever (a) visible in the gap, then slide the pin toward the back upper cover. Do not remove the ink tank. a The right cover unlocks. 2 Open the right cover. 7-14 Troubleshooting Insert a thin pin into the groove of the right cover.

User Guide
Page 117
... the jammed media and press the Online button. (ÆP.7-20) Load Media Problem 1: The printer is waiting for removal of the printer driver. No Media:Manual Problem 1: Paper could not feed from the tray and press the Online button. (ÆP.2-17) Error Messages 7-19 Solution: Load the media in the tray...
... the jammed media and press the Online button. (ÆP.7-20) Load Media Problem 1: The printer is waiting for removal of the printer driver. No Media:Manual Problem 1: Paper could not feed from the tray and press the Online button. (ÆP.2-17) Error Messages 7-19 Solution: Load the media in the tray...

User Guide
Page 118
Removing Paper Jams When a paper jam occurs, the "Media Jam" message is displayed on the operation panel and the print job stops. Follow the procedure below to remove all the paper cassettes. 2 Remove the front upper cover. 7-20 Troubleshooting If you are using Cassette 2, be sure to check each part for paper jams and remove the jammed sheets. 1 While raising the manual feed lever, remove the paper cassettes.
Removing Paper Jams When a paper jam occurs, the "Media Jam" message is displayed on the operation panel and the print job stops. Follow the procedure below to remove all the paper cassettes. 2 Remove the front upper cover. 7-20 Troubleshooting If you are using Cassette 2, be sure to check each part for paper jams and remove the jammed sheets. 1 While raising the manual feed lever, remove the paper cassettes.

User Guide
Page 152
... 6-3 how to replace ...6-4 when to replace 6-2 jams ...7-20 lamps ...5-6 length guide ...2-9 lift handles ...1-3, 1-6 load limit mark ...2-10 LPR Port ...8-7 Mac OS 8.6/9.x 4-2, 4-7 Mac OS X ...4-4, 4-9 Macintosh ...4-2 manual feed ...2-17 manual feed lever 1-2, 2-18, 7-20 Matte Photo Paper ...2-3 media (see "print media") media set menu 5-7, 5-9, 5-15 Message lamp ...5-6 messages ...7-16 NetBIOS/NetBEUI Port Monitor 8-8 network...
... 6-3 how to replace ...6-4 when to replace 6-2 jams ...7-20 lamps ...5-6 length guide ...2-9 lift handles ...1-3, 1-6 load limit mark ...2-10 LPR Port ...8-7 Mac OS 8.6/9.x 4-2, 4-7 Mac OS X ...4-4, 4-9 Macintosh ...4-2 manual feed ...2-17 manual feed lever 1-2, 2-18, 7-20 Matte Photo Paper ...2-3 media (see "print media") media set menu 5-7, 5-9, 5-15 Message lamp ...5-6 messages ...7-16 NetBIOS/NetBEUI Port Monitor 8-8 network...

Setup Guide
Page 5
...unless otherwise specified in a particular installation. Do not make any interference received, including interference that interference will not occur in the manual. One Canon Plaza, Lake Success, NY 11042, U.S.A. However, there is no guarantee that may not cause harmful interference, and (2) this...to which can radiate radio frequency energy and, if not installed and used in accordance with Class B limits in a residential installation. Canon U.S.A. Tel No. 516-328-5600 iii Operation is subject to the following measures: • Reorient or relocate the receiving antenna. ...
...unless otherwise specified in a particular installation. Do not make any interference received, including interference that interference will not occur in the manual. One Canon Plaza, Lake Success, NY 11042, U.S.A. However, there is no guarantee that may not cause harmful interference, and (2) this...to which can radiate radio frequency energy and, if not installed and used in accordance with Class B limits in a residential installation. Canon U.S.A. Tel No. 516-328-5600 iii Operation is subject to the following measures: • Reorient or relocate the receiving antenna. ...

Setup Guide
Page 15
... Power cord Printhead Ink tanks (Bk,PC,C,PM,M,Y) User Software CD-ROM Paper Feed Support Graphic Color Printer Setup Guide User's Guide Network Guide User Manuals CD-ROM LF adjust paper Note z In addition to the items above, a Warranty and Support & Service Agreement, and other items of information are provided with... below to make sure that all the guides-Setup Guide, User's Guide, and Network Guide-are provided in different languages in PDF format on the Manual CD-ROM. Please remember that you purchased the printer.
... Power cord Printhead Ink tanks (Bk,PC,C,PM,M,Y) User Software CD-ROM Paper Feed Support Graphic Color Printer Setup Guide User's Guide Network Guide User Manuals CD-ROM LF adjust paper Note z In addition to the items above, a Warranty and Support & Service Agreement, and other items of information are provided with... below to make sure that all the guides-Setup Guide, User's Guide, and Network Guide-are provided in different languages in PDF format on the Manual CD-ROM. Please remember that you purchased the printer.

Setup Guide
Page 65
... press . Set TCP/IP IP Mode → 9 Press or to select "Frame Type" then press . IP Mode Manual → Note z If the IP address is acquired from Step 23. Ext. In this case, you do not need to perform the settings in Step ...
... press . Set TCP/IP IP Mode → 9 Press or to select "Frame Type" then press . IP Mode Manual → Note z If the IP address is acquired from Step 23. Ext. In this case, you do not need to perform the settings in Step ...

Setup Guide
Page 77
.../Delete Printers for Driver Installation screen, click the Cancel button to close the screen, then click the Back button to return to install the port manually. 1. Important z If the printer to 10 of the printers that the printer is switched on the network. 8 Click the Add/Delete button. Follow Step 5 to...
.../Delete Printers for Driver Installation screen, click the Cancel button to close the screen, then click the Back button to return to install the port manually. 1. Important z If the printer to 10 of the printers that the printer is switched on the network. 8 Click the Add/Delete button. Follow Step 5 to...

Setup Guide
Page 85
Clicking this checkbox on for "After printer installation, install GARO Status Monitor", the installation will continue with the installation of the end user license agreement, then select "I accept the terms in the license agreement" then click the Next button. 5 Select "Manually Set Port to install the GARO Status Monitor is recommended. (Æ P.3-47) Installing a Windows USB or IEEE1394 Connection 3-17 If you click the checkbox on to Install", then click the Next button. 4 Read the terms of the GARO Status Monitor.
Clicking this checkbox on for "After printer installation, install GARO Status Monitor", the installation will continue with the installation of the end user license agreement, then select "I accept the terms in the license agreement" then click the Next button. 5 Select "Manually Set Port to install the GARO Status Monitor is recommended. (Æ P.3-47) Installing a Windows USB or IEEE1394 Connection 3-17 If you click the checkbox on to Install", then click the Next button. 4 Read the terms of the GARO Status Monitor.


