User Manual
Page 27
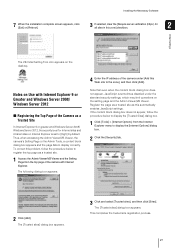
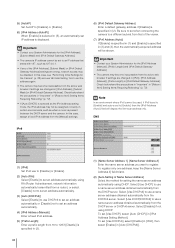
... dialog box does not appear, JavaScript is set to [High] by default. This completes the trusted site registration process. 27 Register the page as a trusted site as... Click [Add]. Notes on Use with Internet Explorer. The following dialog box appears. 4 Enter the IP address of the Camera as a Trusted Site In Internet Explorer 9 or greater and Windows Server 2008...Server 2012, the security level for all sites in this zone] checkbox. 2 Initial Settings The VB Initial Setting Tool icon appears on the desktop. Installing the Necessary Software 7 When the installation complete...
... dialog box does not appear, JavaScript is set to [High] by default. This completes the trusted site registration process. 27 Register the page as a trusted site as... Click [Add]. Notes on Use with Internet Explorer. The following dialog box appears. 4 Enter the IP address of the Camera as a Trusted Site In Internet Explorer 9 or greater and Windows Server 2008...Server 2012, the security level for all sites in this zone] checkbox. 2 Initial Settings The VB Initial Setting Tool icon appears on the desktop. Installing the Necessary Software 7 When the installation complete...
User Manual
Page 28
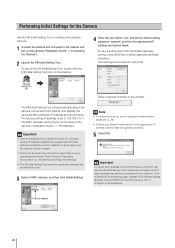
...-click the [VB Initial Setting Tool] icon on the setting page, change the administrator password (p. 32). • Contact your operating environment. The factory setting IP address is set IPv6, first use a setting other than the default gateway setting, clear the [Enter a default gateway address] ...off and on the camera ("Installation Guide" > "Connecting the Camera"). 2 Launch the VB Initial Setting Tool. Then, in [Network] on the desktop. 4 Enter the user name "root" and factory default setting password "camera", and then the appropriate IP address and subnet mask.
...-click the [VB Initial Setting Tool] icon on the setting page, change the administrator password (p. 32). • Contact your operating environment. The factory setting IP address is set IPv6, first use a setting other than the default gateway setting, clear the [Enter a default gateway address] ...off and on the camera ("Installation Guide" > "Connecting the Camera"). 2 Launch the VB Initial Setting Tool. Then, in [Network] on the desktop. 4 Enter the user name "root" and factory default setting password "camera", and then the appropriate IP address and subnet mask.
User Manual
Page 32
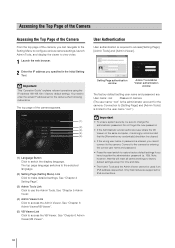
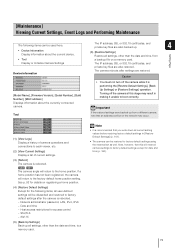
... set for the camera. See "Chapter 6 Admin Viewer/VB Viewer". Important This "Operation Guide" explains relevant operations using the IP address 192.168.100.1 (factory default setting). The top page of the camera, you can navigate to the Setting Menu to configure various camera ...the viewer to view video. 1 Launch the web browser. 2 Enter the IP address you have forgotten the administrator password (p. 159). Setting Page authentication window Admin Tools/Admin Viewer authentication window The factory default setting user name and password are supported for time and date. •...
... set for the camera. See "Chapter 6 Admin Viewer/VB Viewer". Important This "Operation Guide" explains relevant operations using the IP address 192.168.100.1 (factory default setting). The top page of the camera, you can navigate to the Setting Menu to configure various camera ...the viewer to view video. 1 Launch the web browser. 2 Enter the IP address you have forgotten the administrator password (p. 159). Setting Page authentication window Admin Tools/Admin Viewer authentication window The factory default setting user name and password are supported for time and date. •...

User Manual
Page 37
... characters (space or printable characters) can be entered in [IPv4 Address],[Subnet Mask] and [IPv4 Default Gateway Address]. (2) [IPv4 Address] If [Manual] is specified in (1), enter a fixed IP address. (3) [Subnet Mask] If [Manual] is specified in (1), enter the designated subnet mask ...values for each network. (4) [IPv4 Default Gateway Address] Enter an appropriate value if [Manual] is specified in (1). IPv4 (1)...
... characters (space or printable characters) can be entered in [IPv4 Address],[Subnet Mask] and [IPv4 Default Gateway Address]. (2) [IPv4 Address] If [Manual] is specified in (1), enter a fixed IP address. (3) [Subnet Mask] If [Manual] is specified in (1), enter the designated subnet mask ...values for each network. (4) [IPv4 Default Gateway Address] Enter an appropriate value if [Manual] is specified in (1). IPv4 (1)...
User Manual
Page 38
... Address] Enter a default gateway address if [Disable] is specified in "[Reboot Item] Setting Items Requiring Rebooting" (p. 72). Select [Disable] if not using DHCP. Important • Contact your System Administrator for the Camera" (p. 28) and use VB Initial Setting Tool to set ..."Performing Initial Settings for the [IPv4 Address], [Subnet Mask] and [IPv4 Default Gateway Address]. • The camera's IP address cannot be set to an IP address that of the [IPv4 Address], [Subnet Mask] or [IPv4 Default Gateway Address] settings are changed in (2). (1) [Name Server Address 1], [...
... Address] Enter a default gateway address if [Disable] is specified in "[Reboot Item] Setting Items Requiring Rebooting" (p. 72). Select [Disable] if not using DHCP. Important • Contact your System Administrator for the Camera" (p. 28) and use VB Initial Setting Tool to set ..."Performing Initial Settings for the [IPv4 Address], [Subnet Mask] and [IPv4 Default Gateway Address]. • The camera's IP address cannot be set to an IP address that of the [IPv4 Address], [Subnet Mask] or [IPv4 Default Gateway Address] settings are changed in (2). (1) [Name Server Address 1], [...

User Manual
Page 39
... Select [Use DHCPv6] or [Use DHCP/DHCPv6] in the this camera. [Network] Setting Administrator Password, LAN, IP Address, DNS, etc (3) [Name Server Address (DHCP)] Select [Use DHCP] or [Use DHCP/DHCPv6] in...address 2 must be set in length. (4) [Administration Function Name] Set the camera name used by default: Select [Enable] to display the Set a community name for the You can be accessed. Camera ...specified in [Auto-Setting of Name Server Address] to register the entered name server VB-S30D address and host name of the domain names. • Supports SNMP protocol versions v1...
... Select [Use DHCPv6] or [Use DHCP/DHCPv6] in the this camera. [Network] Setting Administrator Password, LAN, IP Address, DNS, etc (3) [Name Server Address (DHCP)] Select [Use DHCP] or [Use DHCP/DHCPv6] in...address 2 must be set in length. (4) [Administration Function Name] Set the camera name used by default: Select [Enable] to display the Set a community name for the You can be accessed. Camera ...specified in [Auto-Setting of Name Server Address] to register the entered name server VB-S30D address and host name of the domain names. • Supports SNMP protocol versions v1...
User Manual
Page 52
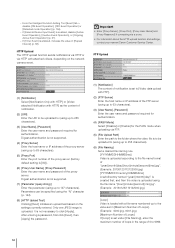
... [Video attached Notification with FTP]. (2) [FTP Server] Enter the host name or IP address of the FTP server (using up to 63 characters). (5) [Proxy Port] Enter the port number of the proxy server (factory default setting is [80]). (6) [Proxy User Name], [Proxy Password] Enter the user ...via a proxy. • For information about the HTTP upload function and settings, contact your nearest Canon Customer Service Center. Digest authentication is not supported. (4) [Proxy Server] Enter the host name or IP address of notification. (2) [URI] Enter the URI to be specified using up to [Video ...
... [Video attached Notification with FTP]. (2) [FTP Server] Enter the host name or IP address of the FTP server (using up to 63 characters). (5) [Proxy Port] Enter the port number of the proxy server (factory default setting is [80]). (6) [Proxy User Name], [Proxy Password] Enter the user ...via a proxy. • For information about the HTTP upload function and settings, contact your nearest Canon Customer Service Center. Digest authentication is not supported. (4) [Proxy Server] Enter the host name or IP address of notification. (2) [URI] Enter the URI to be specified using up to [Video ...
User Manual
Page 53
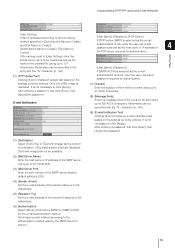
...is selected as the e-mail authentication mode, enter the user name and password as well as the content of the SMTP server (factory default setting is not necessary to click [Apply]. Set an appropriate method according to the authentication method used by the SMTP server to send to.... (8) [Message Body] E-mail Notification Enter the message (text) of the e-mail to be available. (2) [Mail Server Name] Enter the host name or IP address of the SMTP server (using up to 63 characters). (3) [Mail Server Port] Enter the port number of notification. [Upload] Setting HTTP/FTP Upload and...
...is selected as the e-mail authentication mode, enter the user name and password as well as the content of the SMTP server (factory default setting is not necessary to click [Apply]. Set an appropriate method according to the authentication method used by the SMTP server to send to.... (8) [Message Body] E-mail Notification Enter the message (text) of the e-mail to be available. (2) [Mail Server Name] Enter the host name or IP address of the SMTP server (using up to 63 characters). (3) [Mail Server Port] Enter the port number of notification. [Upload] Setting HTTP/FTP Upload and...
User Manual
Page 62
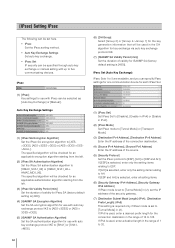
...an applicable encryption algorithm starting from the left . (3) [IPsec SA Validity Period (min)] Set the duration of validity for IPsec SA (factory default setting is [480]). (4) [ISAKMP SA Encryption Algorithm] Set the SA encryption algorithm for use with auto key exchange protocol IKE to [AES... all setting items. (6) [Security Gateway IPv4 Address], [Security Gateway IPv6 Address] If IPsec mode is set to [Tunnel Mode] in (2), set the IP address of the security gateway. (7) [Destination Subnet Mask Length] (IPv4), [Destination Prefix Length] (IPv6) This setting is required only if IPsec mode ...
...an applicable encryption algorithm starting from the left . (3) [IPsec SA Validity Period (min)] Set the duration of validity for IPsec SA (factory default setting is [480]). (4) [ISAKMP SA Encryption Algorithm] Set the SA encryption algorithm for use with auto key exchange protocol IKE to [AES... all setting items. (6) [Security Gateway IPv4 Address], [Security Gateway IPv6 Address] If IPsec mode is set to [Tunnel Mode] in (2), set the IP address of the security gateway. (7) [Destination Subnet Mask Length] (IPv4), [Destination Prefix Length] (IPv6) This setting is required only if IPsec mode ...
User Manual
Page 73
.... See p. 92 for details on the network may result in [Restore Default Settings] (p. 161). • The camera can be discarded and restored to factory default settings after settings are also restored. Host access restrictions for date and time (p. 160). 73 The IP address, SSL or 802.1X certificates, and private key files are...
.... See p. 92 for details on the network may result in [Restore Default Settings] (p. 161). • The camera can be discarded and restored to factory default settings after settings are also restored. Host access restrictions for date and time (p. 160). 73 The IP address, SSL or 802.1X certificates, and private key files are...
User Manual
Page 123
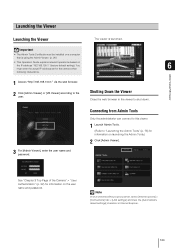
... (Refer to "Launching the Admin Tools" (p. 78) for information on the user name and password. Admin Viewer/VB Viewer 1 Access "http://192.168.100.1/" via the web browser. 2 Click [Admin Viewer] or [VB Viewer] according to shut down. 3 For [Admin Viewer], enter the user name and password. Shutting Down the ...Launching the Viewer Launching the Viewer The viewer is using the Admin Viewer. (p. 26) • This Operation Guide explains relevant operations based on the IP address "192.168.100.1" (factory default setting). Important • The Admin Tools Certificate must enter the actual...
... (Refer to "Launching the Admin Tools" (p. 78) for information on the user name and password. Admin Viewer/VB Viewer 1 Access "http://192.168.100.1/" via the web browser. 2 Click [Admin Viewer] or [VB Viewer] according to shut down. 3 For [Admin Viewer], enter the user name and password. Shutting Down the ...Launching the Viewer Launching the Viewer The viewer is using the Admin Viewer. (p. 26) • This Operation Guide explains relevant operations based on the IP address "192.168.100.1" (factory default setting). Important • The Admin Tools Certificate must enter the actual...

User Manual
Page 142
...:00:00 to a computer with the Recorded Video Utility, folders are created automatically in the setting page (p. 70). • Canon will equal the local time. 142 The following data is added to the camera's memory card. ("Chapter 4 Setting Page", "[Memory... FTP Software Settings Address: Camera IP address User ID: Administrator user ID Password: Administrator password (factory default setting: 192.168.100.1) (factory default setting: root) (factory default setting: camera) Important • When deleting a video using a camera with [Download to] (2) IP address of 192.168.100.1,...
...:00:00 to a computer with the Recorded Video Utility, folders are created automatically in the setting page (p. 70). • Canon will equal the local time. 142 The following data is added to the camera's memory card. ("Chapter 4 Setting Page", "[Memory... FTP Software Settings Address: Camera IP address User ID: Administrator user ID Password: Administrator password (factory default setting: 192.168.100.1) (factory default setting: root) (factory default setting: camera) Important • When deleting a video using a camera with [Download to] (2) IP address of 192.168.100.1,...
User Manual
Page 146
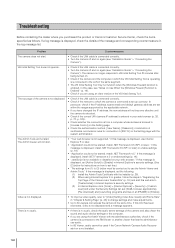
...or enable settings (p. 18). • "Application could not be used if the Canon Network Camera Audio Receiver add-on is not installed. 146 In particular, check if the IP address, subnet mask and default gateway address are using Internet Explorer 9 or greater, follow the steps in Internet ...Check if the LAN cable is not available or disabled on again (see "Installation Guide" > "Connecting the Camera"). Install .NET Framework 4.5." VB Initial Setting Tool does not operate. • Check if the LAN cable is enabled. In this message is not displayed. • To ...
...or enable settings (p. 18). • "Application could not be used if the Canon Network Camera Audio Receiver add-on is not installed. 146 In particular, check if the IP address, subnet mask and default gateway address are using Internet Explorer 9 or greater, follow the steps in Internet ...Check if the LAN cable is not available or disabled on again (see "Installation Guide" > "Connecting the Camera"). Install .NET Framework 4.5." VB Initial Setting Tool does not operate. • Check if the LAN cable is enabled. In this message is not displayed. • To ...
User Manual
Page 159
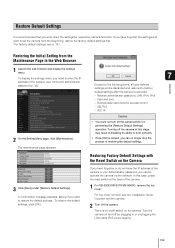
... off the camera at the back of the camera. 1 For VB-S30D/VB-S31D/VB-S800D, remove the top cover. Turning off the camera while it is clicked, you have forgotten the settings and want to factory default settings after the camera is no longer stop the process of the...Restoring the Initial Setting from the beginning, restore the factory default settings first. *For factory default settings, see the "Installation Guide" included with the Reset Switch on the camera. If you have forgotten or do not know the IP address of the camera or your Administrator password, you need ...
... off the camera at the back of the camera. 1 For VB-S30D/VB-S31D/VB-S800D, remove the top cover. Turning off the camera while it is clicked, you have forgotten the settings and want to factory default settings after the camera is no longer stop the process of the...Restoring the Initial Setting from the beginning, restore the factory default settings first. *For factory default settings, see the "Installation Guide" included with the Reset Switch on the camera. If you have forgotten or do not know the IP address of the camera or your Administrator password, you need ...
User Manual
Page 160
...switch using to connect to factory default settings including the camera's IP address, subnet mask, default gateway address, etc. 3 Turn on the power while pushing the reset switch, and keep pushing the reset switch for the Camera" (p. 28)). 4 For VB-S30D/VB-S31D/VB-S800D, attach the top cover.... Important If the reset switch is used (See "Performing Initial Settings for 5 seconds or more. When initializing the camera, use the "VB Initial Setting Tool" installed in your computer to factory default settings. The reset switch...
...switch using to connect to factory default settings including the camera's IP address, subnet mask, default gateway address, etc. 3 Turn on the power while pushing the reset switch, and keep pushing the reset switch for the Camera" (p. 28)). 4 For VB-S30D/VB-S31D/VB-S800D, attach the top cover.... Important If the reset switch is used (See "Performing Initial Settings for 5 seconds or more. When initializing the camera, use the "VB Initial Setting Tool" installed in your computer to factory default settings. The reset switch...
User Manual
Page 173
...Night Mode 137 Noise Reduction 43, 139 NTP Server 40 O One-shot AF 135 One-shot WB 136 On-screen Display 47 173 Index F Factory Default Settings 159, 161 Filter 111, 113 Focus 135 Focus Mode 43, 91 Format 69, 113 Frame Rate 47, 51 FTP 142 FTP Upload 52 ...Camera Settings 42 Initial Settings 28, 159 Input Volume 54 Installation Conditions 45 Installation Guide 5 Installing the Necessary Software 26 Intelligent Function Setting Tool 97 IP Address 28, 37 IPsec 62 IPsec Set 62, 63 IPv4 37 IPv4 Host Access Restrictions 60 IPv6 38 IPv6 Host Access Restrictions 61 J JPEG...
...Night Mode 137 Noise Reduction 43, 139 NTP Server 40 O One-shot AF 135 One-shot WB 136 On-screen Display 47 173 Index F Factory Default Settings 159, 161 Filter 111, 113 Focus 135 Focus Mode 43, 91 Format 69, 113 Frame Rate 47, 51 FTP 142 FTP Upload 52 ...Camera Settings 42 Initial Settings 28, 159 Input Volume 54 Installation Conditions 45 Installation Guide 5 Installing the Necessary Software 26 Intelligent Function Setting Tool 97 IP Address 28, 37 IPsec 62 IPsec Set 62, 63 IPv4 37 IPv4 Host Access Restrictions 60 IPv6 38 IPv6 Host Access Restrictions 61 J JPEG...


