
Owner's guide
Page 3
Setting Up 4 Before you keep your sales receipt and warranty card...wall 11 Adjusting Your Surround Sound Settings 12 For realistic home theater sound 12 How to set your Pro-Logic receiver 12 To use the cord properly 8 Make the connections 9 Check the connections 10 Mounting your Dolby Digital receiver ...13 If the sound is a trademark of Dolby Laboratories Licensing Corporation. 3 Italiano Nederlands Svenska English Dansk Deutsch Espanol Francais Where to set your speakers on the back of...
Setting Up 4 Before you keep your sales receipt and warranty card...wall 11 Adjusting Your Surround Sound Settings 12 For realistic home theater sound 12 How to set your Pro-Logic receiver 12 To use the cord properly 8 Make the connections 9 Check the connections 10 Mounting your Dolby Digital receiver ...13 If the sound is a trademark of Dolby Laboratories Licensing Corporation. 3 Italiano Nederlands Svenska English Dansk Deutsch Espanol Francais Where to set your speakers on the back of...

Owner's guide
Page 4
...English Setting Up Before you begin Thank you set up and use . Other speakers at the rear of this speaker directly on page 3 of your new home theater speakers for possible future use your room. Note: Now is a center speaker. Both the VCS-10® center speaker and the VCS-30...for video (A/V) surround sound receivers or amplifiers with video soundtracks. They are designed for use at the front of your authorized Bose dealer immediately. They will deliver clear, crisp soundtrack reproduction from the center channel. Write them on your warranty card and on , above,...
...English Setting Up Before you begin Thank you set up and use . Other speakers at the rear of this speaker directly on page 3 of your new home theater speakers for possible future use your room. Note: Now is a center speaker. Both the VCS-10® center speaker and the VCS-30...for video (A/V) surround sound receivers or amplifiers with video soundtracks. They are designed for use at the front of your authorized Bose dealer immediately. They will deliver clear, crisp soundtrack reproduction from the center channel. Write them on your warranty card and on , above,...

Owner's guide
Page 5
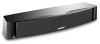
The VCS-30® Series II system carton contents Left surround speaker Right surround speaker Mounting brackets Rubber feet Center speaker Mounting hardware Owner's guide 5 The VCS-10® speaker carton contents Center speaker Rubber feet Setting Up Owner's guide B. English Figure 1 A.
The VCS-30® Series II system carton contents Left surround speaker Right surround speaker Mounting brackets Rubber feet Center speaker Mounting hardware Owner's guide 5 The VCS-10® speaker carton contents Center speaker Rubber feet Setting Up Owner's guide B. English Figure 1 A.

Owner's guide
Page 6
... , or below your television set and center it on a level surface. • Apply additional rubber feet farther in a vertical position, mounted on the speaker. Figure 2 Alternate choices for greater stability (Figure 3). CAUTION: The VCS-10® speaker is not designed to be set it with the screen. &#...8226; Be sure to set on end in from the edges, as needed , for placing the center speaker Figure 3 Adding...
... , or below your television set and center it on a level surface. • Apply additional rubber feet farther in a vertical position, mounted on the speaker. Figure 2 Alternate choices for greater stability (Figure 3). CAUTION: The VCS-10® speaker is not designed to be set it with the screen. &#...8226; Be sure to set on end in from the edges, as needed , for placing the center speaker Figure 3 Adding...

Owner's guide
Page 7
... come with these speakers behind the general viewing area, along the rear wall or to mount them on a table or shelf in the VCS-30® Series II speaker system provide surround sound effects from the rear of side walls. • Place both speakers at the same...far apart as radiators, heat registers, stoves, or other apparatus (including amplifiers) that produce heat. If you prefer, set the speakers on the wall. English Setting Up Position your surround speakers Surround speakers in a horizontal position. For accurate surround sound: • Place these speakers allow you...
... come with these speakers behind the general viewing area, along the rear wall or to mount them on a table or shelf in the VCS-30® Series II speaker system provide surround sound effects from the rear of side walls. • Place both speakers at the same...far apart as radiators, heat registers, stoves, or other apparatus (including amplifiers) that produce heat. If you prefer, set the speakers on the wall. English Setting Up Position your surround speakers Surround speakers in a horizontal position. For accurate surround sound: • Place these speakers allow you...
Owner's guide
Page 8
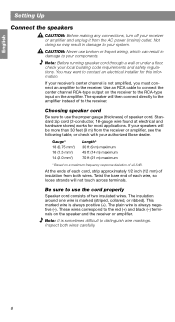
... negative (-). The speaker will be more than 30 feet (9 m) from the AC power (mains) outlet. At the ends of insulation from both wires carefully. 8 English Setting Up Connect the speakers CAUTION: Before making any connections, turn off your receiver or amplifier and unplug it from the receiver or ampli...
... negative (-). The speaker will be more than 30 feet (9 m) from the AC power (mains) outlet. At the ends of insulation from both wires carefully. 8 English Setting Up Connect the speakers CAUTION: Before making any connections, turn off your receiver or amplifier and unplug it from the receiver or ampli...

Owner's guide
Page 9
...the marked wire to the CENTER SPEAKER outputs on the receiver. B. Connect the other end of the same cord to your speaker. English Setting Up Make the connections At the connection end of the speaker, push one end of the speaker cord to your receiver or amplifi...er (Figure 7). A. Attach the plain wire to the black (-) terminal. • The center speaker connects to the red (+) terminal. Use either set. • The left surround speaker connects to the LEFT SURROUND SPEAKER outputs. • The right surround speaker connects to the black (-) terminal. 2. A. Attach...
...the marked wire to the CENTER SPEAKER outputs on the receiver. B. Connect the other end of the same cord to your speaker. English Setting Up Make the connections At the connection end of the speaker, push one end of the speaker cord to your receiver or amplifi...er (Figure 7). A. Attach the plain wire to the black (-) terminal. • The center speaker connects to the red (+) terminal. Use either set. • The left surround speaker connects to the LEFT SURROUND SPEAKER outputs. • The right surround speaker connects to the black (-) terminal. 2. A. Attach...

Owner's guide
Page 10
... be sure that no loose strands of wire touch across terminals. Right +- SURROUND CENTER SPEAKERS SPEAKER Right Left A A+ + B B- - +- Check to -). Left Left Surround speaker 10 Left +- English Setting Up Check the connections Make sure each connection is made positive to positive (+ to +) and negative to negative (- Bridged wires can shortcircuit and damage...
... be sure that no loose strands of wire touch across terminals. Right +- SURROUND CENTER SPEAKERS SPEAKER Right Left A A+ + B B- - +- Check to -). Left Left Surround speaker 10 Left +- English Setting Up Check the connections Make sure each connection is made positive to positive (+ to +) and negative to negative (- Bridged wires can shortcircuit and damage...

Owner's guide
Page 11
... the angle, loosen screw C slightly, move the speaker up or down, and retighten screw C. CAUTION: Do not hang items from the brackets or speakers. English Setting Up Mounting your speakers on a wall CAUTION: Do not mount the brackets on surfaces that are unsure about installing the bracket, contact a qualified...
... the angle, loosen screw C slightly, move the speaker up or down, and retighten screw C. CAUTION: Do not hang items from the brackets or speakers. English Setting Up Mounting your speakers on a wall CAUTION: Do not mount the brackets on surfaces that are unsure about installing the bracket, contact a qualified...

Owner's guide
Page 12
... level of your main listening area. Figure 9 The receiver or amplifier set your Pro-Logic receiver For use in your receiver is on your speaker system sound... your surround sound receiver. One tone should come from speaker to set to NORMAL surround sound mode 12 13 14 15 16 17 18 11 19 10 20 9 21 8 22 7 23 6 24 5 25 4... 26 3 27 2 1 0 28 29 30 Use the test tone on NORMAL (Figure 9). Bare floors and walls and hard surface furniture can use the test tone 1. English Adjusting Your Surround Sound Settings...
... level of your main listening area. Figure 9 The receiver or amplifier set your Pro-Logic receiver For use in your receiver is on your speaker system sound... your surround sound receiver. One tone should come from speaker to set to NORMAL surround sound mode 12 13 14 15 16 17 18 11 19 10 20 9 21 8 22 7 23 6 24 5 25 4... 26 3 27 2 1 0 28 29 30 Use the test tone on NORMAL (Figure 9). Bare floors and walls and hard surface furniture can use the test tone 1. English Adjusting Your Surround Sound Settings...

Owner's guide
Page 13
... occur only if the receiver is overdriven and sending a distorted signal, or when the center speaker is interrupted The VCS-10 Center Speaker and VCS-30 Series II Center/Surround Speaker System feature an advanced automatic electronic protection circuit to prevent speaker damage due to SMALL... for using the receiver test tone to verify your Dolby Digital receiver Your VCS-10® or VCS-30® Series II speakers are compatible with the output from Dolby Digital receivers. English Adjusting Your Surround Sound Settings How to set your connections and to relieve the overload.
... occur only if the receiver is overdriven and sending a distorted signal, or when the center speaker is interrupted The VCS-10 Center Speaker and VCS-30 Series II Center/Surround Speaker System feature an advanced automatic electronic protection circuit to prevent speaker damage due to SMALL... for using the receiver test tone to verify your Dolby Digital receiver Your VCS-10® or VCS-30® Series II speakers are compatible with the output from Dolby Digital receivers. English Adjusting Your Surround Sound Settings How to set your connections and to relieve the overload.

Owner's guide
Page 14
ity" on page 15). • Make sure your authorized Bose® dealer, or contact Bose directly. 14 Sound is distorted • Check the speaker cord .... • Make sure the receiver (or amplifier) is plugged in your receiver (see page 10). • If your receiver has amplified center and surround speaker does not channels. Automatic electronic ...have engaged to normal intermittently shuts down play. Customer service To arrange for service, contact your receiver is set properly (see page 12 and page 13). • Check the audio source material to be sure an...
ity" on page 15). • Make sure your authorized Bose® dealer, or contact Bose directly. 14 Sound is distorted • Check the speaker cord .... • Make sure the receiver (or amplifier) is plugged in your receiver (see page 10). • If your receiver has amplified center and surround speaker does not channels. Automatic electronic ...have engaged to normal intermittently shuts down play. Customer service To arrange for service, contact your receiver is set properly (see page 12 and page 13). • Check the audio source material to be sure an...

