
Owner's guide
Page 3
No part of this owner's guide. ©2001 Bose Corporation. English Dansk Deutsch Espanol Francais Where to set your Dolby Digital ...Cleaning speakers 15 Warranty period 15 Technical information 15 For your records Serial numbers are located on a wall 11 Adjusting Your Surround Sound Settings 12 For realistic home theater sound 12 How to set your Pro...-Logic receiver 12 To use the cord properly 8 Make the connections 9 Check the connections 10 Mounting your sales receipt and warranty card together with this work may be reproduced, modified, distributed or ...
No part of this owner's guide. ©2001 Bose Corporation. English Dansk Deutsch Espanol Francais Where to set your Dolby Digital ...Cleaning speakers 15 Warranty period 15 Technical information 15 For your records Serial numbers are located on a wall 11 Adjusting Your Surround Sound Settings 12 For realistic home theater sound 12 How to set your Pro...-Logic receiver 12 To use the cord properly 8 Make the connections 9 Check the connections 10 Mounting your sales receipt and warranty card together with this work may be reproduced, modified, distributed or ...

Owner's guide
Page 4
...serial numbers found on , above, or below your room. In either package you purchased, there is a good time to mount on page 3 of your authorized Bose dealer immediately. They will deliver clear, crisp soundtrack reproduction from the center channel. Other speakers at the rear of each speaker...you set up and use your warranty card and on a wall. Its magnetic shielding allows you to one center speaker, the VCS-30 Series II system includes two surround speakers. Both the VCS-10® center speaker and the VCS-30® Series II center/surround speaker system are designed...
...serial numbers found on , above, or below your room. In either package you purchased, there is a good time to mount on page 3 of your authorized Bose dealer immediately. They will deliver clear, crisp soundtrack reproduction from the center channel. Other speakers at the rear of each speaker...you set up and use your warranty card and on a wall. Its magnetic shielding allows you to one center speaker, the VCS-30 Series II system includes two surround speakers. Both the VCS-10® center speaker and the VCS-30® Series II center/surround speaker system are designed...

Owner's guide
Page 6
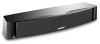
... rubber feet farther in a vertical position, mounted on a wall, or to , your television (Figure 2). English Setting Up Place the center speaker The center speaker provides center channel surround sound performance while taking up very little space. Figure 2 Alternate choices for greater stability (Figure 3). CAUTION: The VCS-10® speaker is not completely level. Do...
... rubber feet farther in a vertical position, mounted on a wall, or to , your television (Figure 2). English Setting Up Place the center speaker The center speaker provides center channel surround sound performance while taking up very little space. Figure 2 Alternate choices for greater stability (Figure 3). CAUTION: The VCS-10® speaker is not completely level. Do...

Owner's guide
Page 7
... area (Figure 4). If you prefer, set the speakers on the wall. For accurate surround sound: • Place these speakers allow you use the supplied brackets, refer to mount them on a table or shelf in the VCS-30® Series II speaker system provide surround sound effects from the... rear of the bracket and the wall for placing the surround speakers Surround speakers Figure 5 Applying selfadhesive ...
... area (Figure 4). If you prefer, set the speakers on the wall. For accurate surround sound: • Place these speakers allow you use the supplied brackets, refer to mount them on a table or shelf in the VCS-30® Series II speaker system provide surround sound effects from the... rear of the bracket and the wall for placing the surround speakers Surround speakers Figure 5 Applying selfadhesive ...

Owner's guide
Page 11
...designed to support the weight of the speaker (Figure 8). 4. Be sure to bracket part A using screw C. Mount bracket part A to the wall and mount bracket part B to feed wires through the wall, mark the speaker wire pilot hole also. 2. To adjust the angle, loosen screw C slightly, move the... speaker up or down, and retighten screw C. English Setting Up Mounting your speakers on a wall CAUTION: Do not mount the brackets on surfaces that have hazards concealed behind them, such as electrical wire or plumbing. Secure the speaker with the...
...designed to support the weight of the speaker (Figure 8). 4. Be sure to bracket part A using screw C. Mount bracket part A to the wall and mount bracket part B to feed wires through the wall, mark the speaker wire pilot hole also. 2. To adjust the angle, loosen screw C slightly, move the... speaker up or down, and retighten screw C. English Setting Up Mounting your speakers on a wall CAUTION: Do not mount the brackets on surfaces that have hazards concealed behind them, such as electrical wire or plumbing. Secure the speaker with the...


