
Owner's guide
Page 4
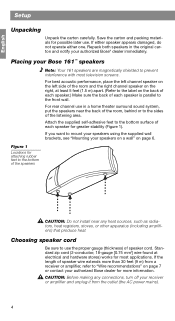
...carton carefully. Attach the supplied self-adhesive feet to the label on page 7 or contact your authorized Bose dealer for greater stability (Figure 1). For rear channel use in the original carton and notify your receiver or amplifier and unplug it from...speakers near any connections, turn off your authorized Bose® dealer immediately. If the length of the listening area. If you want to mount your speakers using the supplied wall brackets, see "Mounting your Bose 161™ speakers Note: Your 161 speakers are magnetically shielded to the sides of speaker...
...carton carefully. Attach the supplied self-adhesive feet to the label on page 7 or contact your authorized Bose dealer for greater stability (Figure 1). For rear channel use in the original carton and notify your receiver or amplifier and unplug it from...speakers near any connections, turn off your authorized Bose® dealer immediately. If the length of the listening area. If you want to mount your speakers using the supplied wall brackets, see "Mounting your Bose 161™ speakers Note: Your 161 speakers are magnetically shielded to the sides of speaker...

Owner's guide
Page 5
...and release the button. Secure any loose wires before you plug in a home theater system, choose the "SMALL SPEAKER" setting. 5 Twist the bare ends of each wire so there are used for the rear surround channels in the receiver or amplifier. In the same manner, connect the right... speaker cord to -). Note: If these speakers are no loose strands of each wire to the proper terminal (+ to connect each speaker, receiver, or amplifier....
...and release the button. Secure any loose wires before you plug in a home theater system, choose the "SMALL SPEAKER" setting. 5 Twist the bare ends of each wire so there are used for the rear surround channels in the receiver or amplifier. In the same manner, connect the right... speaker cord to -). Note: If these speakers are no loose strands of each wire to the proper terminal (+ to connect each speaker, receiver, or amplifier....
Owner's guide
Page 6
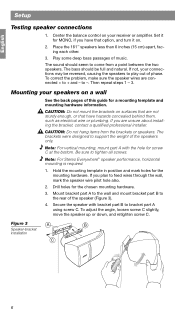
...be full and natural. Drill holes for a mounting template and mounting hardware information. The brackets were designed to the rear of the speakers only. Hold the mounting template in position and mark holes for MONO, if you have hazards concealed behind them, such... wire or plumbing. Note: For Stereo Everywhere® speaker performance, horizontal mounting is required. 1. Then repeat steps 1 - 3. English Setup Testing speaker connections 1. Center the balance control on a wall See the back pages of music. Place the 161™ speakers less than 6 inches (15 cm) apart, facing ...
...be full and natural. Drill holes for a mounting template and mounting hardware information. The brackets were designed to the rear of the speakers only. Hold the mounting template in position and mark holes for MONO, if you have hazards concealed behind them, such... wire or plumbing. Note: For Stereo Everywhere® speaker performance, horizontal mounting is required. 1. Then repeat steps 1 - 3. English Setup Testing speaker connections 1. Center the balance control on a wall See the back pages of music. Place the 161™ speakers less than 6 inches (15 cm) apart, facing ...


