Operation Manual
Page 2
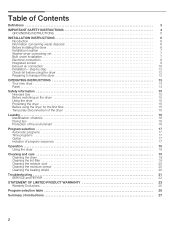
... the dryer 6 Installation location 7 WasherĆdryer connecting set 7 Built under Installation 7 Electrical connection 8 Integrated socket 9 Exhaust air connection 10 Installation ć step by step 12 Check list before using the dryer 12 Preparing to transport the dryer 12 OPERATING INSTRUCTIONS 13 Your new dryer 13...sequence 17 Operation 18 Using the dryer 18 Cleaning and care 19 Cleaning the dryer 19 Cleaning the lint filter 19 Cleaning the exhaust duct 20 Cleaning the moisture sensor 20 Cleaning the bearing shield 20 Troubleshooting 21 SERVICE and REPAIR 22 ...
... the dryer 6 Installation location 7 WasherĆdryer connecting set 7 Built under Installation 7 Electrical connection 8 Integrated socket 9 Exhaust air connection 10 Installation ć step by step 12 Check list before using the dryer 12 Preparing to transport the dryer 12 OPERATING INSTRUCTIONS 13 Your new dryer 13...sequence 17 Operation 18 Using the dryer 18 Cleaning and care 19 Cleaning the dryer 19 Cleaning the lint filter 19 Cleaning the exhaust duct 20 Cleaning the moisture sensor 20 Cleaning the bearing shield 20 Troubleshooting 21 SERVICE and REPAIR 22 ...

Operation Manual
Page 12
... Ćside. 7. q After 3Ć5 minutes press the Stop button and open the door. 5. Place any accessories in the troubleshooting section (page 21) of the dryer feels warm, the dryer has been connected properly. If the dryer is slid across the floor if heightĆadjustable feet have been implemented properly. 2. Insert plug into the...
... Ćside. 7. q After 3Ć5 minutes press the Stop button and open the door. 5. Place any accessories in the troubleshooting section (page 21) of the dryer feels warm, the dryer has been connected properly. If the dryer is slid across the floor if heightĆadjustable feet have been implemented properly. 2. Insert plug into the...
Operation Manual
Page 15
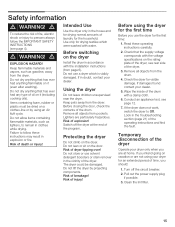
...first time: 1. Switch off the circuit breaker. 2. Do not lift the dryer by using an Air fluff cycle. Read these instructions may result in the troubleshooting section (page 21) of the program. Check the dryer for an extended period of injury! Look in explosion or fire. Pull ...the risk of fire, electric shock or injury to follow the IMPORTANT SAFETY INSTRUCTIONS (see page 4). Use only for the first time Before you should: 1. Risk of breakage! Wipe the inside of the dryer. Turn off the dryer at home. Lighters are not using the dryer for drying textiles which...
...first time: 1. Switch off the circuit breaker. 2. Do not lift the dryer by using an Air fluff cycle. Read these instructions may result in the troubleshooting section (page 21) of the program. Check the dryer for an extended period of injury! Look in explosion or fire. Pull ...the risk of fire, electric shock or injury to follow the IMPORTANT SAFETY INSTRUCTIONS (see page 4). Use only for the first time Before you should: 1. Risk of breakage! Wipe the inside of the dryer. Turn off the dryer at home. Lighters are not using the dryer for drying textiles which...

Operation Manual
Page 21
... ELECTRICAL ... sequence or malfunction. Switch off /switch on page 20. Switch off dryer, leave to Off. 2. Unsuitable program selected. Select program with aid .... Switch off /switch on again. Laundry was exceeded. Switch off dryer, leave to maximum length as described on page 11. Start/Stop indicator...1. Repairs or replacement of fresh air. Switch off dryer, leave to maximum length as described on page 11. Restart program. ... drying time was exceeded. Problem Possible cause Remedial action Dryer does not start. Reduce exhaust air duct to cool ...
... ELECTRICAL ... sequence or malfunction. Switch off /switch on page 20. Switch off dryer, leave to Off. 2. Unsuitable program selected. Select program with aid .... Switch off /switch on again. Laundry was exceeded. Switch off dryer, leave to maximum length as described on page 11. Start/Stop indicator...1. Repairs or replacement of fresh air. Switch off dryer, leave to maximum length as described on page 11. Restart program. ... drying time was exceeded. Problem Possible cause Remedial action Dryer does not start. Reduce exhaust air duct to cool ...