Installation Instructions
Page 3
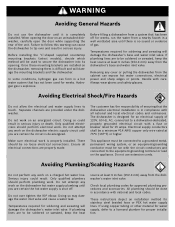
... electrical codes and ordinances. Electrical supply conductors shall be no sound or evidence of 120V, 60 Hz, AC, connected to a dishwasher-dedicated, properly grounded electrical circuit with national and local codes. Before installing the "L"-shaped supplied countertop mounting brackets (select models), decide... water inlet valve and cause a water leak. Check local plumbing codes for soldering and sweating will damage the dishwasher's water inlet valve. All plumbing should be a minimum #14 AWG copper only wire rated at least 6 inches (152.4 mm) away from a system that has not...
... electrical codes and ordinances. Electrical supply conductors shall be no sound or evidence of 120V, 60 Hz, AC, connected to a dishwasher-dedicated, properly grounded electrical circuit with national and local codes. Before installing the "L"-shaped supplied countertop mounting brackets (select models), decide... water inlet valve and cause a water leak. Check local plumbing codes for soldering and sweating will damage the dishwasher's water inlet valve. All plumbing should be a minimum #14 AWG copper only wire rated at least 6 inches (152.4 mm) away from a system that has not...
Instructions for Use
Page 3
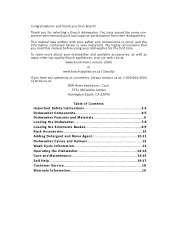
..., CA 92649 Table of Contents Important Safety Instructions 2-3 Dishwasher Components 4-5 Dishwasher Features and Materials 6 Loading the Dishwasher 7-8 Loading the Silverware Basket 8-9 Rack Accessories 10 Adding Detergent and Rinse Agent 10-11 Dishwasher Cycles and Options 12 Wash Cycle Information 12 Operating the Dishwasher 13-14 Care and Maintenance 14-15 Self Help 16-17 Customer Service 18...
..., CA 92649 Table of Contents Important Safety Instructions 2-3 Dishwasher Components 4-5 Dishwasher Features and Materials 6 Loading the Dishwasher 7-8 Loading the Silverware Basket 8-9 Rack Accessories 10 Adding Detergent and Rinse Agent 10-11 Dishwasher Cycles and Options 12 Wash Cycle Information 12 Operating the Dishwasher 13-14 Care and Maintenance 14-15 Self Help 16-17 Customer Service 18...
Instructions for Use
Page 13
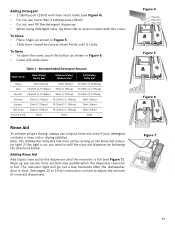
...fill the detergent dispenser. • When using detergent tabs, lay them flat to refill the rinse aid dispenser by following the directions below. Note: The dishwasher indicates low rinse aid by turning on , you need to avoid contact with the cover. If this light is shut. To Close • Place ... the cover, push the button as shown in Figure 6. • Cover will go out a few moments after the dishwasher door is on the Rinse Aid indicator light. See pages 13 or 14 for instruction on how to the dispenser until it clicks. Adding Rinse Aid Add liquid rinse aid to adjust...
...fill the detergent dispenser. • When using detergent tabs, lay them flat to refill the rinse aid dispenser by following the directions below. Note: The dishwasher indicates low rinse aid by turning on , you need to avoid contact with the cover. If this light is shut. To Close • Place ... the cover, push the button as shown in Figure 6. • Cover will go out a few moments after the dishwasher door is on the Rinse Aid indicator light. See pages 13 or 14 for instruction on how to the dispenser until it clicks. Adding Rinse Aid Add liquid rinse aid to adjust...
Instructions for Use
Page 16
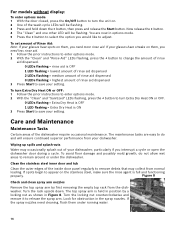
...1 LED flashing = lowest amount of rinse aid dispensed 2 LEDs flashing = medium amount of rinse aid dispensed 3 LEDs flashing = highest amount of the dishwasher require occasional maintenance. To set amount of your setting. If spots begin to remove debris that may occasionally splash out of Rinse Aid: Note: If... your glasses have streaks on them, you would like to remain around or under running water. 14 Now release the > button. 4 The "Clean" and one other LED will be flashing. Turn the rack upside down the > button, then press...
...1 LED flashing = lowest amount of rinse aid dispensed 2 LEDs flashing = medium amount of rinse aid dispensed 3 LEDs flashing = highest amount of the dishwasher require occasional maintenance. To set amount of your setting. If spots begin to remove debris that may occasionally splash out of Rinse Aid: Note: If... your glasses have streaks on them, you would like to remain around or under running water. 14 Now release the > button. 4 The "Clean" and one other LED will be flashing. Turn the rack upside down the > button, then press...


