Installation Instructions
Page 3
.... The customer has the responsibility of the unit. Doing so may damage the water inlet valve and cause a water leak. All plumbing should be a minimum #14 AWG copper only wire rated at 75°C (167°F) or higher. Only qualified electricians should perform plumbing work on an uninstalled dishwasher, carefully open...
.... The customer has the responsibility of the unit. Doing so may damage the water inlet valve and cause a water leak. All plumbing should be a minimum #14 AWG copper only wire rated at 75°C (167°F) or higher. Only qualified electricians should perform plumbing work on an uninstalled dishwasher, carefully open...
Instructions for Use
Page 3
... 10 Adding Detergent and Rinse Agent 10-11 Dishwasher Cycles and Options 12 Wash Cycle Information 12 Operating the Dishwasher 13-14 Care and Maintenance 14-15 Self Help 16-17 Customer Service 18 Warranty Information 19 You have any questions or comments, please contact us at...: 1-800-944-2904 or write us at : www.bosch-home.com/us (USA) or www.bosch-appliances.ca (Canada) If you read this manual before using your dishwasher for selecting a Bosch...
... 10 Adding Detergent and Rinse Agent 10-11 Dishwasher Cycles and Options 12 Wash Cycle Information 12 Operating the Dishwasher 13-14 Care and Maintenance 14-15 Self Help 16-17 Customer Service 18 Warranty Information 19 You have any questions or comments, please contact us at...: 1-800-944-2904 or write us at : www.bosch-home.com/us (USA) or www.bosch-appliances.ca (Canada) If you read this manual before using your dishwasher for selecting a Bosch...
Instructions for Use
Page 13
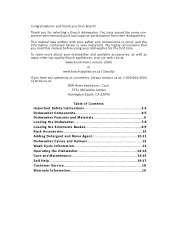
... Add liquid rinse aid to adjust the amount of rinse aid dispensed. The indicator light will clean most loads (see Figure 7). See pages 13 or 14 for instruction on the Rinse Aid indicator light. To Open • To open the cover, push the button as shown in Figure 6. • Cover will...
... Add liquid rinse aid to adjust the amount of rinse aid dispensed. The indicator light will clean most loads (see Figure 7). See pages 13 or 14 for instruction on the Rinse Aid indicator light. To Open • To open the cover, push the button as shown in Figure 6. • Cover will...
Instructions for Use
Page 16
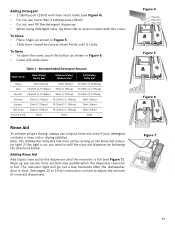
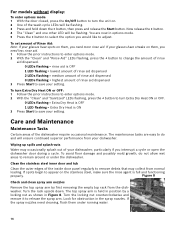
... rinse aid. Look for obstruction in Figure 8. If the spray nozzles need cleaning, flush them , you would like to remain around or under running water. 14 You are easy to do not allow wet areas to adjust. Turn the locking nut counterclockwise and remove it to save your dishwasher. Wiping up...
... rinse aid. Look for obstruction in Figure 8. If the spray nozzles need cleaning, flush them , you would like to remain around or under running water. 14 You are easy to do not allow wet areas to adjust. Turn the locking nut counterclockwise and remove it to save your dishwasher. Wiping up...