Installation Instructions
Page 3
... be soldered or sweated, keep the heat source at least 6 inches (152.4 mm) away from the dishwasher's water inlet valve. Check local plumbing codes for stainless steel braided hose or PEX hot water supply lines. Before installing the "L"-shaped supplied countertop mounting brackets (select models), decide which method will damage the dishwasher...
... be soldered or sweated, keep the heat source at least 6 inches (152.4 mm) away from the dishwasher's water inlet valve. Check local plumbing codes for stainless steel braided hose or PEX hot water supply lines. Before installing the "L"-shaped supplied countertop mounting brackets (select models), decide which method will damage the dishwasher...
Instructions for Use
Page 8
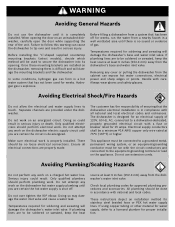
... pad. This can only be removed with certain wash cycles. China, Crystal, Stoneware: Some hand-painted utensils may occur. Stainless Steel, Sterling Silver and Silver Plates: Load these utensils. Not Recommended Acrylic: Crazing, small cracks throughout the acrylic, may discolor,...™: This feature senses when the unit is hygenic, energy efficient and economical. SaniDry™: A high temperature final rinse, a low temperature stainless steel tub and the sheeting action of clean water and protect the main pump and the drain pump from foreign material. Sanitize: An option to ...
... pad. This can only be removed with certain wash cycles. China, Crystal, Stoneware: Some hand-painted utensils may occur. Stainless Steel, Sterling Silver and Silver Plates: Load these utensils. Not Recommended Acrylic: Crazing, small cracks throughout the acrylic, may discolor,...™: This feature senses when the unit is hygenic, energy efficient and economical. SaniDry™: A high temperature final rinse, a low temperature stainless steel tub and the sheeting action of clean water and protect the main pump and the drain pump from foreign material. Sanitize: An option to ...
Instructions for Use
Page 16
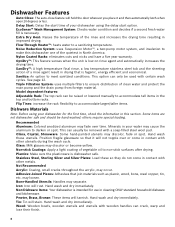
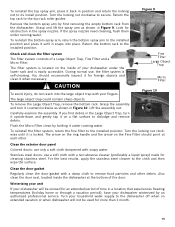
... cycle or open the dishwasher door during a cycle. Wiping up spills and splash-outs Water may collect from normal loading. Clean the stainless steel inner door and tub Clean the outer edges of the inside door panel regularly to remove debris that may occasionally splash out of your ...Follow the prior instructions to enter options mode. 2 With the "Clean" and "Sanitized" LEDs flashing, press the < button to turn the unit on the stainless steel, make sure the rinse agent is full and functioning properly. Now release the > button. 4 The "Clean" and one other LED will be flashing. 3...
... cycle or open the dishwasher door during a cycle. Wiping up spills and splash-outs Water may collect from normal loading. Clean the stainless steel inner door and tub Clean the outer edges of the inside door panel regularly to remove debris that may occasionally splash out of your ...Follow the prior instructions to enter options mode. 2 With the "Clean" and "Sanitized" LEDs flashing, press the < button to turn the unit on the stainless steel, make sure the rinse agent is full and functioning properly. Now release the > button. 4 The "Clean" and one other LED will be flashing. 3...
Instructions for Use
Page 17
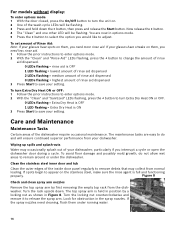
...clockwise until it snaps into the large object trap with a non-abrasive cleaner (preferably a liquid spray) made for obstruction in the spray nozzles. Stainless steel doors: use only a soft cloth dampened with a damp cloth to the dishwasher off when on a flat surface to the installed position. To ... door. Flush the Micro Filter clean by first removing the empty bottom rack from the dishwasher. For the best results, apply the stainless steel cleaner to the installed position and press it until it is self-cleaning. To reinstall the top spray arm, place it back in...
...clockwise until it snaps into the large object trap with a non-abrasive cleaner (preferably a liquid spray) made for obstruction in the spray nozzles. Stainless steel doors: use only a soft cloth dampened with a damp cloth to the dishwasher off when on a flat surface to the installed position. To ... door. Flush the Micro Filter clean by first removing the empty bottom rack from the dishwasher. For the best results, apply the stainless steel cleaner to the installed position and press it until it is self-cleaning. To reinstall the top spray arm, place it back in...

Instructions for Use
Page 21
... components), if the rack proves defective in materials or workmanship (excludes labor charges). • Lifetime Warranty against Stainless Steel Rust Through: Bosch will replace the stainless steel door if the door should rust through (excludes labor charges). Bosch's sole liability and responsibility hereunder is to repair manufacturer-defective Product only, using purchaser, provided that the Product...
... components), if the rack proves defective in materials or workmanship (excludes labor charges). • Lifetime Warranty against Stainless Steel Rust Through: Bosch will replace the stainless steel door if the door should rust through (excludes labor charges). Bosch's sole liability and responsibility hereunder is to repair manufacturer-defective Product only, using purchaser, provided that the Product...


