Installation Instructions
Page 3
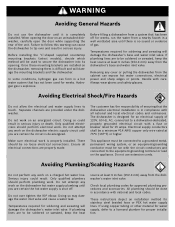
... and will damage the dishwasher's base and water inlet valve. Do not attempt any work is completely installed. If plumbing lines are to be a minimum #14 AWG copper only wire rated at least 6 inches (152.4 mm) away from the cabinet can form in serious injury. If plumbing lines are to be...
... and will damage the dishwasher's base and water inlet valve. Do not attempt any work is completely installed. If plumbing lines are to be a minimum #14 AWG copper only wire rated at least 6 inches (152.4 mm) away from the cabinet can form in serious injury. If plumbing lines are to be...
Instructions for Use
Page 3
This manual was written with your dishwasher and available accessories, as well as many consumers who demand quiet and superior performance from Bosch! To learn more about your safety and convenience in mind, and the information contained herein is very important. We highly recommend that ... Rack Accessories 10 Adding Detergent and Rinse Agent 10-11 Dishwasher Cycles and Options 12 Wash Cycle Information 12 Operating the Dishwasher 13-14 Care and Maintenance 14-15 Self Help 16-17 Customer Service 18 Warranty Information 19 Congratulations and thank you from their dishwashers.
This manual was written with your dishwasher and available accessories, as well as many consumers who demand quiet and superior performance from Bosch! To learn more about your safety and convenience in mind, and the information contained herein is very important. We highly recommend that ... Rack Accessories 10 Adding Detergent and Rinse Agent 10-11 Dishwasher Cycles and Options 12 Wash Cycle Information 12 Operating the Dishwasher 13-14 Care and Maintenance 14-15 Self Help 16-17 Customer Service 18 Warranty Information 19 Congratulations and thank you from their dishwashers.
Instructions for Use
Page 13
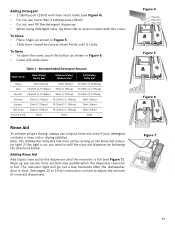
...) Figure 5 Figure 6 Figure 7 11 To Open • To open . Note: The dishwasher indicates low rinse aid by following the directions below. See pages 13 or 14 for instruction on how to refill the rinse aid dispenser by turning on , you need to adjust the amount of rinse aid dispensed.
...) Figure 5 Figure 6 Figure 7 11 To Open • To open . Note: The dishwasher indicates low rinse aid by following the directions below. See pages 13 or 14 for instruction on how to refill the rinse aid dispenser by turning on , you need to adjust the amount of rinse aid dispensed.
Instructions for Use
Page 16
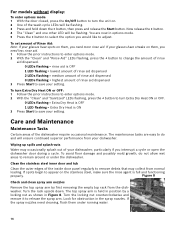
... 2 LEDs flashing = medium amount of rinse aid dispensed 3 LEDs flashing = highest amount of rinse aid dispensed 3 Press Start to remain around or under running water. 14 If the spray nozzles need more rinse aid. For models without display: To enter options mode: 1 With the door closed, press the On/Off button...
... 2 LEDs flashing = medium amount of rinse aid dispensed 3 LEDs flashing = highest amount of rinse aid dispensed 3 Press Start to remain around or under running water. 14 If the spray nozzles need more rinse aid. For models without display: To enter options mode: 1 With the door closed, press the On/Off button...