
Use & Care Manual (all languages)
Page 37
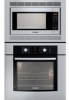
... the control panel. Model No. FD No./No FD Date of Purchase Specifications Power Source Power Consumption Cooking Power* Outside Dimensions (H x W x D) Oven Cavity Dimensions (H x W x D) Operating Frequency Net Weight Trim Kit 27" Trim Kit 30" * IEC Test procedure Specifications subject to change without notice. 120 V, 60 Hz 1,460 W 1,200 W 14" x 23 7/8" x 19 7/16" 356 mm...
... the control panel. Model No. FD No./No FD Date of Purchase Specifications Power Source Power Consumption Cooking Power* Outside Dimensions (H x W x D) Oven Cavity Dimensions (H x W x D) Operating Frequency Net Weight Trim Kit 27" Trim Kit 30" * IEC Test procedure Specifications subject to change without notice. 120 V, 60 Hz 1,460 W 1,200 W 14" x 23 7/8" x 19 7/16" 356 mm...

Installation Instructions
Page 5
.... The cabinet base must be installed either above or below the unit, a 2" diameter hole or space is required between the side of the oven and the wall/door. Dimensions for 27" Wall-Mounted Units 24" (610mm) 251/2" (648mm) 263/4" (680mm) 2413/16" (630mm) 281/4" (718mm) 291/16" (738mm) 27" (686mm) min. 43/4" (121mm) max...
.... The cabinet base must be installed either above or below the unit, a 2" diameter hole or space is required between the side of the oven and the wall/door. Dimensions for 27" Wall-Mounted Units 24" (610mm) 251/2" (648mm) 263/4" (680mm) 2413/16" (630mm) 281/4" (718mm) 291/16" (738mm) 27" (686mm) min. 43/4" (121mm) max...

Installation Instructions
Page 8
... base must be well secured to the floor/ cabinet and level. Double Oven 30" It is good practice, when oven is required between the back wall and the right rear of the 2x4 supports. For oven support, install 2x4's extending front to back flush with the bottom and...2" diameter hole or space is installed at the end of a cabinet run , adjacent to a perpendicular wall or cabinet door, to allow at least 1/4" space between the side of the oven and the wall/door. 30" Appliances Dimensions for 30" Wall-Mounted Units 24" (610mm) 281/2" (724mm) 293/4" (755mm) 2713/16" (706mm) 281/4" ...
... base must be well secured to the floor/ cabinet and level. Double Oven 30" It is good practice, when oven is required between the back wall and the right rear of the 2x4 supports. For oven support, install 2x4's extending front to back flush with the bottom and...2" diameter hole or space is installed at the end of a cabinet run , adjacent to a perpendicular wall or cabinet door, to allow at least 1/4" space between the side of the oven and the wall/door. 30" Appliances Dimensions for 30" Wall-Mounted Units 24" (610mm) 281/2" (724mm) 293/4" (755mm) 2713/16" (706mm) 281/4" ...

Installation Instructions
Page 14
...on hinges toward you. 4. To remove the oven door: 1. Open the door completely. 3. English 12 Oven Installation Note: Before installing the oven, be sure to avoid breaking. • Grasp only the sides of the oven door. Handle carefully to verify the cabinet dimensions and electrical connections. Hold firmly; the hinge..., pull the door up and out of the hinge slots. Removing the Oven Door For ease of the oven by 30 lbs (14 kg) per door, before attempting to reduce the weight of installation, some oven doors may swing in place before removing the door. See "To remove ...
...on hinges toward you. 4. To remove the oven door: 1. Open the door completely. 3. English 12 Oven Installation Note: Before installing the oven, be sure to avoid breaking. • Grasp only the sides of the oven door. Handle carefully to verify the cabinet dimensions and electrical connections. Hold firmly; the hinge..., pull the door up and out of the hinge slots. Removing the Oven Door For ease of the oven by 30 lbs (14 kg) per door, before attempting to reduce the weight of installation, some oven doors may swing in place before removing the door. See "To remove ...

