Installation Instructions
Page 4
...Rec day 2-5 Rec weekend/night 2-5 Enable alarm inputs for 2-5 Alarm input recording 2-5 Enable motion for 2-5 Motion recording 2-5 Approximate recording duration 2-6 Network settings 2-6 DHCP 2-6 DVR name 2-6 IP address, Subnet mask and Default gateway 2-6 MAC address 2-6 Bandwidth limit 2-6 Operating instructions 3-1 Front panel controls 3-2 Indicators 3-2 Keys 3-2 Primary functions 3-3 Alternate ... loss alarm 3-13 Multiple alarms 3-13 Disk-full alarm 3-13 Hardware setup 4-1 Rack mounting 4-2 Camera connections 4-2 Monitor connections 4-3 Bosch Security Systems
...Rec day 2-5 Rec weekend/night 2-5 Enable alarm inputs for 2-5 Alarm input recording 2-5 Enable motion for 2-5 Motion recording 2-5 Approximate recording duration 2-6 Network settings 2-6 DHCP 2-6 DVR name 2-6 IP address, Subnet mask and Default gateway 2-6 MAC address 2-6 Bandwidth limit 2-6 Operating instructions 3-1 Front panel controls 3-2 Indicators 3-2 Keys 3-2 Primary functions 3-3 Alternate ... loss alarm 3-13 Multiple alarms 3-13 Disk-full alarm 3-13 Hardware setup 4-1 Rack mounting 4-2 Camera connections 4-2 Monitor connections 4-3 Bosch Security Systems

Installation Instructions
Page 18
...the network. >> IP ADDRESS, SUBNET MASK AND DEFAULT GATEWAY • Fill in motion recording for the bandwidth limit. Bosch Security Systems For event recording, the following parameters are displayed. >> DVR NAME • Enter a Divar name to be used : • During the day, one camera is in ...APPROXIMATE RECORDING DURATION • This is an estimate of the recording duration based on the total amount of the time. >> NETWORK SETTINGS NETWORK SETTINGS DHCP DVR NAME IP ADDRESS SUBNET MASK DEFAULT GATEWAY MAC ADDRESS BANDWIDTH LIMIT NO DIVAR 192.168. 10.2 255.255.255. 0 0. 0. 0. 0 00:00...
...the network. >> IP ADDRESS, SUBNET MASK AND DEFAULT GATEWAY • Fill in motion recording for the bandwidth limit. Bosch Security Systems For event recording, the following parameters are displayed. >> DVR NAME • Enter a Divar name to be used : • During the day, one camera is in ...APPROXIMATE RECORDING DURATION • This is an estimate of the recording duration based on the total amount of the time. >> NETWORK SETTINGS NETWORK SETTINGS DHCP DVR NAME IP ADDRESS SUBNET MASK DEFAULT GATEWAY MAC ADDRESS BANDWIDTH LIMIT NO DIVAR 192.168. 10.2 255.255.255. 0 0. 0. 0. 0 00:00...

Installation Instructions
Page 49
... server. • The time and date of all other connected units are automatically synchronized every hour from the time and date of the unit with DVR ID 1. Bosch Security Systems The name can be up to which it is adjusted accordingly.) • Fill in the day, month and time of the individual...
... server. • The time and date of all other connected units are automatically synchronized every hour from the time and date of the unit with DVR ID 1. Bosch Security Systems The name can be up to which it is adjusted accordingly.) • Fill in the day, month and time of the individual...

Installation Instructions
Page 60
...The Configuration Tool application must be installed on the task bar and the Programs menu item. Select the Serial connection entry from the DVR list. To install separately: 1. Alternatively, select the Divar Configuration Tool program via the serial RS232 connection, double click the Configuration... your desktop window to a PC via the RS232 Console Port or via the Control Center, click the Config button in this way. Bosch Security Systems Divar | Installation Manual | Using the Configuration Tool EN | 6-2 Getting started To use the Configuration Tool to change settings,...
...The Configuration Tool application must be installed on the task bar and the Programs menu item. Select the Serial connection entry from the DVR list. To install separately: 1. Alternatively, select the Divar Configuration Tool program via the serial RS232 connection, double click the Configuration... your desktop window to a PC via the RS232 Console Port or via the Control Center, click the Config button in this way. Bosch Security Systems Divar | Installation Manual | Using the Configuration Tool EN | 6-2 Getting started To use the Configuration Tool to change settings,...
Installation Instructions
Page 71
... 2 Level 3 Motion Setup Video loss Setup History log setup Connectivity Log alarms Log motions Log video loss Log errors Log network Keyboard access Network setup Bosch Security Systems Level 4 Output relay Beeper Display monitor A Display monitor B Output relay Beeper Keyboard 1 Keyboard 2 Keyboard 3 Keyboard 4 DHCP Discovery...
... 2 Level 3 Motion Setup Video loss Setup History log setup Connectivity Log alarms Log motions Log video loss Log errors Log network Keyboard access Network setup Bosch Security Systems Level 4 Output relay Beeper Display monitor A Display monitor B Output relay Beeper Keyboard 1 Keyboard 2 Keyboard 3 Keyboard 4 DHCP Discovery...

Installation Instructions
Page 72
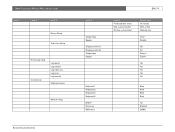
Divar | Installation Manual | Menu default values Level 1 Level 2 Level 3 Network access Expand system Com port Input and Output contacts Inputs Outputs Level 4 Default gateway HTTP port Bandwidth limit IP Range List of users DVR ID First camera number Connect to Baudrate Parity Bits Stopbits RTS/CTS EN | 7-6 Level 5 List of IP addresses User name User rights User password Default value 0. 0. 0. 0 80 100 MBPS 0. 0. 0. 0 255.255.255.255 ADMINISTRATOR, USER2...6 Playback No password 1 1 CCL 9600 None 8 1 On N/O N/O Bosch Security Systems
Divar | Installation Manual | Menu default values Level 1 Level 2 Level 3 Network access Expand system Com port Input and Output contacts Inputs Outputs Level 4 Default gateway HTTP port Bandwidth limit IP Range List of users DVR ID First camera number Connect to Baudrate Parity Bits Stopbits RTS/CTS EN | 7-6 Level 5 List of IP addresses User name User rights User password Default value 0. 0. 0. 0 80 100 MBPS 0. 0. 0. 0 255.255.255.255 ADMINISTRATOR, USER2...6 Playback No password 1 1 CCL 9600 None 8 1 On N/O N/O Bosch Security Systems