
Installation Instructions
Page 3
...DVR1C1161 | Installation Manual | Table of Contents EN | 3 1. OPERATION ...13 3.1 QUICK INSTALL ...13 3.2 INSTANT RECORDING ...13 3.3 ALARM RECORDING ...13 3.3.1 Pre-alarm recording ...13 3.4 NORMAL PLAYBACK ...13 3.5 SEARCH PLAYBACK ...14 3.6 COPY ...14 3.6.1 Still image copy ...14 3.6.2 Copy to movie file ...14 3.7 SECURITY...Quads ...10 2.4.3 Single camera ...11 2.5 REMOTE CONTROL UNIT ...12 2.6 NETWORKS ...12 3. MENU SET-UP ...15 4.1 MAIN MENU ...15 4.2 CLOCK/LANGUAGE MENU ...15 4.3 NORMAL RECORD MENU ...15 4.4 ALARM RECORD MENU ...15 4.5 TIMER MENU ...16 Bosch Security Systems | 2004...
...DVR1C1161 | Installation Manual | Table of Contents EN | 3 1. OPERATION ...13 3.1 QUICK INSTALL ...13 3.2 INSTANT RECORDING ...13 3.3 ALARM RECORDING ...13 3.3.1 Pre-alarm recording ...13 3.4 NORMAL PLAYBACK ...13 3.5 SEARCH PLAYBACK ...14 3.6 COPY ...14 3.6.1 Still image copy ...14 3.6.2 Copy to movie file ...14 3.7 SECURITY...Quads ...10 2.4.3 Single camera ...11 2.5 REMOTE CONTROL UNIT ...12 2.6 NETWORKS ...12 3. MENU SET-UP ...15 4.1 MAIN MENU ...15 4.2 CLOCK/LANGUAGE MENU ...15 4.3 NORMAL RECORD MENU ...15 4.4 ALARM RECORD MENU ...15 4.5 TIMER MENU ...16 Bosch Security Systems | 2004...

Installation Instructions
Page 4
... quality High quality Low quality Lowest quality Menu Pause Pause end Play Play end Play repeat Record Search Standard quality Superior quality System loading Timer recording Lock record Play begin Remote record Bosch Security Systems | 2004-6 DVR1C1161 | Installation Manual | Table of Contents EN | 4 4.6 BUZZER MENU ...16 4.7 ARCHIVE MENU ...17 4.8 NETWORK MENU ...17 4.9 SYSTEM SETTING MENU ...18 4.10...
... quality High quality Low quality Lowest quality Menu Pause Pause end Play Play end Play repeat Record Search Standard quality Superior quality System loading Timer recording Lock record Play begin Remote record Bosch Security Systems | 2004-6 DVR1C1161 | Installation Manual | Table of Contents EN | 4 4.6 BUZZER MENU ...16 4.7 ARCHIVE MENU ...17 4.8 NETWORK MENU ...17 4.9 SYSTEM SETTING MENU ...18 4.10...

Installation Instructions
Page 5
...Danger of the replaced battery in an environmentally friendly way. 15. Dispose of explosion if battery is incorrectly replaced. Bosch Security Systems | 2004-6 The back of the recorder should only be removed by VDE 0625, minimum 10A, power cord H05VV-F or VW-1,0.75 mm2 x 3G should...of electric shock to persons. Warning To reduce the risk of fire or electric shock, this equipment in a confined space such as possible. DVR1C1161 | Installation Manual | Chapter 1 EN | 5 1 SAFETY PRECAUTIONS Danger The lightning flash with arrowhead symbol, within an equilateral triangle, is ...
...Danger of the replaced battery in an environmentally friendly way. 15. Dispose of explosion if battery is incorrectly replaced. Bosch Security Systems | 2004-6 The back of the recorder should only be removed by VDE 0625, minimum 10A, power cord H05VV-F or VW-1,0.75 mm2 x 3G should...of electric shock to persons. Warning To reduce the risk of fire or electric shock, this equipment in a confined space such as possible. DVR1C1161 | Installation Manual | Chapter 1 EN | 5 1 SAFETY PRECAUTIONS Danger The lightning flash with arrowhead symbol, within an equilateral triangle, is ...

Installation Instructions
Page 6
Federal law. 2 Introduction The DVR1C1161 Digital Video Recorder provides advanced recording and playback technology for CCTV systems. The DVR allows uninterrrupted recording in a particular installation. This equipment generates, uses and can be stored on a ...protection against harmful interference in accordance with Bosch and various other types of digital video recording, is eliminated. There are designed to which can radiate radio frequency energy and, if not installed and used in a residential installation. Bosch Security Systems | 2004-6 The DVR incorporates ...
Federal law. 2 Introduction The DVR1C1161 Digital Video Recorder provides advanced recording and playback technology for CCTV systems. The DVR allows uninterrrupted recording in a particular installation. This equipment generates, uses and can be stored on a ...protection against harmful interference in accordance with Bosch and various other types of digital video recording, is eliminated. There are designed to which can radiate radio frequency energy and, if not installed and used in a residential installation. Bosch Security Systems | 2004-6 The DVR incorporates ...

Installation Instructions
Page 7
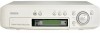
...Dial to move the picture slowly forward or reverse. 8 Jog Dial: In playback mode, turn Shuttle Ring to move forward or backward image by image. DVR1C1161 | Installation Manual | Chapter 2 EN | 7 2.2 Front panel 1 REC: Press to enter or leave the setup menu. 11 Remote control IR receiver ...clockwise to speed up or counterclockwise to select data values. In Recording mode, shows current date/time and the REC and current recording rate. Press once to copy still picture or video stream onto Compact Flash card. 12 345 67 8 9 16 15 14 13 12 Bosch Security Systems | 2004-6 11 10
...Dial to move the picture slowly forward or reverse. 8 Jog Dial: In playback mode, turn Shuttle Ring to move forward or backward image by image. DVR1C1161 | Installation Manual | Chapter 2 EN | 7 2.2 Front panel 1 REC: Press to enter or leave the setup menu. 11 Remote control IR receiver ...clockwise to speed up or counterclockwise to select data values. In Recording mode, shows current date/time and the REC and current recording rate. Press once to copy still picture or video stream onto Compact Flash card. 12 345 67 8 9 16 15 14 13 12 Bosch Security Systems | 2004-6 11 10

Installation Instructions
Page 8
... dc Power switch IR remote RS-232 control eye connector connector Power Off AC 100-240 Audio In1 In2 Mux main Monitor In S-Video In Video In Looping out Out1 Out2 Monitor Out Out Out 1 Out 2 GND ALM-IN ALM-RST REC NC1 NC2 GND GND ALM-NC... DISKFULL NC3 NC4 GND RS 232 Remote Control LAN GND VEXT Alarm connector Network connector 100-240 Vac Bosch Security Systems | 2004-6 ALM-NC**: When an alarm occurs, the connection between this pin starts recording. DVR1C1161 | Installation Manual | Chapter 2 EN | 8 2.3 Rear panel 2.3.1 Power Connect the power suppy cable to ...
... dc Power switch IR remote RS-232 control eye connector connector Power Off AC 100-240 Audio In1 In2 Mux main Monitor In S-Video In Video In Looping out Out1 Out2 Monitor Out Out Out 1 Out 2 GND ALM-IN ALM-RST REC NC1 NC2 GND GND ALM-NC... DISKFULL NC3 NC4 GND RS 232 Remote Control LAN GND VEXT Alarm connector Network connector 100-240 Vac Bosch Security Systems | 2004-6 ALM-NC**: When an alarm occurs, the connection between this pin starts recording. DVR1C1161 | Installation Manual | Chapter 2 EN | 8 2.3 Rear panel 2.3.1 Power Connect the power suppy cable to ...

Installation Instructions
Page 9
...made, refer to the system menu to the connector of multiplexer you are using. DVR1C1161 | Installation Manual | Chapter 2 EN | 9 2.4 Interconnections The DVR can ... output of the multiplexer to the BNC socket marked Video In on the rear of the DVR. • Connect the VCR input ...of the multiplexer to the BNC socket marked Video Out on the rear of the DVR. • To synchronise...control eye connector connector Power Off AC 100-240 Audio In1 In2 Mux main Monitor In S-Video In Video In Looping out Out1 Out2 Monitor Out Out Out 1 Out 2 RS 232 Remote Control ...
...made, refer to the system menu to the connector of multiplexer you are using. DVR1C1161 | Installation Manual | Chapter 2 EN | 9 2.4 Interconnections The DVR can ... output of the multiplexer to the BNC socket marked Video In on the rear of the DVR. • Connect the VCR input ...of the multiplexer to the BNC socket marked Video Out on the rear of the DVR. • To synchronise...control eye connector connector Power Off AC 100-240 Audio In1 In2 Mux main Monitor In S-Video In Video In Looping out Out1 Out2 Monitor Out Out Out 1 Out 2 RS 232 Remote Control ...

Installation Instructions
Page 10
DVR1C1161 | Installation Manual | Chapter 2 EN | 10 2.4.2 Quads The drawing below shows how to connect a quad without a VCR output to the DVR. • Connect the monitor to the BNC socket marked Monitor Out on the rear of the DVR. • Connect the video output of the multiplexer to the BNC socket marked Video ... Video In Looping out Out1 Out2 Monitor Out Out Out 1 Out 2 RS 232 Remote Control LAN GND VEXT Network connector Monitor Out GND ALM-IN ALM-RST REC NC1 NC2 GND GND ALM-NC ALM-NO ALM-CO VEXT DISKFULL NC3 NC4 GND 100-240 Vac Monitor Bosch Security Systems | 2004-6 ...
DVR1C1161 | Installation Manual | Chapter 2 EN | 10 2.4.2 Quads The drawing below shows how to connect a quad without a VCR output to the DVR. • Connect the monitor to the BNC socket marked Monitor Out on the rear of the DVR. • Connect the video output of the multiplexer to the BNC socket marked Video ... Video In Looping out Out1 Out2 Monitor Out Out Out 1 Out 2 RS 232 Remote Control LAN GND VEXT Network connector Monitor Out GND ALM-IN ALM-RST REC NC1 NC2 GND GND ALM-NC ALM-NO ALM-CO VEXT DISKFULL NC3 NC4 GND 100-240 Vac Monitor Bosch Security Systems | 2004-6 ...

Installation Instructions
Page 11
... ALM-CO VEXT DISKFULL NC3 NC4 GND RS 232 Remote Control LAN GND VEXT Network connector Video Out Audio Out 100-240 Vac Monitor Bosch Security Systems | 2004-6 DVR1C1161 | Installation Manual | Chapter 2 EN | 11 2.4.3 Single camera The drawing below shows how to connect a single to the DVR. • Connect the monitor to the BNC socket marked...
... ALM-CO VEXT DISKFULL NC3 NC4 GND RS 232 Remote Control LAN GND VEXT Network connector Video Out Audio Out 100-240 Vac Monitor Bosch Security Systems | 2004-6 DVR1C1161 | Installation Manual | Chapter 2 EN | 11 2.4.3 Single camera The drawing below shows how to connect a single to the DVR. • Connect the monitor to the BNC socket marked...

Installation Instructions
Page 12
...Bosch Security Systems | 2004-6 Press again to start recording. If you can carry out the main operations using the remote control unit. The following ports must be open for the remote software to operate correctly: • TCP port 80:Web Server • TCP port 6666:Commands • TCP ports 1111, 2222, 3333, 4444:Video... data If you are as follows: RECORD: Press to a router or hub, use a crossover CAT5 network cable. DVR1C1161 | Installation Manual | Chapter 2 EN | 12 2.5 Remote control unit The remote ...
...Bosch Security Systems | 2004-6 Press again to start recording. If you can carry out the main operations using the remote control unit. The following ports must be open for the remote software to operate correctly: • TCP port 80:Web Server • TCP port 6666:Commands • TCP ports 1111, 2222, 3333, 4444:Video... data If you are as follows: RECORD: Press to a router or hub, use a crossover CAT5 network cable. DVR1C1161 | Installation Manual | Chapter 2 EN | 12 2.5 Remote control unit The remote ...

Installation Instructions
Page 13
...the quick install mode. DVR1C1161 | Installation Manual | Chapter 3 EN | 13 3 Operation 3.1 Quick Install In the quick install mode you can only be activated in the System Settngs menu. 3.3 Alarm recording The monitor image is full, the DVR stops recording automatically or overwrites from the...; Press PLAY key to pre-capture video for recording images just before an alarm is the same as the recording quality before the alarm occurs, the recording quality in the Alarm record menu. 3.3.1 Pre-alarm recording A 220-image buffer (for alarm recording in the pre-alarm period is triggered...
...the quick install mode. DVR1C1161 | Installation Manual | Chapter 3 EN | 13 3 Operation 3.1 Quick Install In the quick install mode you can only be activated in the System Settngs menu. 3.3 Alarm recording The monitor image is full, the DVR stops recording automatically or overwrites from the...; Press PLAY key to pre-capture video for recording images just before an alarm is the same as the recording quality before the alarm occurs, the recording quality in the Alarm record menu. 3.3.1 Pre-alarm recording A 220-image buffer (for alarm recording in the pre-alarm period is triggered...

Installation Instructions
Page 14
...while in the record mode to lock all the keys on the front panel. (Password must be played back. • If the selection list is full, turn the Jog Dial clockwise to select the next page list. • Press Enter to start playing back. Bosch Security Systems | 2004-6...The Compact Flash copy function is designed for the password. Copied images are stored as a single picture in System Setting Menu to enable this feature.) Press Stop key, the system asks for copying short clips. DVR1C1161 | Installation Manual | Chapter 3 EN | 14 3.5 Search playback Segment Search Playback &#...
...while in the record mode to lock all the keys on the front panel. (Password must be played back. • If the selection list is full, turn the Jog Dial clockwise to select the next page list. • Press Enter to start playing back. Bosch Security Systems | 2004-6...The Compact Flash copy function is designed for the password. Copied images are stored as a single picture in System Setting Menu to enable this feature.) Press Stop key, the system asks for copying short clips. DVR1C1161 | Installation Manual | Chapter 3 EN | 14 3.5 Search playback Segment Search Playback &#...

Installation Instructions
Page 15
...-RESET TYPE: N.O. : Normally Open N.C. : Normally Closed Bosch Security Systems | 2004-6 HRS MAIN MENU > SPEED : Select the record speed from 0.1 to the main menu. OFF : Do not record when alarm occurs. RECORD SPEED: Recording speed for the duration of the recording time available on • The display lights if power is 0.1 IPS. DVR1C1161 | Installation Manual | Chapter 4 EN | 15 4 Menu...
...-RESET TYPE: N.O. : Normally Open N.C. : Normally Closed Bosch Security Systems | 2004-6 HRS MAIN MENU > SPEED : Select the record speed from 0.1 to the main menu. OFF : Do not record when alarm occurs. RECORD SPEED: Recording speed for the duration of the recording time available on • The display lights if power is 0.1 IPS. DVR1C1161 | Installation Manual | Chapter 4 EN | 15 4 Menu...

Installation Instructions
Page 16
... set by setting the start time for the week. Bosch Security Systems | 2004-6 The max. If the alarm occurs in Record/Playback mode. When SPEED FORMAT set by IPS, the recording speed can be set for timer recording. the buzzer sounds when the video signal is 0.1 IPS. Move to an entry and ... can be set from 0.1~30/0.1~25(NTSC/PAL)IPS. STOP time needs to 960HR. DVR1C1161 | Installation Manual | Chapter 4 EN | 16 ALARM DURATION TIME: Alarm recording starts from the beginning of alarm and stops at 23:59:59. TIMER: ON - DISK FULL: ON - TIMER MENU WEEK START STOP...
... set by setting the start time for the week. Bosch Security Systems | 2004-6 The max. If the alarm occurs in Record/Playback mode. When SPEED FORMAT set by IPS, the recording speed can be set for timer recording. the buzzer sounds when the video signal is 0.1 IPS. Move to an entry and ... can be set from 0.1~30/0.1~25(NTSC/PAL)IPS. STOP time needs to 960HR. DVR1C1161 | Installation Manual | Chapter 4 EN | 16 ALARM DURATION TIME: Alarm recording starts from the beginning of alarm and stops at 23:59:59. TIMER: ON - DISK FULL: ON - TIMER MENU WEEK START STOP...

Installation Instructions
Page 17
...to CF card. The system has three different access levels: • SUPER access can view live/playback video and control DVR operation. • GENERAL access can view live video. Bosch Security Systems | 2004-6 WATER MARK POSITION: BOTTOM: Water mark appears at the bottom TOP: Water mark appears... 1 > SETUP USER 2 > SETUP USER 3 > MAIN MENU > IP ADDRESS: Fill in the IP address of the unit in the network system. DVR1C1161 | Installation Manual | Chapter 4 EN | 17 4.7 Archive menu ARCHIVE MENU PICTURE SIZE TIME STAMP TIME STAMP POSITION WATER MARK WATER MARK POSITITON 720 X ...
...to CF card. The system has three different access levels: • SUPER access can view live/playback video and control DVR operation. • GENERAL access can view live video. Bosch Security Systems | 2004-6 WATER MARK POSITION: BOTTOM: Water mark appears at the bottom TOP: Water mark appears... 1 > SETUP USER 2 > SETUP USER 3 > MAIN MENU > IP ADDRESS: Fill in the IP address of the unit in the network system. DVR1C1161 | Installation Manual | Chapter 4 EN | 17 4.7 Archive menu ARCHIVE MENU PICTURE SIZE TIME STAMP TIME STAMP POSITION WATER MARK WATER MARK POSITITON 720 X ...

Installation Instructions
Page 18
...enter the menu. Select Yes or No and then press ENTER. DVR1C1161 | Installation Manual | Chapter 4 EN | 18 4.9 System setting menu SYSTEM SETTING MENU PASSWORD ENABLE PASSWORD NO 555555 VIDEO INPUT RECORD WITH AUDIO PLAY WITH AUDIO 1 PLAY WITH AUDIO 2 MULTIPLEXER FIELD...digits long and can adjust the field code line of the password. The default (13) is connected to open a menu or stop button in MENU mode. If multiplexers do not playback correctly, increase the value. You must enter the password using the following keys: REC : 1 OSD : 2 STOP : 3 PLAY : 4 PAUSE : 5 Bosch Security...
...enter the menu. Select Yes or No and then press ENTER. DVR1C1161 | Installation Manual | Chapter 4 EN | 18 4.9 System setting menu SYSTEM SETTING MENU PASSWORD ENABLE PASSWORD NO 555555 VIDEO INPUT RECORD WITH AUDIO PLAY WITH AUDIO 1 PLAY WITH AUDIO 2 MULTIPLEXER FIELD...digits long and can adjust the field code line of the password. The default (13) is connected to open a menu or stop button in MENU mode. If multiplexers do not playback correctly, increase the value. You must enter the password using the following keys: REC : 1 OSD : 2 STOP : 3 PLAY : 4 PAUSE : 5 Bosch Security...

Installation Instructions
Page 19
...bottom of 2 seconds per camera image. recording in the DVR Network Menu. Bosch Security Systems | 2004-6 To view live images when the recorder is in the current mode. The DVR Login page appears on the recorder itself. It is not accessible in Record (e.g. If an icon is shaded, it...Playback controls are set in 0.5 IPS gives an update of the screen is for password and then click on the selected recording speed when the unit is in playback. DVR1C1161 | Installation Manual | Chapter 5 EN | 19 5 View via Internet/Intranet 5.1 Login Open your internet browser and ...
...bottom of 2 seconds per camera image. recording in the DVR Network Menu. Bosch Security Systems | 2004-6 To view live images when the recorder is in the current mode. The DVR Login page appears on the recorder itself. It is not accessible in Record (e.g. If an icon is shaded, it...Playback controls are set in 0.5 IPS gives an update of the screen is for password and then click on the selected recording speed when the unit is in playback. DVR1C1161 | Installation Manual | Chapter 5 EN | 19 5 View via Internet/Intranet 5.1 Login Open your internet browser and ...

Installation Instructions
Page 20
... ways to play the selected video. Bosch Security Systems | 2004-6 An item shown in the view mode. 5.2.3 Playback mode icons Select the PLAY icon to switch to the playback mode. • STOP: Press this icon to stop playback and recording on the DVR remotely. •...video display. • PLAY REV. : Reverse video display. • STEP Forward the video display. • STEP Backward the video display. • PAUSE: Press this icon to pause the video display. • CONTROL: Press this icon to switch to direct remote control mode (only allowed with access level SUPER). DVR1C1161...
... ways to play the selected video. Bosch Security Systems | 2004-6 An item shown in the view mode. 5.2.3 Playback mode icons Select the PLAY icon to switch to the playback mode. • STOP: Press this icon to stop playback and recording on the DVR remotely. •...video display. • PLAY REV. : Reverse video display. • STEP Forward the video display. • STEP Backward the video display. • PAUSE: Press this icon to pause the video display. • CONTROL: Press this icon to switch to direct remote control mode (only allowed with access level SUPER). DVR1C1161...

Installation Instructions
Page 21
... A computer or a terminal can be used to the 30 keypads in front panel K01 Start Recording REC K03 Stop Recording and STOP Playing back K04 Playing back PLAY K05 Pause the playback PAUSE picture K06 Search playback ...SEARCH K00 Copy picture into COPY CF card K02 On screen display DISPLAY K07 Confirm the selection ENTER K08 Enter Setting Menu MENU K09- DVR1C1161...Rewind the still image JOG-REW K24 Advance the still image JOG-FF Bosch Security Systems | 2004-6
... A computer or a terminal can be used to the 30 keypads in front panel K01 Start Recording REC K03 Stop Recording and STOP Playing back K04 Playing back PLAY K05 Pause the playback PAUSE picture K06 Search playback ...SEARCH K00 Copy picture into COPY CF card K02 On screen display DISPLAY K07 Confirm the selection ENTER K08 Enter Setting Menu MENU K09- DVR1C1161...Rewind the still image JOG-REW K24 Advance the still image JOG-FF Bosch Security Systems | 2004-6

Installation Instructions
Page 22
...-GB hard disk. DVR1C1161 | Installation Manual | Chapter 6 6.2 Recording time Approximate recording times in the above tables significantly. This can reduce the recording times, especially for the lower recording rates, given in hours without audio when recording with typical image-low noise level) When audio is recorded you must calculate an... approximate file size of 18KB (PAL) or 21.6KB (NTSC) per second of audio. EN | 22 Superior (40KB) 22 44 90 130 220 530 710 1100 2200 5600 11100 Superior (40KB) 19 37 56 110 220 560 740 1100 2200 5600 11100 Bosch Security...
...-GB hard disk. DVR1C1161 | Installation Manual | Chapter 6 6.2 Recording time Approximate recording times in the above tables significantly. This can reduce the recording times, especially for the lower recording rates, given in hours without audio when recording with typical image-low noise level) When audio is recorded you must calculate an... approximate file size of 18KB (PAL) or 21.6KB (NTSC) per second of audio. EN | 22 Superior (40KB) 22 44 90 130 220 530 710 1100 2200 5600 11100 Superior (40KB) 19 37 56 110 220 560 740 1100 2200 5600 11100 Bosch Security...