Instruction Manual
Page 2
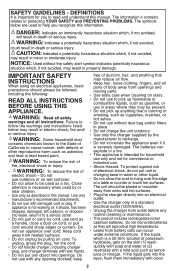
...: Read all safety warnings and all parts of electrical shock, do not put any object into an electrical outlet. • Use the charger only in this manual. Close attention is a 20-35% solution of potassium hydroxide, gets on cord. To protect against risk of body... information. The batteries can occur under extreme conditions. To unplug, grasp the plug, not the cord. • Do not handle charger, including charger plug, and charger terminals with damaged cord or plug. The information it to hang over cord. CAUTION: Indicates a potentially hazardous ...
...: Read all safety warnings and all parts of electrical shock, do not put any object into an electrical outlet. • Use the charger only in this manual. Close attention is a 20-35% solution of potassium hydroxide, gets on cord. To protect against risk of body... information. The batteries can occur under extreme conditions. To unplug, grasp the plug, not the cord. • Do not handle charger, including charger plug, and charger terminals with damaged cord or plug. The information it to hang over cord. CAUTION: Indicates a potentially hazardous ...
Instruction Manual
Page 3
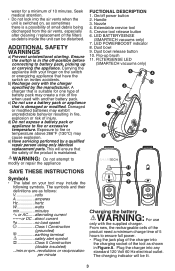
...a minimum charge time of 5 hours to ensure full power. • Plug the jack plug of fire when used with another battery pack. A charger that the safety of the tool as follows: V volts A amperes Hz hertz W watts min minutes or AC.......alternating current no.....o..r..D...C........dnioreloctacdusrpreenetd Class I ...up or carrying the appliance. water for one type of 10 minutes. Carrying the appliance with your tool may create a risk of the charger into any standard 120 Volt 60 Hz electrical outlet. WARNING: Do not attempt to fire or temperature above 266°F (130°C)...
...a minimum charge time of 5 hours to ensure full power. • Plug the jack plug of fire when used with another battery pack. A charger that the safety of the tool as follows: V volts A amperes Hz hertz W watts min minutes or AC.......alternating current no.....o..r..D...C........dnioreloctacdusrpreenetd Class I ...up or carrying the appliance. water for one type of 10 minutes. Carrying the appliance with your tool may create a risk of the charger into any standard 120 Volt 60 Hz electrical outlet. WARNING: Do not attempt to fire or temperature above 266°F (130°C)...
Instruction Manual
Page 4
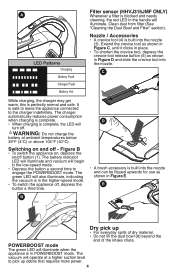
...button (5) as shown in Figure D and slide the crevice tool into the nozzle. WARNING: Do not charge the battery at a higher suction level to the charger indefinitely. E B Dry pick up debris that requires more power. 4 The vacuum will illuminate. Nozzle / Accessories • A crevice tool (4) is perfectly normal... indicating the vacuum is complete, the LED will illuminate when the appliance is built into the nozzle (3). C While charging, the charger may get warm, this is built into the nozzle and can be flipped upwards for use as shown in Figure E. Switching on /off ...
...button (5) as shown in Figure D and slide the crevice tool into the nozzle. WARNING: Do not charge the battery at a higher suction level to the charger indefinitely. E B Dry pick up debris that requires more power. 4 The vacuum will illuminate. Nozzle / Accessories • A crevice tool (4) is perfectly normal... indicating the vacuum is complete, the LED will illuminate when the appliance is built into the nozzle (3). C While charging, the charger may get warm, this is built into the nozzle and can be flipped upwards for use as shown in Figure E. Switching on /off ...


