Operation Manual
Page 7
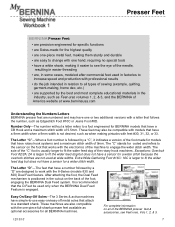
...the wider stitch width. The Letter "C"-When a foot number is positioned in the industry, such as optional accessories for BERNINA models that have simple-to-use easy-on all BERNINA machines. After attaching the foot, the Dual Feed mechanism is followed by a "D" are designed to fit the ... for a wider stitch because the overlock stitches are not used at www.berninausa.com Understanding the Numbers/Letters BERNINA presser feet are , in relation to all types of sewing (example, quilting, garment-making pintucks with the one or two additional versions with the 8-Series (models 830...
...the wider stitch width. The Letter "C"-When a foot number is positioned in the industry, such as optional accessories for BERNINA models that have simple-to-use easy-on all BERNINA machines. After attaching the foot, the Dual Feed mechanism is followed by a "D" are designed to fit the ... for a wider stitch because the overlock stitches are not used at www.berninausa.com Understanding the Numbers/Letters BERNINA presser feet are , in relation to all types of sewing (example, quilting, garment-making pintucks with the one or two additional versions with the 8-Series (models 830...
Operation Manual
Page 11
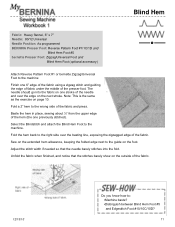
...of the needle and over the basting line, exposing the zigzagged edge of the presser foot. Fold a 2" hem to the machine. Sew on the extended hem allowance, keeping the folded edge next to the guide on the next stroke. Baste the hem in place...: Heavy flannel, 6" x 7" Needle: 80/12 Universal Needle Position: As programmed BERNINA Presser Foot: Reverse Pattern Foot #1/1C/1D and Blind Hem Foot #5 bernette Presser Foot: Zigzag/Universal Foot and Blind Hem Foot (optional accessory) Attach Reverse Pattern Foot #1 or bernette Zigzag/Universal Foot to the machine Finish one previously stitched).
...of the needle and over the basting line, exposing the zigzagged edge of the presser foot. Fold a 2" hem to the machine. Sew on the extended hem allowance, keeping the folded edge next to the guide on the next stroke. Baste the hem in place...: Heavy flannel, 6" x 7" Needle: 80/12 Universal Needle Position: As programmed BERNINA Presser Foot: Reverse Pattern Foot #1/1C/1D and Blind Hem Foot #5 bernette Presser Foot: Zigzag/Universal Foot and Blind Hem Foot (optional accessory) Attach Reverse Pattern Foot #1 or bernette Zigzag/Universal Foot to the machine Finish one previously stitched).
Operation Manual
Page 12
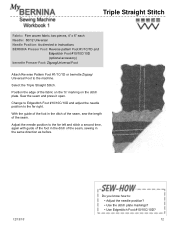
... position to the machine. Triple Straight Stitch Fabric: Firm woven fabric, two pieces, 4" x 6" each Needle: 80/12 Universal Needle Position: As directed in instructions BERNINA Presser Foot: Reverse pattern Foot #1/1C/1D and Edgestitch Foot #10/10C/10D (optional accessory) bernette Presser Foot: Zigzag.../Universal Foot Attach Reverse Pattern Foot #1/1C/1D or bernette Zigzag/ Universal Foot to the far right. Sew the seam and press ...
... position to the machine. Triple Straight Stitch Fabric: Firm woven fabric, two pieces, 4" x 6" each Needle: 80/12 Universal Needle Position: As directed in instructions BERNINA Presser Foot: Reverse pattern Foot #1/1C/1D and Edgestitch Foot #10/10C/10D (optional accessory) bernette Presser Foot: Zigzag.../Universal Foot Attach Reverse Pattern Foot #1/1C/1D or bernette Zigzag/ Universal Foot to the far right. Sew the seam and press ...
Operation Manual
Page 15
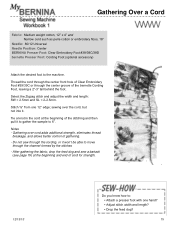
...Position: Center BERNINA Presser Foot: Clear Embroidery Foot #39/39C/39D bernette Presser Foot: Cording Foot (optional accessory) Attach the desired foot to move through the center groove of gathering. - sewing over cord ...adds additional strength, eliminates thread breakage, and allows better control of the bernette Cording Foot, leaving a 2"-3" tail behind the foot. Do not sew through the cording, or it won't be able to the machine...
...Position: Center BERNINA Presser Foot: Clear Embroidery Foot #39/39C/39D bernette Presser Foot: Cording Foot (optional accessory) Attach the desired foot to move through the center groove of gathering. - sewing over cord ...adds additional strength, eliminates thread breakage, and allows better control of the bernette Cording Foot, leaving a 2"-3" tail behind the foot. Do not sew through the cording, or it won't be able to the machine...


