Owners Manual
Page 2
... Control and Power Cord - Owner's manual pg.___ • Light Switch - Owner's manual pg.___ • Cover/Chain Stitch Foot - Right Needle (Green) - Owner's manual pg.____ • Assembling thread stand - MASTERING YOUR BERNINA® BERNINA® 009DCC SECTION A Cover & Chain Stitch Machine Set-Up • Identifying the serger parts - Owner's manual pg.___ • Power Switch - Owner's manual pg.___ • Change...
... Control and Power Cord - Owner's manual pg.___ • Light Switch - Owner's manual pg.___ • Cover/Chain Stitch Foot - Right Needle (Green) - Owner's manual pg.____ • Assembling thread stand - MASTERING YOUR BERNINA® BERNINA® 009DCC SECTION A Cover & Chain Stitch Machine Set-Up • Identifying the serger parts - Owner's manual pg.___ • Power Switch - Owner's manual pg.___ • Change...
Owners Manual
Page 3
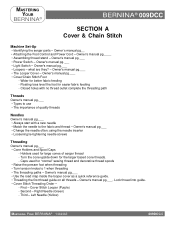
MASTERING YOUR BERNINA® BERNINA® 009DCC • Chain Stitch Threading Order - - First - Left Needle (Yellow) Test Sewing Owner's manual pg.___ • Always start and end stitching on fabric. • Lift the entire presser foot by the handle at the thread guide support. • ...
MASTERING YOUR BERNINA® BERNINA® 009DCC • Chain Stitch Threading Order - - First - Left Needle (Yellow) Test Sewing Owner's manual pg.___ • Always start and end stitching on fabric. • Lift the entire presser foot by the handle at the thread guide support. • ...
Owners Manual
Page 4
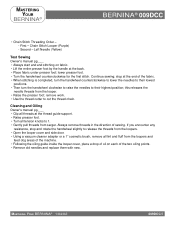
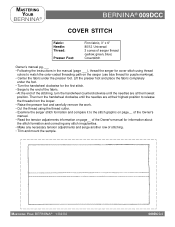
... place the fabric completely under the presser foot. MASTERING YOUR BERNINA® BERNINA® 009DCC COVER STITCH Fabric: Needle: Thread: Presser Foot: Firm fabric, 3" x 6" 80/12 Universal 3 cones of serger thread (yellow, green, blue) Coverstitch Owner's manual pg.___ • Following the instructions in the manual (page ___), thread the serger for cover stitch using the...
... place the fabric completely under the presser foot. MASTERING YOUR BERNINA® BERNINA® 009DCC COVER STITCH Fabric: Needle: Thread: Presser Foot: Firm fabric, 3" x 6" 80/12 Universal 3 cones of serger thread (yellow, green, blue) Coverstitch Owner's manual pg.___ • Following the instructions in the manual (page ___), thread the serger for cover stitch using the...
Owners Manual
Page 5
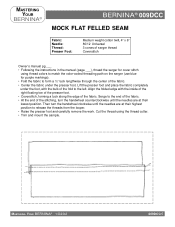
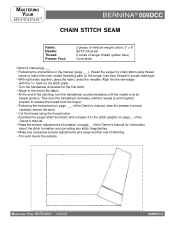
MASTERING YOUR BERNINA® 1/04/02 009DCC/5 Serge to the end of the fabric. • At the end of the stitching, turn the handwheel clockwise until the needles are at their highest ... place the fabric completely under the presser foot. MASTERING YOUR BERNINA® BERNINA® 009DCC MOCK FLAT FELLED SEAM Fabric: Needle: Thread: Presser Foot: Medium weight cotton twill, 4" x 6" 80/12 Universal 3 cones of serger thread Coverstitch Owner's manual pg.___ • Following the instructions in the manual (page ___), thread the serger for purple markings). •...
MASTERING YOUR BERNINA® 1/04/02 009DCC/5 Serge to the end of the fabric. • At the end of the stitching, turn the handwheel clockwise until the needles are at their highest ... place the fabric completely under the presser foot. MASTERING YOUR BERNINA® BERNINA® 009DCC MOCK FLAT FELLED SEAM Fabric: Needle: Thread: Presser Foot: Medium weight cotton twill, 4" x 6" 80/12 Universal 3 cones of serger thread Coverstitch Owner's manual pg.___ • Following the instructions in the manual (page ___), thread the serger for purple markings). •...
Owners Manual
Page 6
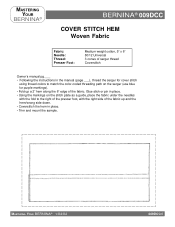
... thread Coverstitch Owner's manual pg.___ • Following the instructions in the manual (page ___), thread the serger for purple markings). • Fold up and the hem/wrong side down. • Coverstitch the hem in place. • Trim and mount the sample. MASTERING YOUR BERNINA® 1/04/02 009DCC/6 MASTERING YOUR BERNINA® BERNINA® 009DCC COVER STITCH...
... thread Coverstitch Owner's manual pg.___ • Following the instructions in the manual (page ___), thread the serger for purple markings). • Fold up and the hem/wrong side down. • Coverstitch the hem in place. • Trim and mount the sample. MASTERING YOUR BERNINA® 1/04/02 009DCC/6 MASTERING YOUR BERNINA® BERNINA® 009DCC COVER STITCH...
Owners Manual
Page 7
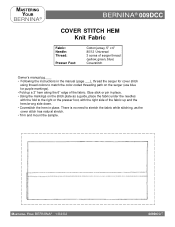
...; Coverstitch the hem in the manual (page ___), thread the serger for cover stitch using thread colors to stretch the fabric while stitching, as the cover stitch has natural stretch. • Trim and mount the sample. MASTERING YOUR BERNINA® 1/04/02 009DCC/7 MASTERING YOUR BERNINA® BERNINA® 009DCC COVER STITCH HEM Knit Fabric Fabric...-coded threading path on the serger (use blue for purple markings). • Fold up a 2" hem along the 6" edge of serger thread (yellow, green, blue) Coverstitch Owner's manual pg.___ • Following the instructions in place.
...; Coverstitch the hem in the manual (page ___), thread the serger for cover stitch using thread colors to stretch the fabric while stitching, as the cover stitch has natural stretch. • Trim and mount the sample. MASTERING YOUR BERNINA® 1/04/02 009DCC/7 MASTERING YOUR BERNINA® BERNINA® 009DCC COVER STITCH HEM Knit Fabric Fabric...-coded threading path on the serger (use blue for purple markings). • Fold up a 2" hem along the 6" edge of serger thread (yellow, green, blue) Coverstitch Owner's manual pg.___ • Following the instructions in place.
Owners Manual
Page 8
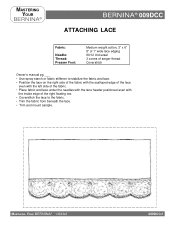
MASTERING YOUR BERNINA® 1/04/02 009DCC/8 MASTERING YOUR BERNINA® BERNINA® 009DCC ATTACHING LACE Fabric: Needle: Thread: Presser Foot: Medium weight cotton, 3" x 6" 8" of 1" wide lace edging 80/12 Universal 3 cones of serger thread Coverstitch Owner's manual pg.___ • Use spray starch or fabric stiffener to stabilize the fabric and lace. • Position the lace on...
MASTERING YOUR BERNINA® 1/04/02 009DCC/8 MASTERING YOUR BERNINA® BERNINA® 009DCC ATTACHING LACE Fabric: Needle: Thread: Presser Foot: Medium weight cotton, 3" x 6" 8" of 1" wide lace edging 80/12 Universal 3 cones of serger thread Coverstitch Owner's manual pg.___ • Use spray starch or fabric stiffener to stabilize the fabric and lace. • Position the lace on...
Owners Manual
Page 9
... the serger stitch formation and compare it to match the color-coded threading path on page__ of the Owner's manual for purple markings). • With right sides together, place the fabric under the needles. MASTERING YOUR BERNINA® 1/04/02 009DCC/9 Then turn the handwheel counterclockwise until the needle is at its lowest position.
... the serger stitch formation and compare it to match the color-coded threading path on page__ of the Owner's manual for purple markings). • With right sides together, place the fabric under the needles. MASTERING YOUR BERNINA® 1/04/02 009DCC/9 Then turn the handwheel counterclockwise until the needle is at its lowest position.
Owners Manual
Page 10
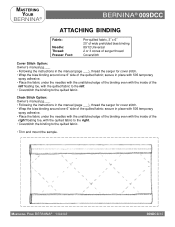
... and mount the sample. MASTERING YOUR BERNINA® BERNINA® 009DCC ATTACHING BINDING Fabric: Needle: Thread: Presser Foot: Pre-quilted fabric, 3" x 6" 20" of wide prefolded bias binding 80/12 Universal 2 or 3 cones of serger thread Coverstitch Cover Stitch Option: Owner's manual pg.___ • Following the instructions in the manual (page ___), thread the serger for...
... and mount the sample. MASTERING YOUR BERNINA® BERNINA® 009DCC ATTACHING BINDING Fabric: Needle: Thread: Presser Foot: Pre-quilted fabric, 3" x 6" 20" of wide prefolded bias binding 80/12 Universal 2 or 3 cones of serger thread Coverstitch Cover Stitch Option: Owner's manual pg.___ • Following the instructions in the manual (page ___), thread the serger for...
Owners Manual
Page 11
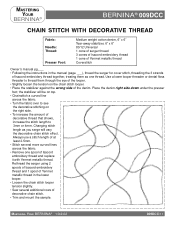
... the sample. MASTERING YOUR BERNINA® 1/04/02 009DCC/11 MASTERING YOUR BERNINA® BERNINA® 009DCC CHAIN STITCH WITH DECORATIVE THREAD Fabric: Needle: Thread: Presser Foot: Medium weight cotton denim, 6" x 6" Tear-away stabilizer, 6" x 6" 80/12 Universal 1 cone of serger thread 3 cones of Isacord embroidery thread 1 cone of Yenmet metallic thread Coverstitch Owner's manual pg.___ •...
... the sample. MASTERING YOUR BERNINA® 1/04/02 009DCC/11 MASTERING YOUR BERNINA® BERNINA® 009DCC CHAIN STITCH WITH DECORATIVE THREAD Fabric: Needle: Thread: Presser Foot: Medium weight cotton denim, 6" x 6" Tear-away stabilizer, 6" x 6" 80/12 Universal 1 cone of serger thread 3 cones of Isacord embroidery thread 1 cone of Yenmet metallic thread Coverstitch Owner's manual pg.___ •...


