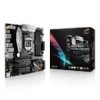
STRIX Z270G GAMING Users manual ENGLISH
Page 20
LGA1151 CPU socket 3. System panel connector (20-3 pin PANEL) 10. Front panel audio connector (10-1 pin AAFP) 17. DDR4 DIMM slots 5. Intel® Serial ATA 6 Gb/s ...
STRIX Z270G GAMING Users manual ENGLISH
Page 21
... with a surface mount LGA1151 socket designed for the 7th / 6th Generation Intel® Core™ i7 / Intel® Core™ i5 / Intel® Core™ i3, Pentium®, and Celeron® processors. • Ensure that all power cables are not bent. ROG STRIX Z270G GAMING 1-5 Chapter 1 1.1.3... Central Processing Unit (CPU) The motherboard comes with the cap on the socket and the socket contacts are unplugged before installing the CPU. • Upon purchase of the PnP cap. ASUS will shoulder the cost of ...
STRIX Z270G GAMING Users manual ENGLISH
Page 41
DO NOT install a CPU designed for LGA1151 socket only. Chapter 2 Top of CPU Bottom of CPU Bottom of CPU ROG STRIX Z270G GAMING 2-3 2.1.2 CPU installation Ensure that you install the correct CPU designed for LGA1155 and LGA1156 sockets on the LGA1151 socket.
STRIX Z270G GAMING Users manual ENGLISH
Page 42
... Tool. • Always firmly hold both sides of CPU Chapter 2 • The CPU Installation Tool is only compatible on ASUS motherboards with a Intel® LGA1151 socket. • Ensure that the CPU is firmly clicked into place before installing it onto the CPU socket on the motherboard..... • Ensure to use a soft stable surface when installing the CPU to the CPU Installation Tool to prevent CPU damage. • ASUS will not cover damages resulting from incorrect CPU installation/removal, incorrect CPU orientation/placement, or other damages resulting from negligence by the user. 2-4...