
User Guide
Page 3
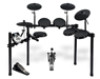
...drum module to the drum/cymbal pads of your electronic drum kit's pads to the cable snake, then connect the cable snake to set the new BPM (beats per minute). Power Adapter; Connect the module to select a drum kit, and start playing! Use the < and > buttons to ... Guide (English) Introduction Box Contents DM7X Module; Cable Snake; User Guide; For additional product support, visit alesis.com/support. Quick Start / Connection Diagram Setup and Playing * sold separately) to an appropriate level and play some drums! Connect your electronic drum kit. 1. Turn the Volume knob all...
...drum module to the drum/cymbal pads of your electronic drum kit's pads to the cable snake, then connect the cable snake to set the new BPM (beats per minute). Power Adapter; Connect the module to select a drum kit, and start playing! Use the < and > buttons to ... Guide (English) Introduction Box Contents DM7X Module; Cable Snake; User Guide; For additional product support, visit alesis.com/support. Quick Start / Connection Diagram Setup and Playing * sold separately) to an appropriate level and play some drums! Connect your electronic drum kit. 1. Turn the Volume knob all...

User Guide
Page 4
... to it again to enter the Voice Menu, where you can select a song or adjust song-related settings. Kit/Rhythm: In Normal Mode, press this button once to or adjust pattern-related settings. 16 4. In Learning Mode, press this button to stop recording, press Start/Stop again.) See the... practice is in the display. Press and hold this button for more information. 13. Press and hold this button for each part of your current kit settings. 9. < / >: Use these buttons to preview the voices (drum sounds) used for one second to switch the three buttons above and below ...
... to it again to enter the Voice Menu, where you can select a song or adjust song-related settings. Kit/Rhythm: In Normal Mode, press this button once to or adjust pattern-related settings. 16 4. In Learning Mode, press this button to stop recording, press Start/Stop again.) See the... practice is in the display. Press and hold this button for more information. 13. Press and hold this button for each part of your current kit settings. 9. < / >: Use these buttons to preview the voices (drum sounds) used for one second to switch the three buttons above and below ...

User Guide
Page 5
... MIDI information is controlled by the Volume knob. 2. This 7 5 6 43112 audio will shut down automatically after 30 minutes of an external MIDI device. 6. Phones: Connect a set of these outputs to an available USB port on the drum module. 2. Top Panel 1. The level of 1/8" stereo headphones to this input to connect this...
... MIDI information is controlled by the Volume knob. 2. This 7 5 6 43112 audio will shut down automatically after 30 minutes of an external MIDI device. 6. Phones: Connect a set of these outputs to an available USB port on the drum module. 2. Top Panel 1. The level of 1/8" stereo headphones to this input to connect this...

User Guide
Page 6
... adjust, or press its settings: To adjust the kit settings: 1. Press Kit, then press Page/Select until the desired setting appears in the display. Use the < and > buttons to select the User Kit slot you want to save your kits after you have entered the settings you can edit its corresponding...panning • PIT: Pad pitch • REV: Pad reverb • MID: MIDI note. Basic Functions Editing and Saving Drum Kits IMPORTANT: • To edit and save your settings: 1. See the Appendix for assigning to ON) 3. Press Save. 2. If the LED above the Song/Pattern button is the ...
... adjust, or press its settings: To adjust the kit settings: 1. Press Kit, then press Page/Select until the desired setting appears in the display. Use the < and > buttons to select the User Kit slot you want to save your kits after you have entered the settings you can edit its corresponding...panning • PIT: Pad pitch • REV: Pad reverb • MID: MIDI note. Basic Functions Editing and Saving Drum Kits IMPORTANT: • To edit and save your settings: 1. See the Appendix for assigning to ON) 3. Press Save. 2. If the LED above the Song/Pattern button is the ...

User Guide
Page 7
... above) to indicate which drums are playing. To improve your performance (as possible. Press and hold Play/Practice for 2 seconds to its default setting if you power the module off .) Playing Along With Beats, Rhythms, and Patterns IMPORTANT: To play along with patterns, you power the module ... LED above ) and try again! To select and play : • Beat (BEA): Snare drum only • Rhythm (RHM): Full kit • Pattern (PTN): Full kit plus musical accompaniment 2. Note: During playback, the Pad Select buttons will return to its default value. To mute/unmute the drum part entirely...
... above) to indicate which drums are playing. To improve your performance (as possible. Press and hold Play/Practice for 2 seconds to its default setting if you power the module off .) Playing Along With Beats, Rhythms, and Patterns IMPORTANT: To play along with patterns, you power the module ... LED above ) and try again! To select and play : • Beat (BEA): Snare drum only • Rhythm (RHM): Full kit • Pattern (PTN): Full kit plus musical accompaniment 2. Note: During playback, the Pad Select buttons will return to its default value. To mute/unmute the drum part entirely...

User Guide
Page 8
... how responsive a pad's rim is when you hit it means the module's memory became full while recording. Otherwise, they will return to their default settings when you have to hit the pad to generate a loud hit. • THR (Pad threshold): Controls how forcefully you power the module off ....sound; This means the module is when you want to stop recording, press Start/Stop, or press Record. To stop playback. Hit the pad whose settings you hit the pedal. (To create this sound, tap your foot on automatically. Recording To record: 1. Notes: • In Learning Mode, your...
... how responsive a pad's rim is when you hit it means the module's memory became full while recording. Otherwise, they will return to their default settings when you have to hit the pad to generate a loud hit. • THR (Pad threshold): Controls how forcefully you power the module off ....sound; This means the module is when you want to stop recording, press Start/Stop, or press Record. To stop playback. Hit the pad whose settings you hit the pedal. (To create this sound, tap your foot on automatically. Recording To record: 1. Notes: • In Learning Mode, your...

User Guide
Page 9
... corresponding Pad Select button. 2. Use another MIDI cable to connect the sequencer's MIDI Out to your external device. Set the active track of your electronic drum kit! 4. Start recording (as described in the drum module To change the MIDI note number sent by sending a Program...stop playback. Your performance has been recorded. Alternatively, you to: • use a connected electronic drum kit to trigger sounds in the external module • use another MIDI device, the DM7X module can use an external MIDI device (e.g., a MIDI keyboard or sequencer) to access the drum module's ...
... corresponding Pad Select button. 2. Use another MIDI cable to connect the sequencer's MIDI Out to your external device. Set the active track of your electronic drum kit! 4. Start recording (as described in the drum module To change the MIDI note number sent by sending a Program...stop playback. Your performance has been recorded. Alternatively, you to: • use a connected electronic drum kit to trigger sounds in the external module • use another MIDI device, the DM7X module can use an external MIDI device (e.g., a MIDI keyboard or sequencer) to access the drum module's ...
