User Guide
Page 5
... Contents Getting Started 1 What is the ALL-IN-WONDER family 1 System Requirements 3 Other Sources of Information 4 Online Help 4 ATI Multimedia Center Guide 4 Getting Additional Accessories 4 Warranty Information 5 Product Warranty Registration 5 Customer Service 5 Hardware Warranty Service Statement 6...Do This First 9 Uninstalling Old Graphics Card Software 10 Installing Your ALL-IN-WONDER Card 11 Power connection requirements 12 Windows® New Hardware Found 14 Installing the CATALYST™ Software Suite 14 Troubleshooting Tips 16 Multiple Display Support 16 Increasing...
... Contents Getting Started 1 What is the ALL-IN-WONDER family 1 System Requirements 3 Other Sources of Information 4 Online Help 4 ATI Multimedia Center Guide 4 Getting Additional Accessories 4 Warranty Information 5 Product Warranty Registration 5 Customer Service 5 Hardware Warranty Service Statement 6...Do This First 9 Uninstalling Old Graphics Card Software 10 Installing Your ALL-IN-WONDER Card 11 Power connection requirements 12 Windows® New Hardware Found 14 Installing the CATALYST™ Software Suite 14 Troubleshooting Tips 16 Multiple Display Support 16 Increasing...
User Guide
Page 6
...Windows® with television display enabled 29 Using a monitor vs. using the television display 29 Adjusting the monitor display 30 TV reception tips 30 Viewing text on television 30 Reducing edge distortion 31 Changing display configurations 32 Using games and applications 32 MULTVIEW 33 MULTVIEW audio requirements 34 EAZYLOOK 34 ATI... HDTV Component Video Adapter 35 System Requirements 36 Setting up your ATI HDTV Component Video Adapter 36 Installing your ATI HDTV Component Video Adapter 37 Using your HDTV Component Video Adapter 39 Windows® Control ...
...Windows® with television display enabled 29 Using a monitor vs. using the television display 29 Adjusting the monitor display 30 TV reception tips 30 Viewing text on television 30 Reducing edge distortion 31 Changing display configurations 32 Using games and applications 32 MULTVIEW 33 MULTVIEW audio requirements 34 EAZYLOOK 34 ATI... HDTV Component Video Adapter 35 System Requirements 36 Setting up your ATI HDTV Component Video Adapter 36 Installing your ATI HDTV Component Video Adapter 37 Using your HDTV Component Video Adapter 39 Windows® Control ...

User Guide
Page 7
...of cards deliver highperformance 3D and 2D graphics, as well as never before. Play games, watch TV or videos, listen to audio CDs, explore the Internet, and work in Windows® as advanced multimedia features. Their features will take your television experience. This guide provides all... the information you view TV, graphics, and video on your PC, TV and video! TV-ON-DEMAND™ and TV Listings enhance your PC's graphics and ...
...of cards deliver highperformance 3D and 2D graphics, as well as never before. Play games, watch TV or videos, listen to audio CDs, explore the Internet, and work in Windows® as advanced multimedia features. Their features will take your television experience. This guide provides all... the information you view TV, graphics, and video on your PC, TV and video! TV-ON-DEMAND™ and TV Listings enhance your PC's graphics and ...
User Guide
Page 9
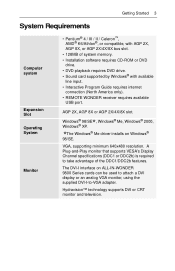
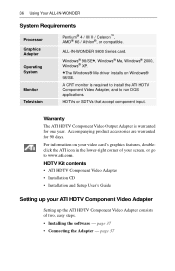
... is required to -VGA adapter. The DVI-I interface on Windows® 98/SE. AGP 2X, AGP 8X or AGP 2X/4X/8X slot. * Windows® 98/SE , Windows® Me, Windows® 2000, Windows® XP. *The Windows® Me driver ...VGA, supporting minimum 640x480 resolution. Hydravision™ technology supports DVI or CRT monitor and television. Getting Started 3 System Requirements Computer system Expansion Slot Operating System Monitor • Pentium® 4 / III / II / Celeron™, AMD® K6/Athlon®, or compatible, with AGP 2X, AGP 8X, or AGP 2X/4X/8X bus slot. • 128MB...
... is required to -VGA adapter. The DVI-I interface on Windows® 98/SE. AGP 2X, AGP 8X or AGP 2X/4X/8X slot. * Windows® 98/SE , Windows® Me, Windows® 2000, Windows® XP. *The Windows® Me driver ...VGA, supporting minimum 640x480 resolution. Hydravision™ technology supports DVI or CRT monitor and television. Getting Started 3 System Requirements Computer system Expansion Slot Operating System Monitor • Pentium® 4 / III / II / Celeron™, AMD® K6/Athlon®, or compatible, with AGP 2X, AGP 8X, or AGP 2X/4X/8X bus slot. • 128MB...
User Guide
Page 10
... of Information If you need additional help available under Windows® 98, Windows® Millennium Edition, Windows® 2000, or Windows® XP for more information about using ATI's enhanced drivers. For information on your CD-ROM drive, then click User Guide. ATI Multimedia Center Guide The online ATI Multimedia Center User's Guide explains how to the...
... of Information If you need additional help available under Windows® 98, Windows® Millennium Edition, Windows® 2000, or Windows® XP for more information about using ATI's enhanced drivers. For information on your CD-ROM drive, then click User Guide. ATI Multimedia Center Guide The online ATI Multimedia Center User's Guide explains how to the...
User Guide
Page 15
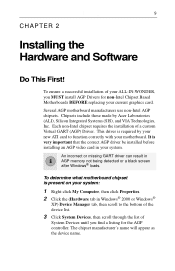
...or Windows® XP) Device Manager tab, then scroll to function correctly with your system. Chipsets include those made by your new ATI card to the bottom of the device list. 3 Click System Devices, then scroll through the list of System Devices until you MUST install AGP Drivers ...chipset is present on your system: 1 Right-click My Computer, then click Properties. 2 Click the (Hardware tab in i AGP memory not being detected or a black screen after Windows® loads. The chipset manufacturer's name will appear as the device name. To ensure a successful installation of a custom Virtual ...
...or Windows® XP) Device Manager tab, then scroll to function correctly with your system. Chipsets include those made by your new ATI card to the bottom of the device list. 3 Click System Devices, then scroll through the list of System Devices until you MUST install AGP Drivers ...chipset is present on your system: 1 Right-click My Computer, then click Properties. 2 Click the (Hardware tab in i AGP memory not being detected or a black screen after Windows® loads. The chipset manufacturer's name will appear as the device name. To ensure a successful installation of a custom Virtual ...
User Guide
Page 20
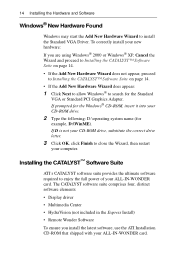
...Windows® CD-ROM, insert it into your ALL-IN-WONDER card. To correctly install your new hardware: If you install the latest software, use the ATI Installation CD-ROM that shipped with your CD-ROM drive. 2 Type the following: D:\operating system name (for the Standard VGA... or Standard PCI Graphics Adapter. Installing the CATALYST™ Software Suite ATI's CATALYST software suite provides the ultimate software required to search for example, D:\WinME). The CATALYST software suite...
...Windows® CD-ROM, insert it into your ALL-IN-WONDER card. To correctly install your new hardware: If you install the latest software, use the ATI Installation CD-ROM that shipped with your CD-ROM drive. 2 Type the following: D:\operating system name (for the Standard VGA... or Standard PCI Graphics Adapter. Installing the CATALYST™ Software Suite ATI's CATALYST software suite provides the ultimate software required to search for example, D:\WinME). The CATALYST software suite...
User Guide
Page 21
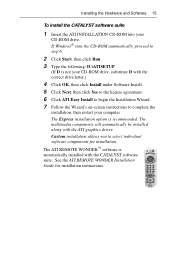
...drive letter.) 4 Click OK, then click Install under Software Install. 5 Click Next, then click Yes to the license agreement. 6 Click ATI Easy Install to begin the Installation Wizard. 7 Follow the Wizard's on-screen instructions to complete the installation, then restart your computer The ... Installing the Hardware and Software 15 To install the CATALYST software suite 1 Insert the ATI INSTALLATION CD-ROM into your CD-ROM drive, substitute D with the CATALYST software suite. If Windows® runs the CD-ROM automatically, proceed to select individual software components for installation ...
...drive letter.) 4 Click OK, then click Install under Software Install. 5 Click Next, then click Yes to the license agreement. 6 Click ATI Easy Install to begin the Installation Wizard. 7 Follow the Wizard's on-screen instructions to complete the installation, then restart your computer The ... Installing the Hardware and Software 15 To install the CATALYST software suite 1 Insert the ATI INSTALLATION CD-ROM into your CD-ROM drive, substitute D with the CATALYST software suite. If Windows® runs the CD-ROM automatically, proceed to select individual software components for installation ...
User Guide
Page 22
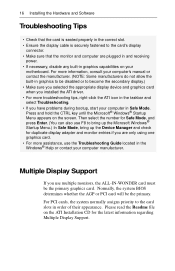
... Guide located in graphics capabilities on your motherboard. Press and hold the CTRL key until the Microsoft® Windows® Startup Menu appears on the ATI Installation CD for the latest information regarding Multiple Display Support. For PCI cards, the system normally assigns priority to...are plugged in and receiving power. • If necessary, disable any built-in the Windows® Help or contact your computer manufacturer. Normally, the system BIOS determines whether the AGP or PCI card will be the primary graphics card. 16 Installing the Hardware and Software ...
... Guide located in graphics capabilities on your motherboard. Press and hold the CTRL key until the Microsoft® Windows® Startup Menu appears on the ATI Installation CD for the latest information regarding Multiple Display Support. For PCI cards, the system normally assigns priority to...are plugged in and receiving power. • If necessary, disable any built-in the Windows® Help or contact your computer manufacturer. Normally, the system BIOS determines whether the AGP or PCI card will be the primary graphics card. 16 Installing the Hardware and Software ...
User Guide
Page 23
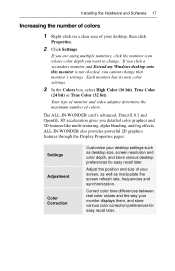
... values and the way your desktop settings such as manipulate the screen refresh rate, frequencies and synchronization. If you click a secondary monitor and Extend my Windows desktop onto this monitor is not checked, you detailed color graphics and 3D features like multi-texturing, alpha blending, and fog effects.
... values and the way your desktop settings such as manipulate the screen refresh rate, frequencies and synchronization. If you click a secondary monitor and Extend my Windows desktop onto this monitor is not checked, you detailed color graphics and 3D features like multi-texturing, alpha blending, and fog effects.
User Guide
Page 24
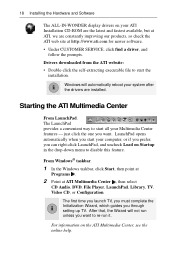
...and Software The ALL-IN-WONDER display drivers on Startup in the drop-down menu to disable this feature. The first time you launch TV, you must complete the i Initialization Wizard, which guides you want to re-run unless you can right-click LaunchPad, and uncheck Load...or if you prefer, you want . LaunchPad opens automatically when you start your ATI Installation CD-ROM are the latest and fastest available, but at ATI, we are installed. i Windows will not run it. Drivers downloaded from the ATI website: • Double-click the self-extracting executable file to start the ...
...and Software The ALL-IN-WONDER display drivers on Startup in the drop-down menu to disable this feature. The first time you launch TV, you must complete the i Initialization Wizard, which guides you want to re-run unless you can right-click LaunchPad, and uncheck Load...or if you prefer, you want . LaunchPad opens automatically when you start your ATI Installation CD-ROM are the latest and fastest available, but at ATI, we are installed. i Windows will not run it. Drivers downloaded from the ATI website: • Double-click the self-extracting executable file to start the ...

User Guide
Page 30
...3 Click the Line-In volume control checkbox, then click OK. 24 Installing the Hardware and Software Windows® Volume Control For correct audio performance, your Taskbar, do the following: • In the Windows taskbar, click Start, point to cancel muting. To display the Line Input setting in the... Windows Volume Control panel: 1 Right-click the speaker icon in the Taskbar (usually in your sound card...
...3 Click the Line-In volume control checkbox, then click OK. 24 Installing the Hardware and Software Windows® Volume Control For correct audio performance, your Taskbar, do the following: • In the Windows taskbar, click Start, point to cancel muting. To display the Line Input setting in the... Windows Volume Control panel: 1 Right-click the speaker icon in the Taskbar (usually in your sound card...
User Guide
Page 35
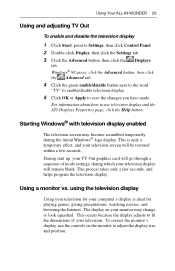
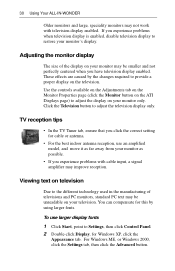
... display enabled The television screen may change or look squashed. To correct the monitor's display, use television display and the ATI Displays Properties page, click the Help button. Windows® 98 users: click the Advanced button, then click the Advanced tab. 4 Click the green enable/disable button next... will be restored within a few seconds, and helps program the television display. Using Your ALL-IN-WONDER 29 Using and adjusting TV Out To enable and disable the television display 1 Click Start, point to adjust the display size and position. During start up, your...
... display enabled The television screen may change or look squashed. To correct the monitor's display, use television display and the ATI Displays Properties page, click the Help button. Windows® 98 users: click the Advanced button, then click the Advanced tab. 4 Click the green enable/disable button next... will be restored within a few seconds, and helps program the television display. Using Your ALL-IN-WONDER 29 Using and adjusting TV Out To enable and disable the television display 1 Click Start, point to adjust the display size and position. During start up, your...
User Guide
Page 36
...available on the Adjustments tab on the Monitor Properties page (click the Monitor button on the ATI Displays page) to restore your monitor as possible. • If you experience problems with television.... Click the Television button to provide a proper display on the television. You can compensate for Windows XP, click the Appearance tab. These effects are caused by using larger fonts. To use an... amplified model, and move it as far away from your monitor's display. TV reception tips • In the TV Tuner tab, ensure that you click the correct setting for cable or antenna. ...
...available on the Adjustments tab on the Monitor Properties page (click the Monitor button on the ATI Displays page) to restore your monitor as possible. • If you experience problems with television.... Click the Television button to provide a proper display on the television. You can compensate for Windows XP, click the Appearance tab. These effects are caused by using larger fonts. To use an... amplified model, and move it as far away from your monitor's display. TV reception tips • In the TV Tuner tab, ensure that you click the correct setting for cable or antenna. ...

User Guide
Page 37
Windows® 98 users: click the Advanced button, then click the Displays tab. 4 Click the TV button, then click the Adjustments tab. 5 Click the plus (+) button under Horizontal Screen to increase the horizontal size of the television display. 6 Click OK or ... the PC application you are running. Reducing edge distortion When using a television for your PC's display, you can also reduce edge distortion by increasing the TV's contrast.
Windows® 98 users: click the Advanced button, then click the Displays tab. 4 Click the TV button, then click the Adjustments tab. 5 Click the plus (+) button under Horizontal Screen to increase the horizontal size of the television display. 6 Click OK or ... the PC application you are running. Reducing edge distortion When using a television for your PC's display, you can also reduce edge distortion by increasing the TV's contrast.

User Guide
Page 38
32 Using Your ALL-IN-WONDER To increase the TV contrast 1 Click Start, point to save the changes you have the television display feature enabled first; see To enable and disable the television display on .... Your television display will not be restored once you exit the game or if you move your system. Windows® 98 users click the Advanced button, then click the Advanced tab. 4 Click the TV button, then drag the Contrast slider to the right to increase the contrast. 5 Click OK or Apply to...
32 Using Your ALL-IN-WONDER To increase the TV contrast 1 Click Start, point to save the changes you have the television display feature enabled first; see To enable and disable the television display on .... Your television display will not be restored once you exit the game or if you move your system. Windows® 98 users click the Advanced button, then click the Advanced tab. 4 Click the TV button, then drag the Contrast slider to the right to increase the contrast. 5 Click OK or Apply to...
User Guide
Page 39
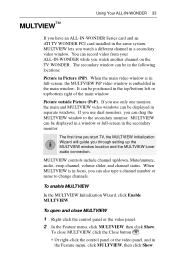
...or top/bottom right of the main window. MULTVIEW controls include channel up the MULTVIEW window location and the MULTVIEW tuner audio connection. MULTVIEW™ Using Your ALL-IN-WONDER 33 If you have an ALL-IN-WONDER Series card and an ATI TV WONDER PCI card installed in the same... system, MULTVIEW lets you watch another channel on the TV WONDER. It can be positioned in the secondary monitor. When MULTVIEW is embedded in a secondary video window. Picture outside Picture (PoP).
...or top/bottom right of the main window. MULTVIEW controls include channel up the MULTVIEW window location and the MULTVIEW tuner audio connection. MULTVIEW™ Using Your ALL-IN-WONDER 33 If you have an ALL-IN-WONDER Series card and an ATI TV WONDER PCI card installed in the same... system, MULTVIEW lets you watch another channel on the TV WONDER. It can be positioned in the secondary monitor. When MULTVIEW is embedded in a secondary video window. Picture outside Picture (PoP).

User Guide
Page 40
... also provides assistance when you move your mouse over the MULTVIEW window, the border re-appears. If you have one audio card or an integrated audio chip, you must connect one audio card and an integrated audio chip, you watch TV, DVD, or File Player. You can manually change the embedded... window's size and location when the MULTVIEW borders are red, a REMOTE WONDER channel-change command will change the location of...
... also provides assistance when you move your mouse over the MULTVIEW window, the border re-appears. If you have one audio card or an integrated audio chip, you must connect one audio card and an integrated audio chip, you watch TV, DVD, or File Player. You can manually change the embedded... window's size and location when the MULTVIEW borders are red, a REMOTE WONDER channel-change command will change the location of...
User Guide
Page 42
.... ALL-IN-WONDER 9800 Series card. * Windows® 98/SE , Windows® Me, Windows® 2000, Windows® XP. *The Windows® Me driver installs on your video card's graphics features, doubleclick the ATI icon in the lower-right corner of your ATI HDTV Component Video Adapter Setting up the ATI HDTV Component Video Adapter consists of two...
.... ALL-IN-WONDER 9800 Series card. * Windows® 98/SE , Windows® Me, Windows® 2000, Windows® XP. *The Windows® Me driver installs on your video card's graphics features, doubleclick the ATI icon in the lower-right corner of your ATI HDTV Component Video Adapter Setting up the ATI HDTV Component Video Adapter consists of two...
User Guide
Page 43
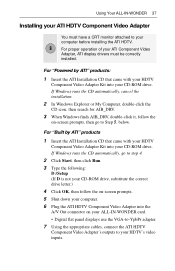
...on your ALL-IN-WONDER card. • Digital flat panel displays use the VGA-to-YpbPr adapter. 7 Using the appropriate cables, connect the ATI HDTV Component Video Adapter's outputs to your ATI Component Video Adapter, ATI display drivers must have a CRT monitor attached to your CD-ROM drive. For... Video Adapter Kit into the A/V Out connector on -screen prompts. 5 Shut down your computer. 6 Plug the ATI HDTV Component Video Adapter into your computer before installing the ATI HDTV. If Windows runs the CD automatically, go to Step 5, below. Using Your ALL-IN-WONDER 37 Installing your...
...on your ALL-IN-WONDER card. • Digital flat panel displays use the VGA-to-YpbPr adapter. 7 Using the appropriate cables, connect the ATI HDTV Component Video Adapter's outputs to your ATI Component Video Adapter, ATI display drivers must have a CRT monitor attached to your CD-ROM drive. For... Video Adapter Kit into the A/V Out connector on -screen prompts. 5 Shut down your computer. 6 Plug the ATI HDTV Component Video Adapter into your computer before installing the ATI HDTV. If Windows runs the CD automatically, go to Step 5, below. Using Your ALL-IN-WONDER 37 Installing your...