
Getting Started Guide
Page 3
... 20 Expansion Module Slot 20 Default Settings 20 2 INSTALLING THE SWITCH Package Contents 22 Choosing a Suitable Site 22 Rack-mounting 23 Placing Units On Top of Hardware Features 13 Switch - CONTENTS ABOUT THIS GUIDE Conventions 8 Related Documentation 9 Accessing Online Documentation 9 Documentation Comments 10 1 INTRODUCING THE SUPERSTACK 3 SWITCH 4900 FAMILY About the Switches 12 Summary of Each Other...
... 20 Expansion Module Slot 20 Default Settings 20 2 INSTALLING THE SWITCH Package Contents 22 Choosing a Suitable Site 22 Rack-mounting 23 Placing Units On Top of Hardware Features 13 Switch - CONTENTS ABOUT THIS GUIDE Conventions 8 Related Documentation 9 Accessing Online Documentation 9 Documentation Comments 10 1 INTRODUCING THE SUPERSTACK 3 SWITCH 4900 FAMILY About the Switches 12 Summary of Each Other...

Getting Started Guide
Page 4
...Pre-requisites 49 Web Management Over the Network 50 Setting Up SNMP Management 51 Pre-requisites 51 Default Users and Passwords 51 Changing Default Passwords 52 4 PROBLEM SOLVING Solving Problems Indicated by LEDs 54 Powering-up the Switch 27 Checking for Management 36 Manually Configuring IP ...Information 37 Connecting to a Front Panel Port 37 Connecting to the Console Port 40 Viewing Automatically Configured IP Information 43 Using 3Com...
...Pre-requisites 49 Web Management Over the Network 50 Setting Up SNMP Management 51 Pre-requisites 51 Default Users and Passwords 51 Changing Default Passwords 52 4 PROBLEM SOLVING Solving Problems Indicated by LEDs 54 Powering-up the Switch 27 Checking for Management 36 Manually Configuring IP ...Information 37 Connecting to a Front Panel Port 37 Connecting to the Console Port 40 Viewing Automatically Configured IP Information 43 Using 3Com...

Getting Started Guide
Page 7
...apply to install and use the following Switches in their default state: ■ SuperStack® 3 Switch 4900 (3C17700) ■ SuperStack® 3 Switch 4900 SX (3C17702) ■ SuperStack® 3 Switch 4924 (3C17701) ■ SuperStack® 3 Switch 4950 (3C17706) This guide is intended for installing and setting up network equipment; The guide is..., follow the instructions in Adobe Acrobat Reader Portable Document Format (PDF) or HTML on the 3Com World Wide Web site: http://www.3com.com/ If the information in the release notes that are available in the release notes. ABOUT...
...apply to install and use the following Switches in their default state: ■ SuperStack® 3 Switch 4900 (3C17700) ■ SuperStack® 3 Switch 4900 SX (3C17702) ■ SuperStack® 3 Switch 4924 (3C17701) ■ SuperStack® 3 Switch 4950 (3C17706) This guide is intended for installing and setting up network equipment; The guide is..., follow the instructions in Adobe Acrobat Reader Portable Document Format (PDF) or HTML on the 3Com World Wide Web site: http://www.3com.com/ If the information in the release notes that are available in the release notes. ABOUT...

Getting Started Guide
Page 11
... Port ■ Expansion Module Slot ■ Default Settings It covers summary information about the Switch 4900, 4900 SX, 4924 and 4950 and how they can be used in the Switch 4900 Family is the same unless otherwise stated. ■ About the Switches ■ Summary of Hardware Features ■ Switch - 1 INTRODUCING THE SUPERSTACK 3 SWITCH 4900 FAMILY This chapter contains introductory...
... Port ■ Expansion Module Slot ■ Default Settings It covers summary information about the Switch 4900, 4900 SX, 4924 and 4950 and how they can be used in the Switch 4900 Family is the same unless otherwise stated. ■ About the Switches ■ Summary of Hardware Features ■ Switch - 1 INTRODUCING THE SUPERSTACK 3 SWITCH 4900 FAMILY This chapter contains introductory...

Getting Started Guide
Page 16
...-T (10 Mbps) is only supported on Switch 4924 and 4950. 1000BASE-SX Ports The default state for these ports is negotiated with the link partner. The default state for these ports is mandatory in any combination. The default state for these ports is negotiated with the...if supported), or 100 Mbps full duplex. Alternatively, auto-negotiation can be disabled and the flow control setting can be manually configured. 16 CHAPTER 1: INTRODUCING THE SUPERSTACK 3 SWITCH 4900 FAMILY 100/1000BASE-T and The 100BASE-TX/1000BASE-T and 10BASE-T/100BASE-TX/1000BASE-T 10/100/1000BASE...
...-T (10 Mbps) is only supported on Switch 4924 and 4950. 1000BASE-SX Ports The default state for these ports is negotiated with the link partner. The default state for these ports is mandatory in any combination. The default state for these ports is negotiated with the...if supported), or 100 Mbps full duplex. Alternatively, auto-negotiation can be disabled and the flow control setting can be manually configured. 16 CHAPTER 1: INTRODUCING THE SUPERSTACK 3 SWITCH 4900 FAMILY 100/1000BASE-T and The 100BASE-TX/1000BASE-T and 10BASE-T/100BASE-TX/1000BASE-T 10/100/1000BASE...
Getting Started Guide
Page 20
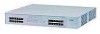
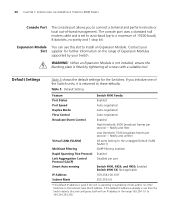
... CHAPTER 1: INTRODUCING THE SUPERSTACK 3 SWITCH 4900 FAMILY Console Port The console port allows you initialize one of the Switch units, it is set to auto-baud (up to a maximum of 19200 baud), 8 data bits, no other Switches on the range of -band management. Table 5 Default Setting Feature Port Status Port ...- Notify and unfilter All ports belong to the untagged Default VLAN (VLAN 1) IGMP filtering enabled Enabled Disabled per port Switch 4900, 4924, and 4950: Enabled Switch 4900 SX: Not applicable 169.254.100.100* 255.255.0.0 * This default IP address is used if the unit is already in...
... CHAPTER 1: INTRODUCING THE SUPERSTACK 3 SWITCH 4900 FAMILY Console Port The console port allows you initialize one of the Switch units, it is set to auto-baud (up to a maximum of 19200 baud), 8 data bits, no other Switches on the range of -band management. Table 5 Default Setting Feature Port Status Port ...- Notify and unfilter All ports belong to the untagged Default VLAN (VLAN 1) IGMP filtering enabled Enabled Disabled per port Switch 4900, 4924, and 4950: Enabled Switch 4900 SX: Not applicable 169.254.100.100* 255.255.0.0 * This default IP address is used if the unit is already in...

Getting Started Guide
Page 33
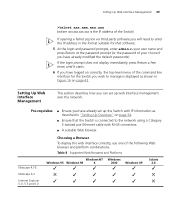
... the overall performance of the features offered by the Switch, and to manage a Switch. This chapter explains the initial set up of the Switch and the different methods of Managing a Switch ■ Setting Up Command Line Interface Management ■ Setting Up Web Interface Management ■ Setting Up SNMP Management ■ Default Users and Passwords It covers the following topics...
... the overall performance of the features offered by the Switch, and to manage a Switch. This chapter explains the initial set up of the Switch and the different methods of Managing a Switch ■ Setting Up Command Line Interface Management ■ Setting Up Web Interface Management ■ Setting Up SNMP Management ■ Default Users and Passwords It covers the following topics...

Getting Started Guide
Page 34
... that follow. See page 35 Do you need to: ■ Configure IP information manually for your Switch or view the automatically configured IP information ■ Prepare for your Switch set up and ready for management when it is automatically configured. See page 43 Connect to manually Yes configure... you must change all three default passwords as soon as possible, even if you want to a front panel port and use the Command Line Interface. How do you want to the Switch? See page 37 Connect to actively manage your Switch? See page 37 Use 3Com Network Supervisor (3NS). In ...
... that follow. See page 35 Do you need to: ■ Configure IP information manually for your Switch or view the automatically configured IP information ■ Prepare for your Switch set up and ready for management when it is automatically configured. See page 43 Connect to manually Yes configure... you must change all three default passwords as soon as possible, even if you want to a front panel port and use the Command Line Interface. How do you want to the Switch? See page 37 Connect to actively manage your Switch? See page 37 Use 3Com Network Supervisor (3NS). In ...

Getting Started Guide
Page 35
....254.1.0 to configure the IP information yourself. If neither server is found, the Switch will configure itself with its default IP address 169.254.100.100 if it again or set the configuration method to your Switch (essential if you change it is not dependent on the network have a DHCP ... you to allocate static IP addresses. (Static IP addresses are You should use on the network then the Switch detects this default IP address is always allocated the same IP information.) For most installations, 3Com recommends that you enter until you wish to manually enter IP information for your...
....254.1.0 to configure the IP information yourself. If neither server is found, the Switch will configure itself with its default IP address 169.254.100.100 if it again or set the configuration method to your Switch (essential if you change it is not dependent on the network have a DHCP ... you to allocate static IP addresses. (Static IP addresses are You should use on the network then the Switch detects this default IP address is always allocated the same IP information.) For most installations, 3Com recommends that you enter until you wish to manually enter IP information for your...

Getting Started Guide
Page 37
...the command line interface (CLI). You must do this section assumes the unit has been powered up in standalone mode and has the default IP address of the Switch. refer to "Choosing a Browser"on page 49. ■ You need to have the following ways: ■ Connecting to ...a front Panel Port panel port. The procedure described in this whilst the Switch is , before you connect the Switch to a Front To set up your Switch manually you can manually set up the Switch with RJ-45 connectors. ■ A suitable Web browser - Manually Configuring IP Information 37 Manually...
...the command line interface (CLI). You must do this section assumes the unit has been powered up in standalone mode and has the default IP address of the Switch. refer to "Choosing a Browser"on page 49. ■ You need to have the following ways: ■ Connecting to ...a front Panel Port panel port. The procedure described in this whilst the Switch is , before you connect the Switch to a Front To set up your Switch manually you can manually set up the Switch with RJ-45 connectors. ■ A suitable Web browser - Manually Configuring IP Information 37 Manually...

Getting Started Guide
Page 38
... can return to an offline unit. Make a note of the front panel ports on the Switch. This takes approximately one end of the workstation that is the default IP address that you can do this using an Ethernet cable as shown in the workstation. This is automatically assigned to them ... and enter 169.254.100.100 in the Location Address field. Change the workstation to the following settings: ■ IP address - 169.254.100.99 ■ Subnet mask - 255.255.0.0 Setting Up the Switch with IP Information You are now ready to the Network Interface Card (NIC) in Figure 13. ...
... can return to an offline unit. Make a note of the front panel ports on the Switch. This takes approximately one end of the workstation that is the default IP address that you can do this using an Ethernet cable as shown in the workstation. This is automatically assigned to them ... and enter 169.254.100.100 in the Location Address field. Change the workstation to the following settings: ■ IP address - 169.254.100.99 ■ Subnet mask - 255.255.0.0 Setting Up the Switch with IP Information You are now ready to the Network Interface Card (NIC) in Figure 13. ...

Getting Started Guide
Page 39
... the dialogue box that appears type the default IP address of your Switch is now complete and the Switch is ready for you have logged on page 46. If the login prompt does not begin immediately, press Return a few times until it is connected to set up of the unit, that you to... for the Switch. If you have logged on correctly, a set of Getting Started pages are displayed. 4 The Getting Started pages allow you want the Switch to use when it starts. 3 At the login and password prompts, enter admin as your user name and press Return at the password prompt (default user name ...
... the dialogue box that appears type the default IP address of your Switch is now complete and the Switch is ready for you have logged on page 46. If the login prompt does not begin immediately, press Return a few times until it is connected to set up of the unit, that you to... for the Switch. If you have logged on correctly, a set of Getting Started pages are displayed. 4 The Getting Started pages allow you want the Switch to use when it starts. 3 At the login and password prompts, enter admin as your user name and press Return at the password prompt (default user name ...

Getting Started Guide
Page 41
... : ■ 19,200 baud ■ 8 data bits Figure 15 Connecting a workstation to the Switch via the console port To connect the cable: a Attach the female connector on the cable to the male connector on page 69. ■ You need to match the default settings for both cables in Figure 15. You can manually...
... : ■ 19,200 baud ■ 8 data bits Figure 15 Connecting a workstation to the Switch via the console port To connect the cable: a Attach the female connector on the cable to the male connector on page 69. ■ You need to match the default settings for both cables in Figure 15. You can manually...
Getting Started Guide
Page 45
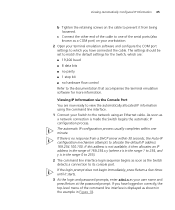
... completes within 30 seconds, the Auto-IP configuration mechanism attempts to allocate the default IP address 169.254.100.100. c Connect the other end of the cable to one minute. The settings should be set to match the default settings for more information. Viewing IP Information via the Console Port You are : ... the range of 169.254.x.y (where x is in the range 0 to 255). 2 The command line interface login sequence begins as soon as the Switch detects a connection to its console port. If the login prompt does not begin immediately, press Return a few times until it starts. 3 At the ...
... completes within 30 seconds, the Auto-IP configuration mechanism attempts to allocate the default IP address 169.254.100.100. c Connect the other end of the cable to one minute. The settings should be set to match the default settings for more information. Viewing IP Information via the Console Port You are : ... the range of 169.254.x.y (where x is in the range 0 to 255). 2 The command line interface login sequence begins as soon as the Switch detects a connection to its console port. If the login prompt does not begin immediately, press Return a few times until it starts. 3 At the ...
Getting Started Guide
Page 49
...correctly, the top-level menu of the command line interface for the Switch you wish to manage is displayed as shown in the format suitable...already set up the Switch with IP information as described in "Setting Up Overview" on page 34. ■ Ensure that the Switch is .... Setting Up Web Interface Management 49 >telnet xxx.xxx.xxx.xxx (where xxx.xxx.xxx.xxx is the IP address of the Switch)...; ✕ Pre-requisites ■ Ensure you can set up web interface management over the network. Setting Up Web Interface Management This section describes how you have already modified the...
...correctly, the top-level menu of the command line interface for the Switch you wish to manage is displayed as shown in the format suitable...already set up the Switch with IP information as described in "Setting Up Overview" on page 34. ■ Ensure that the Switch is .... Setting Up Web Interface Management 49 >telnet xxx.xxx.xxx.xxx (where xxx.xxx.xxx.xxx is the IP address of the Switch)...; ✕ Pre-requisites ■ Ensure you can set up web interface management over the network. Setting Up Web Interface Management This section describes how you have already modified the...
Getting Started Guide
Page 50
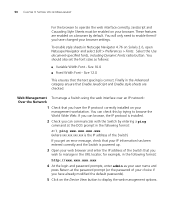
...and enter the IP address of your management workstation. Web Management To manage a Switch using the web interface over an IP network: Over the Network 1 Check that you have changed your browser settings. You should also set the font sizes as your user name and press Return at the DOS prompt ... installed on the Device View button to display the web management options. You will only need to enable them if you have already modified the default passwords). 5 Click on your choice if you wish to manage in the URL locator, for example, in Netscape Navigator 4.76 on Solaris 2.6, ...
...and enter the IP address of your management workstation. Web Management To manage a Switch using the web interface over an IP network: Over the Network 1 Check that you have changed your browser settings. You should also set the font sizes as your user name and press Return at the DOS prompt ... installed on the Device View button to display the web management options. You will only need to enable them if you have already modified the default passwords). 5 Click on your choice if you wish to manage in the URL locator, for example, in Netscape Navigator 4.76 on Solaris 2.6, ...

Getting Started Guide
Page 51
... valid user name and password. refer to log in Table 9. Setting Up SNMP Management 51 Setting Up SNMP Management Any network management application running the Simple Network Management Protocol (SNMP) can manage a Switch if: ■ The correct Management Information Bases (MIBs) are ...your Switch You can use 3Com Network Supervisor it automatically loads the correct MIBs and necessary files onto your Switch. Default Users and Passwords If you intend to change all ports on the Switch. These default users are in VLAN 1 (the Default VLAN). To manage your Switch ...
... valid user name and password. refer to log in Table 9. Setting Up SNMP Management 51 Setting Up SNMP Management Any network management application running the Simple Network Management Protocol (SNMP) can manage a Switch if: ■ The correct Management Information Bases (MIBs) are ...your Switch You can use 3Com Network Supervisor it automatically loads the correct MIBs and necessary files onto your Switch. Default Users and Passwords If you intend to change all ports on the Switch. These default users are in VLAN 1 (the Default VLAN). To manage your Switch ...

Getting Started Guide
Page 52
... can view all manageable password) parameters Use the admin default user name (no security - For more information about default users and passwords, refer to login and carry out initial Switch setup. manager manager - 52 CHAPTER 3: SETTING UP FOR MANAGEMENT Table 9 Default Users User Name monitor manager admin Default Password Access Level monitor monitor - the user can...
... can view all manageable password) parameters Use the admin default user name (no security - For more information about default users and passwords, refer to login and carry out initial Switch setup. manager manager - 52 CHAPTER 3: SETTING UP FOR MANAGEMENT Table 9 Default Users User Name monitor manager admin Default Password Access Level monitor monitor - the user can...

Getting Started Guide
Page 79
...3Com Network Supervisor 43 console port 44 C cable 10/100/1000BASE-T 28 fiber 29 pin-outs 69 CD-ROM 9 command line interface management 46 conventions notice icons, About This Guide 8 text, About This Guide 8 cross-over configuration 28 D default settings 20 users 51 E Ethernet address of the Switch 19 F factory defaults... 20 G GBIC ports 16 H hardware features 13 I installing the Switch 21 prerequisites 23 interconnect cable 25 IP addressing registered 57 IP...
...3Com Network Supervisor 43 console port 44 C cable 10/100/1000BASE-T 28 fiber 29 pin-outs 69 CD-ROM 9 command line interface management 46 conventions notice icons, About This Guide 8 text, About This Guide 8 cross-over configuration 28 D default settings 20 users 51 E Ethernet address of the Switch 19 F factory defaults... 20 G GBIC ports 16 H hardware features 13 I installing the Switch 21 prerequisites 23 interconnect cable 25 IP addressing registered 57 IP...

