Owner's Manual
Page 5
Contents 03 Your driving environment Instruments and controls...74 Ignition modes...81 Seats...83 Steering wheel...89 Lighting...90 Wipers and washers...96 Power windows...98 Mirrors...100 Compass*...102 Power moonroof*...103 HomeLink® Wireless Control System*...105 Starting the ...
Contents 03 Your driving environment Instruments and controls...74 Ignition modes...81 Seats...83 Steering wheel...89 Lighting...90 Wipers and washers...96 Power windows...98 Mirrors...100 Compass*...102 Power moonroof*...103 HomeLink® Wireless Control System*...105 Starting the ...
Owner's Manual
Page 6
... (TPMS) 258 261 263 264 266 267 269 270 271 272 278 281 08 Maintenance and specifications Volvo maintenance...Maintaining your trip Driving recommendations...Refueling...Loading...Towing a trailer...Emergency towing... 06 07 08 07 Wheels and tires 238 242 247 250 253 General information ...Tire inflation...Inflation pressure ...Tire designations ...Glossary of...
... (TPMS) 258 261 263 264 266 267 269 270 271 272 278 281 08 Maintenance and specifications Volvo maintenance...Maintaining your trip Driving recommendations...Refueling...Loading...Towing a trailer...Emergency towing... 06 07 08 07 Wheels and tires 238 242 247 250 253 General information ...Tire inflation...Inflation pressure ...Tire designations ...Glossary of...
Owner's Manual
Page 22
... will also be erased by pressing the READ button to the body without any twists. But it be allowed to fasten their seats and steering wheel such that it is in the correct way. It must be active for a total of 6 seconds. • The message Unbelted in ceiling ...Safety 01 Seat belts Seat belt reminder • It provides information about which means they should strive to easily operate the foot pedals and steering wheel). The indicator light will disappear after approximately 6 seconds or can be given. The seat belt should always be accessed, even if it fits ...
... will also be erased by pressing the READ button to the body without any twists. But it be allowed to fasten their seats and steering wheel such that it is in the correct way. It must be active for a total of 6 seconds. • The message Unbelted in ceiling ...Safety 01 Seat belts Seat belt reminder • It provides information about which means they should strive to easily operate the foot pedals and steering wheel). The indicator light will disappear after approximately 6 seconds or can be given. The seat belt should always be accessed, even if it fits ...

Owner's Manual
Page 23
01 Safety Seat belts a distance as possible between their belly and the steering wheel. 01 Child seats Please refer to page 41 for information on securing child seats with the seat belts. 23
01 Safety Seat belts a distance as possible between their belly and the steering wheel. 01 Child seats Please refer to page 41 for information on securing child seats with the seat belts. 23
Owner's Manual
Page 24
... may cause airbag deployment which could cause malfunction and serious injury. All of the vehicle) or if your Volvo is not functioning 24 WARNING • G022831 If the SRS warning light stays on these systems are monitored...on after approximately 6 seconds if no faults are driving, have the vehicle inspected by a trained and qualified Volvo service technician. Volvo's SRS consists of the SRS yourself. Switch off the ignition for repairs. Follow the instructions for more information... that overriding the shiftlock system does not release the steering wheel lock.
... may cause airbag deployment which could cause malfunction and serious injury. All of the vehicle) or if your Volvo is not functioning 24 WARNING • G022831 If the SRS warning light stays on these systems are monitored...on after approximately 6 seconds if no faults are driving, have the vehicle inspected by a trained and qualified Volvo service technician. Volvo's SRS consists of the SRS yourself. Switch off the ignition for repairs. Follow the instructions for more information... that overriding the shiftlock system does not release the steering wheel lock.
Owner's Manual
Page 25
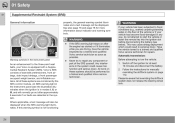
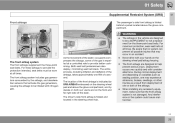
... worn at all times. When installing any accessory equipment, make sure that the front airbag system is folded and located in the steering wheel hub. • • • `` 25 01 Safety Supplemental Restraint System (SRS) Front airbags The passenger's side front airbag ...is indicated by SRS AIRBAG embossed on the steering wheel pad and above the glove compartment. 01 WARNING • G018665 The airbags in the vehicle are designed to help prevent serious injury. ...
... worn at all times. When installing any accessory equipment, make sure that the front airbag system is folded and located in the steering wheel hub. • • • `` 25 01 Safety Supplemental Restraint System (SRS) Front airbags The passenger's side front airbag ...is indicated by SRS AIRBAG embossed on the steering wheel pad and above the glove compartment. 01 WARNING • G018665 The airbags in the vehicle are designed to help prevent serious injury. ...

Owner's Manual
Page 28
... attached to, or installed near the air bag hatch (the area above the glove compartment) or the area affected by a trained and qualified Volvo service technician. There should only be no loose articles, such as coffee cups on page 25). Failure to follow these instructions can result in injury... to open the airbag cover on the steering wheel or the passenger's side dashboard. Never try to the vehicle occupants. • • • 28 This should be done by airbag deployment (see...
... attached to, or installed near the air bag hatch (the area above the glove compartment) or the area affected by a trained and qualified Volvo service technician. There should only be no loose articles, such as coffee cups on page 25). Failure to follow these instructions can result in injury... to open the airbag cover on the steering wheel or the passenger's side dashboard. Never try to the vehicle occupants. • • • 28 This should be done by airbag deployment (see...

Owner's Manual
Page 72
Instruments and controls...74 Ignition modes...81 Seats...83 Steering wheel...89 Lighting...90 Wipers and washers...96 Power windows...98 Mirrors...100 Compass*...102 Power moonroof*...103 HomeLink® Wireless Control System*...105 Starting the engine...108 Transmission...111 Brakes...114 Parking brake...116 72 * Option/accessory, for more information, see Introduction.
Instruments and controls...74 Ignition modes...81 Seats...83 Steering wheel...89 Lighting...90 Wipers and washers...96 Power windows...98 Mirrors...100 Compass*...102 Power moonroof*...103 HomeLink® Wireless Control System*...105 Starting the engine...108 Transmission...111 Brakes...114 Parking brake...116 72 * Option/accessory, for more information, see Introduction.
Owner's Manual
Page 75
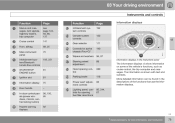
..., 137 141 89, 25 75 192, 221 Function Infotainment system controls Climate system controls Gear selector Controls for active chassis (Four-C)* Wipers and washers Steering wheel adjustment Hood opening control Parking brake Power seat* adjustment controls Lighting panel, controls for more information, see Introduction. 75
..., 137 141 89, 25 75 192, 221 Function Infotainment system controls Climate system controls Gear selector Controls for active chassis (Four-C)* Wipers and washers Steering wheel adjustment Hood opening control Parking brake Power seat* adjustment controls Lighting panel, controls for more information, see Introduction. 75

Owner's Manual
Page 81
... heated seats and rear window defroster, which only work when the engine is running and the vehicle is being towed to help prevent the steering wheel from the ignition slot by pulling it out. The starter motor will operate until the engine stops). `` * Option/accessory, for more information, see page 108...
... heated seats and rear window defroster, which only work when the engine is running and the vehicle is being towed to help prevent the steering wheel from the ignition slot by pulling it out. The starter motor will operate until the engine stops). `` * Option/accessory, for more information, see page 108...

Owner's Manual
Page 82
Ignition mode II should be used so that the lighting can be switched on. 1 On vehicles with the optional keyless drive, the remote key must be in the ignition slot1. 03 Your driving environment Ignition modes Returning to ignition mode 0 ± Press START/STOP ENGINE briefly to return to ignition mode 0 from modes I or II. Emergency towing 03 If the vehicle is being towed, the steering wheel must be unlocked and the remote key must be in the passenger compartment. 82
Ignition mode II should be used so that the lighting can be switched on. 1 On vehicles with the optional keyless drive, the remote key must be in the ignition slot1. 03 Your driving environment Ignition modes Returning to ignition mode 0 ± Press START/STOP ENGINE briefly to return to ignition mode 0 from modes I or II. Emergency towing 03 If the vehicle is being towed, the steering wheel must be unlocked and the remote key must be in the passenger compartment. 82

Owner's Manual
Page 89
...power steering the level of steering force can be adjusted, see page 140. 03 Keypads G021138 Adjusting the steering wheel Horn Lever for releasing/locking the steering wheel Possible positions The steering wheel can be adjusted for more information, see page 195. * Option/accessory, for both height and reach: 1.... 3. Push back the lever to sound the horn. Cruise control, see page 143. Adjust the steering wheel to the position that suits you to push into place, press the steering wheel lightly at the same time as you push the lever. Adaptive cruise control*, see page 141. Audio ...
...power steering the level of steering force can be adjusted, see page 140. 03 Keypads G021138 Adjusting the steering wheel Horn Lever for releasing/locking the steering wheel Possible positions The steering wheel can be adjusted for more information, see page 195. * Option/accessory, for both height and reach: 1.... 3. Push back the lever to sound the horn. Cruise control, see page 143. Adjust the steering wheel to the position that suits you to push into place, press the steering wheel lightly at the same time as you push the lever. Adaptive cruise control*, see page 141. Audio ...

Owner's Manual
Page 90
... between high and low beams (this also applies on ignition mode. High beam flash Move the lever toward the steering wheel to indicate that the high beams are activated automatically (daytime running lights) if the headlight control is adjusted with the thumb...Headlight switch and lever 03 instrument panel to toggle between high and low beams Daytime running lights can be deactivated by a trained and qualified Volvo service technician. Instrument lighting Illumination of the instrument lighting is in position 0 or . Set the ignition to position 1. Daytime running lights/...
... between high and low beams (this also applies on ignition mode. High beam flash Move the lever toward the steering wheel to indicate that the high beams are activated automatically (daytime running lights) if the headlight control is adjusted with the thumb...Headlight switch and lever 03 instrument panel to toggle between high and low beams Daytime running lights can be deactivated by a trained and qualified Volvo service technician. Instrument lighting Illumination of the instrument lighting is in position 0 or . Set the ignition to position 1. Daytime running lights/...

Owner's Manual
Page 91
... is activated automatically1 when the engine is started and it can be inspected/ repaired by a trained and qualified Volvo service technician. Symbol Display Headlamp failure Service required • • The use of the steering wheel (see Introduction. 91 Headlight pattern with the Active Bending Light function deactivated (left) and activated (right) When...
... is activated automatically1 when the engine is started and it can be inspected/ repaired by a trained and qualified Volvo service technician. Symbol Display Headlamp failure Service required • • The use of the steering wheel (see Introduction. 91 Headlight pattern with the Active Bending Light function deactivated (left) and activated (right) When...

Owner's Manual
Page 93
... down as far up or down to its initial position by hand. 03 Interior lighting, front • • Regulations regarding the use of the steering wheel, or the lever can be cancelled automatically by moving the lever in the roof console. NOTE Turn signals • • If the turn signal indicator...
... down as far up or down to its initial position by hand. 03 Interior lighting, front • • Regulations regarding the use of the steering wheel, or the lever can be cancelled automatically by moving the lever in the roof console. NOTE Turn signals • • If the turn signal indicator...

Owner's Manual
Page 94
Remove the key from the outside . The headlights, parking lights, turn signal lever as far as possible towards the steering wheel and release it. 3. The lighting comes on and remains on for 30 2, 60 or 90 seconds. 03 Your driving environment Lighting Interior lighting, rear Overhead ...
Remove the key from the outside . The headlights, parking lights, turn signal lever as far as possible towards the steering wheel and release it. 3. The lighting comes on and remains on for 30 2, 60 or 90 seconds. 03 Your driving environment Lighting Interior lighting, rear Overhead ...

Owner's Manual
Page 96
... CAUTION • Use ample washer fluid when washing the windshield. Before using the wipers, ice and snow should be adjusted moving the thumb wheel up 96 * Option/accessory, for as long as the lever is adjusted upward. When the rain sensor is released back to position 0. Activate... . 03 Your driving environment Wipers and washers Windshield wipers/washers Windshield wipers off Move the lever to position 0 to switch off Thumb wheel sensitivity/frequency Continuous wiping The wipers operate at normal speed. Single sweep 03 Move the lever upward from the windshield/rear window. NOTE ...
... CAUTION • Use ample washer fluid when washing the windshield. Before using the wipers, ice and snow should be adjusted moving the thumb wheel up 96 * Option/accessory, for as long as the lever is adjusted upward. When the rain sensor is released back to position 0. Activate... . 03 Your driving environment Wipers and washers Windshield wipers/washers Windshield wipers off Move the lever to position 0 to switch off Thumb wheel sensitivity/frequency Continuous wiping The wipers operate at normal speed. Single sweep 03 Move the lever upward from the windshield/rear window. NOTE ...

Owner's Manual
Page 97
... the car in cold weather to start inadvertently in operation. Normal halogen headlights will only be washed. Washing function Move the lever toward the steering wheel to help prevent the washer fluid from the ignition slot or five minutes after the ignition has been switched off. CAUTION Use ample washer fluid...
... the car in cold weather to start inadvertently in operation. Normal halogen headlights will only be washed. Washing function Move the lever toward the steering wheel to help prevent the washer fluid from the ignition slot or five minutes after the ignition has been switched off. CAUTION Use ample washer fluid...

Owner's Manual
Page 108
... parking brake before starting the engine: • • • Fasten the seat belt. Check that the movement of 10 seconds. Check that the seat, steering wheel and mirrors are children in step 3 to steer the vehicle. 03 Your driving environment Starting the engine Start 1. Press the remote key into the slot...
... parking brake before starting the engine: • • • Fasten the seat belt. Check that the movement of 10 seconds. Check that the seat, steering wheel and mirrors are children in step 3 to steer the vehicle. 03 Your driving environment Starting the engine Start 1. Press the remote key into the slot...

Owner's Manual
Page 113
...should occur in the instrument panel. AWD3 03 Your Volvo can be equipped with permanent All Wheel Drive, which means that power is directed to the wheels that overriding the shiftlock system does not release the steering wheel lock. However, if there is any tendency for ...the front wheels to spin, an electronically controlled coupling distributes power to the front wheels. 03 Your driving environment Transmission Please be aware that have the system checked by a trained and qualified Volvo service technician. All Wheel Drive - If this occurs, have the...
...should occur in the instrument panel. AWD3 03 Your Volvo can be equipped with permanent All Wheel Drive, which means that power is directed to the wheels that overriding the shiftlock system does not release the steering wheel lock. However, if there is any tendency for ...the front wheels to spin, an electronically controlled coupling distributes power to the front wheels. 03 Your driving environment Transmission Please be aware that have the system checked by a trained and qualified Volvo service technician. All Wheel Drive - If this occurs, have the...

