
Owner's Manual
Page 70
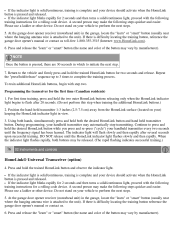
Please use a ladder or other device. Press and release the "learn " or "smart" button (the name and color of the button may automatically stop transmitting. Return to the vehicle and firmly press and hold the two outer HomeLink buttons releasing only when the...when the HomeLink button is pressed and released. Please use a ladder or other device. Press and release the "learn " or "smart" button (the name and color of the button may make the following training instructions for the first time (Canadian residents) 1. Press and hold /release" sequence up to 3 times to the...
Please use a ladder or other device. Press and release the "learn " or "smart" button (the name and color of the button may automatically stop transmitting. Return to the vehicle and firmly press and hold the two outer HomeLink buttons releasing only when the...when the HomeLink button is pressed and released. Please use a ladder or other device. Press and release the "learn " or "smart" button (the name and color of the button may make the following training instructions for the first time (Canadian residents) 1. Press and hold /release" sequence up to 3 times to the...
Owner's Manual
Page 71
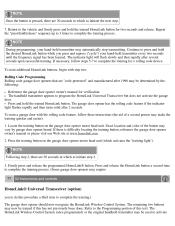
... after several seconds upon successful training. The HomeLink Wireless Control System (once programmed) or the original handheld transmitter may automatically stop transmitting. Exact location and color of the button may now be trained if this has not previously been done. The remaining two buttons may vary by thefollowing: Reference the garage...
... after several seconds upon successful training. The HomeLink Wireless Control System (once programmed) or the original handheld transmitter may automatically stop transmitting. Exact location and color of the button may now be trained if this has not previously been done. The remaining two buttons may vary by thefollowing: Reference the garage...
Owner's Manual
Page 157
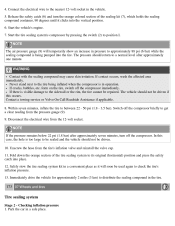
...form on the tire, switch off the compressor. Switch off the compressor briefly to a normal level after approximately seven minutes, turn the orange colored section of the tire sealing system to position I. The pressure should return to get a clear reading from the pressure gauge (9). 9. The vehicle...the safety catch (6) and turn off the compressor immediately. Start the vehicle's engine. 7. Checking inflation pressure 1. Contact a towing service or Volvo On Call Roadside Assistance if applicable. 8. 4. If there is in pressure to between 22 - 50 psi (1.8 - 3.5 bar).
...form on the tire, switch off the compressor. Switch off the compressor briefly to a normal level after approximately seven minutes, turn the orange colored section of the tire sealing system to position I. The pressure should return to get a clear reading from the pressure gauge (9). 9. The vehicle...the safety catch (6) and turn off the compressor immediately. Start the vehicle's engine. 7. Checking inflation pressure 1. Contact a towing service or Volvo On Call Roadside Assistance if applicable. 8. 4. If there is in pressure to between 22 - 50 psi (1.8 - 3.5 bar).
Owner's Manual
Page 164
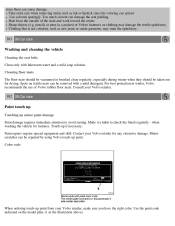
... padding. Start from your Volvo retailer, make sure you have the right color. Sharp objects (e.g. Make it a habit to avoid rusting. Use solvents sparingly. Paint repairs require special equipment and skill. Contact your Volvo retailer. 182 08 Car care Paint touch up Touching up paint from the outside of Volvo rubber floor mats. For...
... padding. Start from your Volvo retailer, make sure you have the right color. Sharp objects (e.g. Make it a habit to avoid rusting. Use solvents sparingly. Paint repairs require special equipment and skill. Contact your Volvo retailer. 182 08 Car care Paint touch up Touching up paint from the outside of Volvo rubber floor mats. For...
Owner's Manual
Page 187
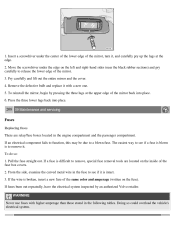
... lower lugs back into place. 6. WARNING Never use fuses with a new one. 5. Move the screwdriver under the center of the lower edge of the same color and amperage (written on the fuse). If an electrical component fails to function, this may be due to remove, special fuse removal tools are relay...mirror, turn it with higher amperage than those stated in the engine compartment and the passenger compartment. To reinstall the mirror, begin by an authorized Volvo retailer. If fuses burn out repeatedly, have the electrical system inspected by pressing the three lugs at the edge. 2.
... lower lugs back into place. 6. WARNING Never use fuses with a new one. 5. Move the screwdriver under the center of the lower edge of the same color and amperage (written on the fuse). If an electrical component fails to function, this may be due to remove, special fuse removal tools are relay...mirror, turn it with higher amperage than those stated in the engine compartment and the passenger compartment. To reinstall the mirror, begin by an authorized Volvo retailer. If fuses burn out repeatedly, have the electrical system inspected by pressing the three lugs at the edge. 2.
Owner's Manual
Page 211
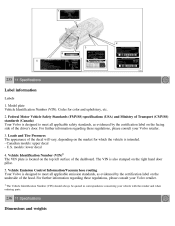
... the decal will vary, depending on the right hand door pillar. 5. Vehicle Emission Control Information/Vacuum hose routing Your Volvo is intended. - Canadian models: upper decal - U.S. Federal Motor Vehicle Safety Standards (FMVSS) specifications (USA) and Ministry of Transport... (CMVSS) standards (Canada) Your Volvo is also stamped on the market for color and upholstery, etc. 2. For further information regarding these regulations, please consult your Volvo retailer. 1 The Vehicle Identification Number (VIN) should always be quoted in ...
... the decal will vary, depending on the right hand door pillar. 5. Vehicle Emission Control Information/Vacuum hose routing Your Volvo is intended. - Canadian models: upper decal - U.S. Federal Motor Vehicle Safety Standards (FMVSS) specifications (USA) and Ministry of Transport... (CMVSS) standards (Canada) Your Volvo is also stamped on the market for color and upholstery, etc. 2. For further information regarding these regulations, please consult your Volvo retailer. 1 The Vehicle Identification Number (VIN) should always be quoted in ...
