Warranty, Maitenance, Services Guide
Page 11
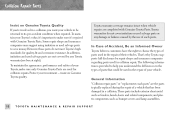
...information is provided to help you understand the differences in the types of a vehicle that could be returned to make sure only Genuine Toyota Parts are the parts typically replaced during the repair of parts that has been damaged in a collision, you want your vehicle. and... plastic components such as fenders, hoods, doors and related components; To maintain your investment - In addition, imitation and used salvage parts or any Toyota warranty (see box at right). Some repair shops and insurance companies may suggest using ...
...information is provided to help you understand the differences in the types of a vehicle that could be returned to make sure only Genuine Toyota Parts are the parts typically replaced during the repair of parts that has been damaged in a collision, you want your vehicle. and... plastic components such as fenders, hoods, doors and related components; To maintain your investment - In addition, imitation and used salvage parts or any Toyota warranty (see box at right). Some repair shops and insurance companies may suggest using ...
Warranty, Maitenance, Services Guide
Page 14
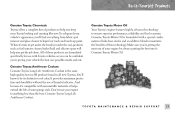
... best into it 's time to anything less than the best: Genuine Toyota Long Life Antifreeze Coolant. TOYOTA MAINTENANCE & R E PA I R SUPPORT 13 Do-It-Yourself Products Genuine Toyota Chemicals Genuine Toyota Motor Oil Toyota offers a complete line of products to help you get under the hood (or under the car), products such as fuel injector cleaner, brake...
... best into it 's time to anything less than the best: Genuine Toyota Long Life Antifreeze Coolant. TOYOTA MAINTENANCE & R E PA I R SUPPORT 13 Do-It-Yourself Products Genuine Toyota Chemicals Genuine Toyota Motor Oil Toyota offers a complete line of products to help you get under the hood (or under the car), products such as fuel injector cleaner, brake...

Owners Manual
Page 2
Center vents 4. Electric moon roof switch and/or interior light 5. Glove box 6. Instrument cluster 3. Power window switches 8. Auxiliary box 10. Celica_U Instrument panel overview 1. Manual transmission gear shift lever or automatic transmission selector lever 7. Power rear view mirror control switch 2 2000 CELICA (OM20735U) Hood lock release lever 12. Power door lock switch 9. Side vents 2. Parking brake lever 11.
Center vents 4. Electric moon roof switch and/or interior light 5. Glove box 6. Instrument cluster 3. Power window switches 8. Auxiliary box 10. Celica_U Instrument panel overview 1. Manual transmission gear shift lever or automatic transmission selector lever 7. Power rear view mirror control switch 2 2000 CELICA (OM20735U) Hood lock release lever 12. Power door lock switch 9. Side vents 2. Parking brake lever 11.

Owners Manual
Page 7
Celica_U SECTION 1− 2 OPERATION OF INSTRUMENTS AND CONTROLS Keys and Doors Keys ...8 Side doors ...8 Power windows ...14 Back door ...16 Hood ...17 Fuel tank cap ...18 Electric moon roof ...19 2000 CELICA (OM20735U) 7
Celica_U SECTION 1− 2 OPERATION OF INSTRUMENTS AND CONTROLS Keys and Doors Keys ...8 Side doors ...8 Power windows ...14 Back door ...16 Hood ...17 Fuel tank cap ...18 Electric moon roof ...19 2000 CELICA (OM20735U) 7

Owners Manual
Page 17
... the auxiliary catch lever and lift the hood. 3. and return the support rod to see that the hood is closed and securely locked. If necessary, press down on the front edge to your head or body. 2000 CELICA (OM20735U) 17 Before closing the hood, check to its clip-this prevents rattles.... Then lower the hood and make sure the rod supports the hood securely from falling down gently on to lock it locks into place. ...
... the auxiliary catch lever and lift the hood. 3. and return the support rod to see that the hood is closed and securely locked. If necessary, press down on the front edge to your head or body. 2000 CELICA (OM20735U) 17 Before closing the hood, check to its clip-this prevents rattles.... Then lower the hood and make sure the rod supports the hood securely from falling down gently on to lock it locks into place. ...

Owners Manual
Page 18
... the cap is suddenly removed. 18 2000 CELICA (OM20735U) To open flames when refueling. When refueling, turn the cap clockwise till you hear a click. To remove the fuel tank cap, turn the cap slowly counterclockwise, then pause slightly before closing ing the hood with the could cause injury by spraying...opened. If the indicator lamp does not go off, contact your Toyota dealer as soon as shown in the illustration. The fumes are flammable. In hot weather, fuel under pressure could cause the hood support rod to the hood. Celica_U Fuel tank cap NOTICE Be sure to return the its ...
... the cap is suddenly removed. 18 2000 CELICA (OM20735U) To open flames when refueling. When refueling, turn the cap clockwise till you hear a click. To remove the fuel tank cap, turn the cap slowly counterclockwise, then pause slightly before closing ing the hood with the could cause injury by spraying...opened. If the indicator lamp does not go off, contact your Toyota dealer as soon as shown in the illustration. The fumes are flammable. In hot weather, fuel under pressure could cause the hood support rod to the hood. Celica_U Fuel tank cap NOTICE Be sure to return the its ...

Owners Manual
Page 175
..., lights left on), you should follow this section. Carefully dispose of very high pressure. 2000 CELICA (OM20735U) 175 CAUTION To help avoid personal injury, keep the hood closed until the steam subsides before opening the hood. After starting the engine again. If the cause of your battery discharging is a sign of... road, stop the engine. If your vehicle overheats If your vehicle will be much harder than usual. You should have it at about 2000 rpm for the brakes and steering will not work so steering and braking will not start , see "If your engine coolant temperature gauge...
..., lights left on), you should follow this section. Carefully dispose of very high pressure. 2000 CELICA (OM20735U) 175 CAUTION To help avoid personal injury, keep the hood closed until the steam subsides before opening the hood. After starting the engine again. If the cause of your battery discharging is a sign of... road, stop the engine. If your vehicle overheats If your vehicle will be much harder than usual. You should have it at about 2000 rpm for the brakes and steering will not work so steering and braking will not start , see "If your engine coolant temperature gauge...

Owners Manual
Page 199
... once a month. Tire surface and wheel nuts Check the tires carefully for additional information. 2000 CELICA (OM20735U) 199 See "Owner's Warranty Information Booklet" or "Owner's Manual Supplement" for additional...12000 km (7500 miles). Please be performed as frequently as specified. Doors and engine hood Check that any leak, have the cause found and corrected immediately. Celica_U General maintenance ...If you are a skilled do −it −yourself mechanic, the Toyota service manuals are missing, and check the nuts for looseness. It is released. See ...
... once a month. Tire surface and wheel nuts Check the tires carefully for additional information. 2000 CELICA (OM20735U) 199 See "Owner's Warranty Information Booklet" or "Owner's Manual Supplement" for additional...12000 km (7500 miles). Please be performed as frequently as specified. Doors and engine hood Check that any leak, have the cause found and corrected immediately. Celica_U General maintenance ...If you are a skilled do −it −yourself mechanic, the Toyota service manuals are missing, and check the nuts for looseness. It is released. See ...

Owners Manual
Page 208
...Do not reuse iridium−tipped spark plugs by cleaning or regapping. z When closing the engine hood, check to fall through the spark plug holes. D Demineralized or distilled water Tools: D Funnel... (only for adding coolant) Checking brake fluid Parts (if level is low): D "TOYOTA Long Life Coolant" or equivalent See Section 7−2 for adding oil) Checking the engine coolant level Parts... (if level is low): D SAE J1703 or FMVSS No.116 DOT 3 brake fluid 208 2000 CELICA (OM20735U) z Add only demineralized or distilled water to scratch the glass surface with the wiper ...
...Do not reuse iridium−tipped spark plugs by cleaning or regapping. z When closing the engine hood, check to fall through the spark plug holes. D Demineralized or distilled water Tools: D Funnel... (only for adding coolant) Checking brake fluid Parts (if level is low): D "TOYOTA Long Life Coolant" or equivalent See Section 7−2 for adding oil) Checking the engine coolant level Parts... (if level is low): D SAE J1703 or FMVSS No.116 DOT 3 brake fluid 208 2000 CELICA (OM20735U) z Add only demineralized or distilled water to scratch the glass surface with the wiper ...

Owners Manual
Page 234
Open the hood. Remove and install the cover clips as shown in the following illustrations. Celica_U -Headlights (low beam) 1. Removing clip Installing clip 234 2000 CELICA (OM20735U) In doing so, remove the washer hose from the notch on the cover. RIGHT SIDE HEADLIGHT: Remove the clips and take out the cover.
Open the hood. Remove and install the cover clips as shown in the following illustrations. Celica_U -Headlights (low beam) 1. Removing clip Installing clip 234 2000 CELICA (OM20735U) In doing so, remove the washer hose from the notch on the cover. RIGHT SIDE HEADLIGHT: Remove the clips and take out the cover.

Owners Manual
Page 236
RIGHT SIDE HEADLIGHT: Remove the clips and take out the cover. RIGHT SIDE HEADLIGHT: Install the cover. In doing so, remove the washer hose from the notch on the cover. This prevents washer hose damage. 236 2000 CELICA (OM20735U) Remove and install the cover clips as shown in the following illustrations. 5. Open the hood. Celica_U -Headlights (high beam) 1. NOTICE Always notch the washer hose before fastening it when installing the cover.
RIGHT SIDE HEADLIGHT: Remove the clips and take out the cover. RIGHT SIDE HEADLIGHT: Install the cover. In doing so, remove the washer hose from the notch on the cover. This prevents washer hose damage. 236 2000 CELICA (OM20735U) Remove and install the cover clips as shown in the following illustrations. 5. Open the hood. Celica_U -Headlights (high beam) 1. NOTICE Always notch the washer hose before fastening it when installing the cover.
