Owners Manual
Page 57
... the headlight/ turn signal lever up or down to position 1. To turn on the instrument panel flash faster than normal, a front or rear turn signal bulb is burned out. To turn them off the road as far off , push the switch once again. All the turn signal lights will not work...
... the headlight/ turn signal lever up or down to position 1. To turn on the instrument panel flash faster than normal, a front or rear turn signal bulb is burned out. To turn them off the road as far off , push the switch once again. All the turn signal lights will not work...

Owners Manual
Page 68
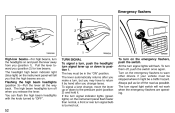
...center airbag sensor assembly, inflators, warning light, interconnecting wiring and power sources. The open the driver's door with the ignition key in your Toyota dealer as soon as possible. 63 Turn the ignition key to remove the key when you are completely closed. (i) SRS Airbag Warning Light... Key Reminder Buzzer This buzzer reminds you to "ACC". This means the airbag system is in need of the following cases. If either the bulb is burned out or the circuit is operating properly. CHECKING SERVICE REMINDER INDICATORS (except the low fuel level warning light) 1. It goes off ...
...center airbag sensor assembly, inflators, warning light, interconnecting wiring and power sources. The open the driver's door with the ignition key in your Toyota dealer as soon as possible. 63 Turn the ignition key to remove the key when you are completely closed. (i) SRS Airbag Warning Light... Key Reminder Buzzer This buzzer reminds you to "ACC". This means the airbag system is in need of the following cases. If either the bulb is burned out or the circuit is operating properly. CHECKING SERVICE REMINDER INDICATORS (except the low fuel level warning light) 1. It goes off ...

Owners Manual
Page 181
... original Tools: S Screwdriver (for passenger's side kick panel screw) Adding washer fluid Parts: S Water S Washer fluid containing antifreeze (for winter use) Tools: S Funnel Replacing light bulbs Parts: S Bulb with same number and wattage rating as original (See charts in "Replacing light...
... original Tools: S Screwdriver (for passenger's side kick panel screw) Adding washer fluid Parts: S Water S Washer fluid containing antifreeze (for winter use) Tools: S Funnel Replacing light bulbs Parts: S Bulb with same number and wattage rating as original (See charts in "Replacing light...

Owners Manual
Page 193
... get medical attention immediately. Chapter 7-3 Electrical components S S S S S S Checking battery condition Battery recharging precautions Checking and replacing fuses Adding washer fluid Checking headlight aims Replacing light bulbs Checking battery condition- -Precautions ! S Do not cause a spark from the battery. S Do not smoke or light a match near the battery. S Wear protective safety glasses when...
... get medical attention immediately. Chapter 7-3 Electrical components S S S S S S Checking battery condition Battery recharging precautions Checking and replacing fuses Adding washer fluid Checking headlight aims Replacing light bulbs Checking battery condition- -Precautions ! S Do not cause a spark from the battery. S Do not smoke or light a match near the battery. S Wear protective safety glasses when...

Owners Manual
Page 199
... movement gauges: The triangle mark on both sides. NOTICE Only use a bulb of a bulb with the wattage ratings given in the table. ! Replacing light bulbs- They can burst or shatter if scratched or dropped. Light bulbs Headlights (low beam) Headlights (high beam) Front fog light Parking and front... pressurized gas inside and require special handling. CAUTION Halogen bulbs have the aiming adjusted by its plastic or metal case. Hold a bulb only by your Toyota dealer. The following illustrations show how to gain access to the bulbs. Do not touch the glass part of the listed ...
... movement gauges: The triangle mark on both sides. NOTICE Only use a bulb of a bulb with the wattage ratings given in the table. ! Replacing light bulbs- They can burst or shatter if scratched or dropped. Light bulbs Headlights (low beam) Headlights (high beam) Front fog light Parking and front... pressurized gas inside and require special handling. CAUTION Halogen bulbs have the aiming adjusted by its plastic or metal case. Hold a bulb only by your Toyota dealer. The following illustrations show how to gain access to the bulbs. Do not touch the glass part of the listed ...

Owners Manual
Page 200
-Headlights Light bulbs Rear side marker, stop and tail lights (coupe) Rear side marker lights (liftback) Rear turn signal lights Stop and tail lights Back-up lights License ... roof) Personal lights Glovebox light Door courtesy lights Luggage compartment light Trunk light Bulb No. 1157 194 1156 1157 1156 168 921 W 27/8 4.9 27 27/8 27 5 18 10 8 5 1.2 3.8 5 3.8 Type C D C C C D C C C E D D E D 1. A: HB4 halogen bulbs B: HB3 halogen bulbs C: Single end bulbs D: Wedge base bulbs E: Double end bulbs 194 Unplug the connector while depressing the lock release. If the connector...
-Headlights Light bulbs Rear side marker, stop and tail lights (coupe) Rear side marker lights (liftback) Rear turn signal lights Stop and tail lights Back-up lights License ... roof) Personal lights Glovebox light Door courtesy lights Luggage compartment light Trunk light Bulb No. 1157 194 1156 1157 1156 168 921 W 27/8 4.9 27 27/8 27 5 18 10 8 5 1.2 3.8 5 3.8 Type C D C C C D C C C E D D E D 1. A: HB4 halogen bulbs B: HB3 halogen bulbs C: Single end bulbs D: Wedge base bulbs E: Double end bulbs 194 Unplug the connector while depressing the lock release. If the connector...

Owners Manual
Page 201
Install a new bulb and the connector into the mounting hole. Aiming is necessary, contact your Toyota dealer. 1. Loosen the retainer screw and take out the beam unit. 2. When aiming adjustment is not necessary after replacing the bulb. Turn the cover counterclockwise and remove it. 195 -Front fog lights 3.
Install a new bulb and the connector into the mounting hole. Aiming is necessary, contact your Toyota dealer. 1. Loosen the retainer screw and take out the beam unit. 2. When aiming adjustment is not necessary after replacing the bulb. Turn the cover counterclockwise and remove it. 195 -Front fog lights 3.

Owners Manual
Page 202
Install a new bulb and the bulb retaining spring. Connect the cords, install the cover and turn it clockwise so that two triangle marks are aligned. Install the beam unit and tighten the screw. 196 Plug the connector together. Release the bulb retaining spring and remove the bulb. To install the bulb, align the cutouts of the bulb with the protrusions of the mounting hole. 5. 3. Disconnect the cords. 4.
Install a new bulb and the bulb retaining spring. Connect the cords, install the cover and turn it clockwise so that two triangle marks are aligned. Install the beam unit and tighten the screw. 196 Plug the connector together. Release the bulb retaining spring and remove the bulb. To install the bulb, align the cutouts of the bulb with the protrusions of the mounting hole. 5. 3. Disconnect the cords. 4.

Warranty, Maitenance, Services Guide
Page 17
... IN ABOVE SYSTEMS Data Link Connector* Sensors, Switches, and Valves Hoses,Clamps, Fittings,Tubing, Sealing Gaskets or Devices, and Mounting Hardware Pulleys, Belts, and Idlers Bulbs for malfunctioning indicator (Engine system warning light)* **Spark plugs warranted until first required maintenance only. Other provisions specified under the What Is Not Covered section...
... IN ABOVE SYSTEMS Data Link Connector* Sensors, Switches, and Valves Hoses,Clamps, Fittings,Tubing, Sealing Gaskets or Devices, and Mounting Hardware Pulleys, Belts, and Idlers Bulbs for malfunctioning indicator (Engine system warning light)* **Spark plugs warranted until first required maintenance only. Other provisions specified under the What Is Not Covered section...