Owner's Manual
Page 33
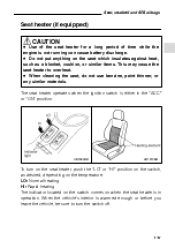
... the temperature. LO: Normal heating HI: Rapid heating The indicator located on the switch comes on when the seat heater is not running can cause battery discharge.
... the temperature. LO: Normal heating HI: Rapid heating The indicator located on the switch comes on when the seat heater is not running can cause battery discharge.
Owner's Manual
Page 52
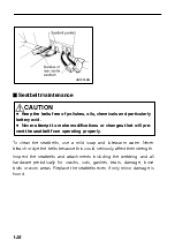
... dye the belts because this could seriously affect their strength. CAUTION 1-28 HB1074BB J Seatbelt maintenance D Keep the belts free of polishes, oils, chemicals and particularly battery acid. To clean the seatbelts, use a mild soap and lukewarm water. Inspect the seatbelts and attachments including the webbing and all hardware periodically for cracks...
... dye the belts because this could seriously affect their strength. CAUTION 1-28 HB1074BB J Seatbelt maintenance D Keep the belts free of polishes, oils, chemicals and particularly battery acid. To clean the seatbelts, use a mild soap and lukewarm water. Inspect the seatbelts and attachments including the webbing and all hardware periodically for cracks...
Owner's Manual
Page 96
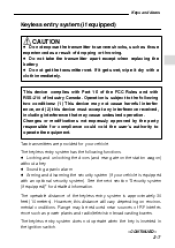
... your vehicle. Two transmitters are provided for your vehicle is subject to operate the equipment. D Do not take the transmitter apart except when replacing the battery. If it gets wet, wipe it dry with RSS-210 of dropping or throwing.
... your vehicle. Two transmitters are provided for your vehicle is subject to operate the equipment. D Do not take the transmitter apart except when replacing the battery. If it gets wet, wipe it dry with RSS-210 of dropping or throwing.
Owner's Manual
Page 98
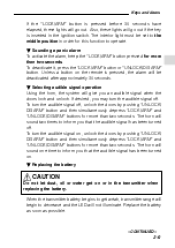
... depress "LOCK/ARM" and "UNLOCK/DISARM" buttons for this function to inform you that the audible signal has been turned off. B Replacing the battery CAUTION Do not let dust, oil or water get weak, transmitter range will begin to the middle position in the transmitter when replacing the... battery. B Selecting audible signal operation Using the horn, the system will not illuminate. B Sounding a panic alarm To activate the alarm, keep the "LOCK/ARM" ...
... depress "LOCK/ARM" and "UNLOCK/DISARM" buttons for this function to inform you that the audible signal has been turned off. B Replacing the battery CAUTION Do not let dust, oil or water get weak, transmitter range will begin to the middle position in the transmitter when replacing the... battery. B Selecting audible signal operation Using the horn, the system will not illuminate. B Sounding a panic alarm To activate the alarm, keep the "LOCK/ARM" ...

Owner's Manual
Page 99
.... The system can be the same or different. 2-10 Reinstall the two screws on the back of the transmitter case. After the battery is equipped with a special code learning feature that you to delete old ones. n Programming the transmitters The keyless entry system is replaced..., the transmitter must be synchronized with the positive (+) side facing up HB1001BA HB1002BB To replace the battery: 1. Remove the two screws on the back of the transmitter case by using a phillips screwdriver. 2. It is recommended that allows you ...
.... The system can be the same or different. 2-10 Reinstall the two screws on the back of the transmitter case. After the battery is equipped with a special code learning feature that you to delete old ones. n Programming the transmitters The keyless entry system is replaced..., the transmitter must be synchronized with the positive (+) side facing up HB1001BA HB1002BB To replace the battery: 1. Remove the two screws on the back of the transmitter case by using a phillips screwdriver. 2. It is recommended that allows you ...

Owner's Manual
Page 105
... key into the ignition switch and cycle it , press the "LOCK/ARM" button or "UNLOCK/DISARM" button. the transmitter is lost, broken or the transmitter battery is activated. B Valet mode When you cannot disarm the system using the transmitter. To disarm the system: 1.
... key into the ignition switch and cycle it , press the "LOCK/ARM" button or "UNLOCK/DISARM" button. the transmitter is lost, broken or the transmitter battery is activated. B Valet mode When you cannot disarm the system using the transmitter. To disarm the system: 1.
Owner's Manual
Page 108
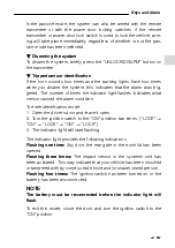
B Disarming the system To disarm the system, briefly press the "UNLOCK/DISARM" button on or the battery has been disconnected. To enter identification mode: 1. Flashing three times: The impact sensor in the system's unit has been activated. The number of whether or ... vehicle has been shocked or tampered with the power door locking switches. Turn the ignition switch to lock the vehicle, arming will flash. NOTE The battery must be armed with the remote transmitter or with by some outside force and/or unauthorized person. Flashing one time: Any door, the rear gate...
B Disarming the system To disarm the system, briefly press the "UNLOCK/DISARM" button on or the battery has been disconnected. To enter identification mode: 1. Flashing three times: The impact sensor in the system's unit has been activated. The number of whether or ... vehicle has been shocked or tampered with the power door locking switches. Turn the ignition switch to lock the vehicle, arming will flash. NOTE The battery must be armed with the remote transmitter or with by some outside force and/or unauthorized person. Flashing one time: Any door, the rear gate...

Owner's Manual
Page 131
... meter will be lost. 3-8 Each press of the knob changes the function in the following order. NOTE If the connection between the combination meter and battery is broken for more than 1 second. HB3015BB B Odometer The odometer shows the total distance that the vehicle has been driven since you last set the...
... meter will be lost. 3-8 Each press of the knob changes the function in the following order. NOTE If the connection between the combination meter and battery is broken for more than 1 second. HB3015BB B Odometer The odometer shows the total distance that the vehicle has been driven since you last set the...
Owner's Manual
Page 138
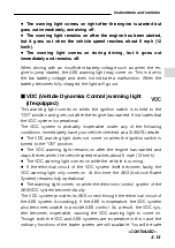
... the electrical circuit of the VDC system itself becomes faulty, the VDC warning light only comes on. The VDC system is due to the low battery voltage and does not indicate a malfunction. D If the electrical circuit of the ABS system. J VDC (Vehicle Dynamics Control) warning light (if ...about 8 mph (12 km/h). This is probably inoperative under any of the ABS/VDC system becomes faulty. Immediately have your vehicle checked at a SUBARU dealer. Accordingly, if the ABS is running. D The VDC warning light comes on while the vehicle is inoperative, the VDC system also becomes ...
... the electrical circuit of the VDC system itself becomes faulty, the VDC warning light only comes on. The VDC system is due to the low battery voltage and does not indicate a malfunction. D If the electrical circuit of the ABS system. J VDC (Vehicle Dynamics Control) warning light (if ...about 8 mph (12 km/h). This is probably inoperative under any of the ABS/VDC system becomes faulty. Immediately have your vehicle checked at a SUBARU dealer. Accordingly, if the ABS is running. D The VDC warning light comes on while the vehicle is inoperative, the VDC system also becomes ...
Owner's Manual
Page 142
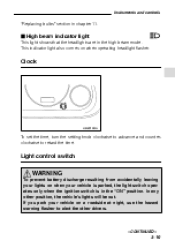
Instruments and controls "Replacing bulbs" section in the high beam mode. Light control switch WARNING To prevent battery discharge resulting from accidentally leaving your lights on when your vehicle on when operating headlight flasher. J High beam indicator light This light shows that the ...
Instruments and controls "Replacing bulbs" section in the high beam mode. Light control switch WARNING To prevent battery discharge resulting from accidentally leaving your lights on when your vehicle on when operating headlight flasher. J High beam indicator light This light shows that the ...
Owner's Manual
Page 146
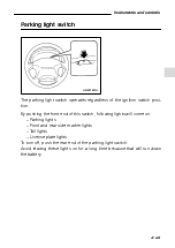
By pushing the front end of this switch, following lights will run down the battery. - CONTINUED - 3-23 Avoid leaving these lights on for a long time because that will come on. - Parking lights - Front and rear side marker lights - Tail lights - License plate lights To turn off, push the rear end of the ignition switch position. Instruments and controls Parking light switch HB2018BA The parking light switch operates regardless of the parking light switch.
By pushing the front end of this switch, following lights will run down the battery. - CONTINUED - 3-23 Avoid leaving these lights on for a long time because that will come on. - Parking lights - Front and rear side marker lights - Tail lights - License plate lights To turn off, push the rear end of the ignition switch position. Instruments and controls Parking light switch HB2018BA The parking light switch operates regardless of the parking light switch.

Owner's Manual
Page 152
D To prevent the battery from being discharged, do not operate the defogger continuously for any longer than necessary. The rear window defogger operates only when the ignition switch is ...
D To prevent the battery from being discharged, do not operate the defogger continuously for any longer than necessary. The rear window defogger operates only when the ignition switch is ...

Owner's Manual
Page 153
Windshield wiper deicer (if equipped) CAUTION To prevent the battery from being discharged, do not operate the windshield wiper deicer continuously for any longer than necessary. HB2027BB 3-30 To turn on the climate control display panel while the rear window defogger is operating. The indicator light "u" lights up on the defogger, push the switch. B For vehicles with automatic climate control HB3016BB To turn it off, push the switch again.
Windshield wiper deicer (if equipped) CAUTION To prevent the battery from being discharged, do not operate the windshield wiper deicer continuously for any longer than necessary. HB2027BB 3-30 To turn on the climate control display panel while the rear window defogger is operating. The indicator light "u" lights up on the defogger, push the switch. B For vehicles with automatic climate control HB3016BB To turn it off, push the switch again.
Owner's Manual
Page 159
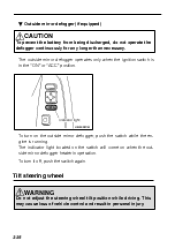
... injury. 3-36 Tilt steering wheel WARNING Do not adjust the steering wheel tilt position while driving. B Outside mirror defogger (if equipped) CAUTION To prevent the battery from being discharged, do not operate the defogger continuously for any longer than necessary. HB4004CB To turn it off, push the switch again. The indicator...
... injury. 3-36 Tilt steering wheel WARNING Do not adjust the steering wheel tilt position while driving. B Outside mirror defogger (if equipped) CAUTION To prevent the battery from being discharged, do not operate the defogger continuously for any longer than necessary. HB4004CB To turn it off, push the switch again. The indicator...
Owner's Manual
Page 178
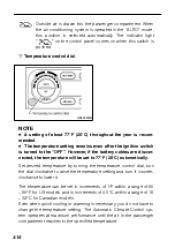
.... n Temperature control dial HB4033BB NOTE D A setting of 18 - 32°C for US models and in the passenger compartment reaches to lower it. However, if the battery cables are disconnected, the temperature will be set to the "OFF". Set desired temperature by turning the temperature control dial; D The temperature setting remains even...
.... n Temperature control dial HB4033BB NOTE D A setting of 18 - 32°C for US models and in the passenger compartment reaches to lower it. However, if the battery cables are disconnected, the temperature will be set to the "OFF". Set desired temperature by turning the temperature control dial; D The temperature setting remains even...

Owner's Manual
Page 192
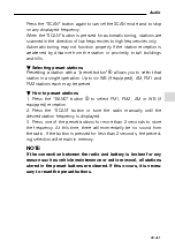
... proximity to tall buildings and hills. B How to select FM1, FM2, AM or WB (if equipped) reception. 2. NOTE If the connection between the radio and battery is weakened by distance from the radio. When the "SCAN" button is necessary to reset the preset buttons. - CONTINUED - 5-11 B Selecting preset stations Presetting a station...
... proximity to tall buildings and hills. B How to select FM1, FM2, AM or WB (if equipped) reception. 2. NOTE If the connection between the radio and battery is weakened by distance from the radio. When the "SCAN" button is necessary to reset the preset buttons. - CONTINUED - 5-11 B Selecting preset stations Presetting a station...

Owner's Manual
Page 205
.... B How to select AM, FM1 or FM2 reception. Press the "FM/AM" selection button to preset stations 1. NOTE If the connection between the radio and battery is necessary to reset the preset buttons. 5-24 Up to six AM, FM1, FM2 and WB stations each may not function properly if the station...
.... B How to select AM, FM1 or FM2 reception. Press the "FM/AM" selection button to preset stations 1. NOTE If the connection between the radio and battery is necessary to reset the preset buttons. 5-24 Up to six AM, FM1, FM2 and WB stations each may not function properly if the station...
Owner's Manual
Page 218
... buttons are scanned in memory. At this occurs, it is broken for automatic tuning, stations are cleared. NOTE If the connection between the radio and battery is necessary to high frequencies only. Automatic tuning may be no sound from the station or proximity to tall buildings and hills. Press one of...
... buttons are scanned in memory. At this occurs, it is broken for automatic tuning, stations are cleared. NOTE If the connection between the radio and battery is necessary to high frequencies only. Automatic tuning may be no sound from the station or proximity to tall buildings and hills. Press one of...
Owner's Manual
Page 228
... will flash once on the display at least two seconds to reset the preset buttons. - CONTINUED - 5-47 NOTE If the connection between the radio and battery is pressed for any reason such as vehicle maintenance or radio removal, all stations stored in a single operation. Up to select that station in the...
... will flash once on the display at least two seconds to reset the preset buttons. - CONTINUED - 5-47 NOTE If the connection between the radio and battery is pressed for any reason such as vehicle maintenance or radio removal, all stations stored in a single operation. Up to select that station in the...

Owner's Manual
Page 235
In this mode, the radio scans through the radio band until the entire band has been scanned. The LED at the first one of the battery, memory presets will be cleared and will be required to automatically search for receivable frequencies and will stop at the top of that station and ...
In this mode, the radio scans through the radio band until the entire band has been scanned. The LED at the first one of the battery, memory presets will be cleared and will be required to automatically search for receivable frequencies and will stop at the top of that station and ...


