
Owner's Manual
Page 19
Index Precautions to observe when handling a compact disc (CD) ...Preparing to drive ...R Rear combination lights ...Rear differential gear oil ...Rear gate (Station wagon) ...Rear seats ...Rear viscous limited slip differential (LSD) (if equipped... 8-16 8-20 S Seatbelt maintenance ...1-28 Seatbelts ...1-15 Seatbelt safety tips ...1-15 Seatbelt warning light and chime ...1-18, 3-10 Seat heater (if equipped) ...1-9 Security system (if equipped) ...2-13 Security system status indicator light (if equipped) ...3-18 Selector lever for automatic transmission ...7-15 Shift lock release ...7-19 Shift ...
Index Precautions to observe when handling a compact disc (CD) ...Preparing to drive ...R Rear combination lights ...Rear differential gear oil ...Rear gate (Station wagon) ...Rear seats ...Rear viscous limited slip differential (LSD) (if equipped... 8-16 8-20 S Seatbelt maintenance ...1-28 Seatbelts ...1-15 Seatbelt safety tips ...1-15 Seatbelt warning light and chime ...1-18, 3-10 Seat heater (if equipped) ...1-9 Security system (if equipped) ...2-13 Security system status indicator light (if equipped) ...3-18 Selector lever for automatic transmission ...7-15 Shift lock release ...7-19 Shift ...

Owner's Manual
Page 29
When operating the reclining lever to the desired position. n Power seat (if equipped) HB1084BA To adjust the angle of the seatback, move the control switch. 1-6 Then release the lever and make sure the seat is securely locked into place. B Reclining the seatback n Manual type HB1072BA Pull the reclining lever up and adjust the seatback to return the seatback, hold it lightly so that it may be raised back gradually. The seatback placed in a reclined position can spring back upward with force when released.
When operating the reclining lever to the desired position. n Power seat (if equipped) HB1084BA To adjust the angle of the seatback, move the control switch. 1-6 Then release the lever and make sure the seat is securely locked into place. B Reclining the seatback n Manual type HB1072BA Pull the reclining lever up and adjust the seatback to return the seatback, hold it lightly so that it may be raised back gradually. The seatback placed in a reclined position can spring back upward with force when released.

Owner's Manual
Page 111
... a deterrent to break into the ignition switch. The system can be activated. B System operation The security system will give the following alarm indications when triggered: D The parking lights will flash and the horn will not operate. The alarm will reactivate if the vehicle is also interrupted to... and triggers 2 warning chirps on the horn and two flashes on while in armed state. - CONTINUED - 2-13 Keys and doors Security system (if equipped) The security system helps to the vehicle (e.g. The system does not operate when the key is triggered by: D Opening a door, the rear ...
... a deterrent to break into the ignition switch. The system can be activated. B System operation The security system will give the following alarm indications when triggered: D The parking lights will flash and the horn will not operate. The alarm will reactivate if the vehicle is also interrupted to... and triggers 2 warning chirps on the horn and two flashes on while in armed state. - CONTINUED - 2-13 Keys and doors Security system (if equipped) The security system helps to the vehicle (e.g. The system does not operate when the key is triggered by: D Opening a door, the rear ...

Owner's Manual
Page 114
the transmitter is lost, broken or the transmitter battery is too weak), you choose the valet mode, the security system does not operate. The alarm will also flash when the alarm is activated. Insert the key into the ignition switch and cycle it , .... Unless a button on the station wagon), briefly press the "UNLOCK/DISARM" button a second time. To enter the valet mode, open the door. 2. The parking lights will sound. 3. The indicator will stop flashing. 2-16 n Emergency disarming If you cannot disarm the system using the transmitter. B Sounding a panic alarm To activate the...
the transmitter is lost, broken or the transmitter battery is too weak), you choose the valet mode, the security system does not operate. The alarm will also flash when the alarm is activated. Insert the key into the ignition switch and cycle it , .... Unless a button on the station wagon), briefly press the "UNLOCK/DISARM" button a second time. To enter the valet mode, open the door. 2. The parking lights will sound. 3. The indicator will stop flashing. 2-16 n Emergency disarming If you cannot disarm the system using the transmitter. B Sounding a panic alarm To activate the...
Owner's Manual
Page 130
... AT vehicles) ...ABS warning light ...VDC (Vehicle Dynamics Control) warning light (if equipped) ...Brake system warning light ...Door open warning lights ...Low fuel warning light ...Front-wheel drive warning light (for AT vehicles) ...VDC (Vehicle Dynamics Control) operation indicator light (if equipped) ...VDC (Vehicle Dynamics Control) OFF indicator light (if equipped) ...Security system status indicator light (if equipped) ...Shift position...
... AT vehicles) ...ABS warning light ...VDC (Vehicle Dynamics Control) warning light (if equipped) ...Brake system warning light ...Door open warning lights ...Low fuel warning light ...Front-wheel drive warning light (for AT vehicles) ...VDC (Vehicle Dynamics Control) operation indicator light (if equipped) ...VDC (Vehicle Dynamics Control) OFF indicator light (if equipped) ...Security system status indicator light (if equipped) ...Shift position...
Owner's Manual
Page 147
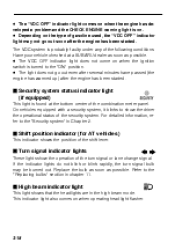
... has been started . D The VDC OFF indicator light does not come on . Have your vehicle checked at the bottom center of the security system. J Security system status indicator light (if equipped) This light is found at a SUBARU dealer as soon as possible. Refer to the "...Replacing bulbs" section in chapter 11. J Turn signal indicator lights These lights show the driver the operational status ...
... has been started . D The VDC OFF indicator light does not come on . Have your vehicle checked at the bottom center of the security system. J Security system status indicator light (if equipped) This light is found at a SUBARU dealer as soon as possible. Refer to the "...Replacing bulbs" section in chapter 11. J Turn signal indicator lights These lights show the driver the operational status ...

Owner's Manual
Page 262
... corrosive liquids or any other dangerous items in the storage tray. Cargo anchorage eyelets (if equipped) CAUTION The cargo anchorage eyelets are designed only for securing light cargo. The maximum load capacity is equipped with four anchorage eyelets so that exceeds the capacity of the hooks. CAUTION 6-16 HB7018BA The cargo area...
... corrosive liquids or any other dangerous items in the storage tray. Cargo anchorage eyelets (if equipped) CAUTION The cargo anchorage eyelets are designed only for securing light cargo. The maximum load capacity is equipped with four anchorage eyelets so that exceeds the capacity of the hooks. CAUTION 6-16 HB7018BA The cargo area...
Owner's Manual
Page 334
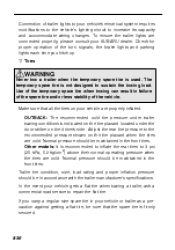
...pressure should be sure that all the tires on your vehicle are cold. Check for proper operation of the turn signals, the brake lights and parking lights each time you carry a regular size spare tire in your vehicle or trailer as a precaution against getting a flat tire, be... (20 kPa, 0.2 kg/cm2) above their normal operating pressure when the tires are connected properly, please consult your SUBARU dealer. To ensure the trailer lights are cold. n Tires WARNING Never tow a trailer when the temporary spare tire is firmly secured. 8-36 Make sure that the spare tire is used.
...pressure should be sure that all the tires on your vehicle are cold. Check for proper operation of the turn signals, the brake lights and parking lights each time you carry a regular size spare tire in your vehicle or trailer as a precaution against getting a flat tire, be... (20 kPa, 0.2 kg/cm2) above their normal operating pressure when the tires are connected properly, please consult your SUBARU dealer. To ensure the trailer lights are cold. n Tires WARNING Never tow a trailer when the temporary spare tire is firmly secured. 8-36 Make sure that the spare tire is used.
Owner's Manual
Page 335
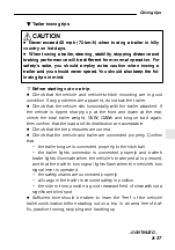
... tow the trailer. D Sufficient time should be different from normal operation. D Check that the trailer's turn signal lights flash when the vehicle's turn signal lever is secured safety in position. - the side mirrors provide a good rearward field of traffic, practice turning, stopping and backing up... before starting out on a trip D Check that the vehicle and vehicle-to the hitch ball. - the trailer lights connector is connected properly and trailer's brake lights illuminate when the vehicle's brake pedal is pressed, and that the vehicle and trailer are correct. For safety's sake...
... tow the trailer. D Sufficient time should be different from normal operation. D Check that the trailer's turn signal lights flash when the vehicle's turn signal lever is secured safety in position. - the side mirrors provide a good rearward field of traffic, practice turning, stopping and backing up... before starting out on a trip D Check that the vehicle and vehicle-to the hitch ball. - the trailer lights connector is connected properly and trailer's brake lights illuminate when the vehicle's brake pedal is pressed, and that the vehicle and trailer are correct. For safety's sake...

Owner's Manual
Page 425
n Low beam light bulbs HBB041BB HBB042BA 1. 2. 3. 4. 5. Remove the retainer spring. Remove the bulb from the bulb. 2. At this time, use care not to touch the bulb surface. 11-.... Disconnect the electrical connector for black cable. Reconnect the electrical connector. Disconnect the electrical connector from the headlight assembly by turning it counterclockwise. 3. n High beam light bulbs HBB043BA HBB044BB 1. Replace the bulb with new one. 4. Replace the bulb, then set the retainer spring...
n Low beam light bulbs HBB041BB HBB042BA 1. 2. 3. 4. 5. Remove the retainer spring. Remove the bulb from the bulb. 2. At this time, use care not to touch the bulb surface. 11-.... Disconnect the electrical connector for black cable. Reconnect the electrical connector. Disconnect the electrical connector from the headlight assembly by turning it counterclockwise. 3. n High beam light bulbs HBB043BA HBB044BB 1. Replace the bulb with new one. 4. Replace the bulb, then set the retainer spring...

Owner's Manual
Page 430
... interior of the vehicle. 9. Using a Phillips screwdriver, remove the upper and lower screws that secure the side cover of the socket. Turn signal light: Pull the bulb out of the rear combination light assembly. 4. Fit the rear combination light assembly into the rear combination light assembly and turn it clockwise until it counterclockwise. Reinstall the...
... interior of the vehicle. 9. Using a Phillips screwdriver, remove the upper and lower screws that secure the side cover of the socket. Turn signal light: Pull the bulb out of the rear combination light assembly. 4. Fit the rear combination light assembly into the rear combination light assembly and turn it clockwise until it counterclockwise. Reinstall the...


