Owner's Manual
Page 5
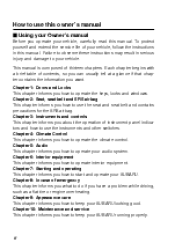
...Interior equipment This chapter informs you how to use the seat and seat belt and contains precautions for the SRS airbag. Failure to observe these instructions may result in this manual. Chapter 3: Instruments and controls This chapter informs you about the operation of instrument panel indicators and how to your SUBARU.... Chapter 9: Appearance care This chapter informs you how to operate the climate control. This manual is composed of your SUBARU looking good. Chapter 1: Doors and Locks This chapter informs you how to keep your vehicle, follow the instructions in serious...
...Interior equipment This chapter informs you how to use the seat and seat belt and contains precautions for the SRS airbag. Failure to observe these instructions may result in this manual. Chapter 3: Instruments and controls This chapter informs you about the operation of instrument panel indicators and how to your SUBARU.... Chapter 9: Appearance care This chapter informs you how to operate the climate control. This manual is composed of your SUBARU looking good. Chapter 1: Doors and Locks This chapter informs you how to keep your vehicle, follow the instructions in serious...

Owner's Manual
Page 14
Table of contents Doors and locks Seat, seatbelt and SRS airbag Instruments and controls Climate control Audio Interior equipment Starting and operating In case of emergency Appearance care Maintenance and service Specifications Consumer information and Reporting safety defects Index 1 2 3 4 5 6 7 8 9 10 11 12 13 - CONTINUED - xi
Table of contents Doors and locks Seat, seatbelt and SRS airbag Instruments and controls Climate control Audio Interior equipment Starting and operating In case of emergency Appearance care Maintenance and service Specifications Consumer information and Reporting safety defects Index 1 2 3 4 5 6 7 8 9 10 11 12 13 - CONTINUED - xi

Owner's Manual
Page 16
Index Child restraint systems ...2-20 Child safety locks ...1-7 Cigarette lighter (if equipped) ...6-9 Cleaning aluminum wheels ...9-5 Cleaning the interior ...9-6 Clock ...3-11 Clock function ...5-11 Clutch fluid (2.5 liter MT models) ...10-28 Clutch pedal (Manual transmission vehicles) ...10-36 Coat hook ...6-12 Coin tray ...6-5 Cooling ...
Index Child restraint systems ...2-20 Child safety locks ...1-7 Cigarette lighter (if equipped) ...6-9 Cleaning aluminum wheels ...9-5 Cleaning the interior ...9-6 Clock ...3-11 Clock function ...5-11 Clutch fluid (2.5 liter MT models) ...10-28 Clutch pedal (Manual transmission vehicles) ...10-36 Coat hook ...6-12 Coin tray ...6-5 Cooling ...

Owner's Manual
Page 18
... Ignition switch ...7-11 Illumination brightness control ...3-15 Inside mirror ...3-22 Installation of accessories ...5-12, 10-46 Installing carrying attachments on the cross bars ...1-35 Interior light ...6-12 Interior light, spot light ...10-55 J Jump starting ... 8-4 K Key interlock release (AT vehicles only) ...Keyless entry system (if equipped) ...Key number ...Key reminder chime ...Keys...
... Ignition switch ...7-11 Illumination brightness control ...3-15 Inside mirror ...3-22 Installation of accessories ...5-12, 10-46 Installing carrying attachments on the cross bars ...1-35 Interior light ...6-12 Interior light, spot light ...10-55 J Jump starting ... 8-4 K Key interlock release (AT vehicles only) ...Keyless entry system (if equipped) ...Key number ...Key reminder chime ...Keys...

Owner's Manual
Page 31
... unlock all doors (and the rear gate on the wagon and OUTBACK SPORT), press and hold the "UNLOCK" button. NOTE 1. The vehicle's interior (courtesy) light and door open warning light (DOOR AJAR indicator) will illuminate for one second (see location below). 2. D Turn the ignition switch... will illuminate for 60 seconds or until vehicle is turned off, or until the doors are locked with the - CONTINUED - 1-9 The vehicle's interior (courtesy) light will flash one time. Parking lights will flash one time. Doors and locks B System operation Keyless entry functions do not operate when...
... unlock all doors (and the rear gate on the wagon and OUTBACK SPORT), press and hold the "UNLOCK" button. NOTE 1. The vehicle's interior (courtesy) light and door open warning light (DOOR AJAR indicator) will illuminate for one second (see location below). 2. D Turn the ignition switch... will illuminate for 60 seconds or until vehicle is turned off, or until the doors are locked with the - CONTINUED - 1-9 The vehicle's interior (courtesy) light will flash one time. Parking lights will flash one time. Doors and locks B System operation Keyless entry functions do not operate when...
Owner's Manual
Page 35
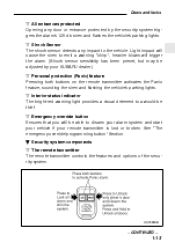
...and options of the security system. HS1000CB - CONTINUED - 1-13 Doors and locks n All entrances protected Opening any impact to the vehicle. n Interior status indicator The bright-red warning light provides a visual deterrent to a would-be able to emit a warning "chirp"; n Emergency override button...flashes the vehicle's parking lights. heavier blows will cause the siren to disarm your alarm system and start your vehicle if your SUBARU dealer.) n Personal protection (Panic) feature Pressing both buttons on the remote transmitter activates the Panic feature, sounding the siren and ...
...and options of the security system. HS1000CB - CONTINUED - 1-13 Doors and locks n All entrances protected Opening any impact to the vehicle. n Interior status indicator The bright-red warning light provides a visual deterrent to a would-be able to emit a warning "chirp"; n Emergency override button...flashes the vehicle's parking lights. heavier blows will cause the siren to disarm your alarm system and start your vehicle if your SUBARU dealer.) n Personal protection (Panic) feature Pressing both buttons on the remote transmitter activates the Panic feature, sounding the siren and ...

Owner's Manual
Page 39
... will turn on for 60 seconds. n The alarm cycle If your absence. If not, the system will flash once. After this time, and the vehicle interior (dome) light will flash for 60 seconds, or until the vehicle is started. Doors and locks n Disarming the system HS1000EB To disarm the system, press...
... will turn on for 60 seconds. n The alarm cycle If your absence. If not, the system will flash once. After this time, and the vehicle interior (dome) light will flash for 60 seconds, or until the vehicle is started. Doors and locks n Disarming the system HS1000EB To disarm the system, press...

Owner's Manual
Page 124
... in the " " position may fog up the windows. Set the air inlet selection lever to the " " position as soon as the outside dusty condition clears. : Interior air is recirculated inside the passenger comparment. : Outside air is running. Switch to the " " position. 2. Set the air outlet control dial to the windshield and...
... in the " " position may fog up the windows. Set the air inlet selection lever to the " " position as soon as the outside dusty condition clears. : Interior air is recirculated inside the passenger comparment. : Outside air is running. Switch to the " " position. 2. Set the air outlet control dial to the windshield and...
Owner's Manual
Page 130
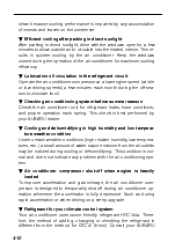
...circulation in quicker cooling by your SUBARU dealer. This results in the refrigerant circuit Operate the air conditioner compressor at a low engine speed (at idle or low driving speeds) a few minutes to allow outside air to circulate into the heated interior. B Checking air conditioning system ... weather condition Under certain weather conditions (high relative humidity, low temperatures, etc.) a small amount of the air conditioner for your SUBARU 4-10 This check is normal and does not indicate any accumulation of insects and leaves on a steep upgrade. Keep the windows ...
...circulation in quicker cooling by your SUBARU dealer. This results in the refrigerant circuit Operate the air conditioner compressor at a low engine speed (at idle or low driving speeds) a few minutes to allow outside air to circulate into the heated interior. B Checking air conditioning system ... weather condition Under certain weather conditions (high relative humidity, low temperatures, etc.) a small amount of the air conditioner for your SUBARU 4-10 This check is normal and does not indicate any accumulation of insects and leaves on a steep upgrade. Keep the windows ...

Owner's Manual
Page 145
Cup holder ...Accessory power socket ...Cigarette lighter (if equipped) ...Ashtray ...Coat hook ...Interior light ...Spotlight (if equipped) ...Gauge pack (if equipped) ...Luggage cover (Wagon only) ...Shopping bag hook (Wagon only) ...Cargo anchorage eyelets (if equipped) ...Maintenance tools ... 6-6 6-7 6-9 6-10 6-12 6-12 6-13 6-14 6-23 6-25 6-25 6-26 6 Interior equipment Sun visors ...Vanity mirror (if equipped) ... 6-2 6-2 Storage compartment ... 6-2 6-3 6-3 6-5 6-5 Glove compartment ...Center console ...Dashboard storage compartment ...Coin tray ...
Cup holder ...Accessory power socket ...Cigarette lighter (if equipped) ...Ashtray ...Coat hook ...Interior light ...Spotlight (if equipped) ...Gauge pack (if equipped) ...Luggage cover (Wagon only) ...Shopping bag hook (Wagon only) ...Cargo anchorage eyelets (if equipped) ...Maintenance tools ... 6-6 6-7 6-9 6-10 6-12 6-12 6-13 6-14 6-23 6-25 6-25 6-26 6 Interior equipment Sun visors ...Vanity mirror (if equipped) ... 6-2 6-2 Storage compartment ... 6-2 6-3 6-3 6-5 6-5 Glove compartment ...Center console ...Dashboard storage compartment ...Coin tray ...

Owner's Manual
Page 147
To lock the glove compartment, insert the master key and turn it counterclockwise. To close it clockwise. To unlock it, insert the masterkey and turn it , push the lid firmly upward. Interior equipment J Glove compartment Unlock Lock HS0090 To open the lid, pull up the lock release. - CONTINUED - 6-3 J Center console HS0279 To open the glove compartment, pull the handle.
To lock the glove compartment, insert the master key and turn it counterclockwise. To close it clockwise. To unlock it, insert the masterkey and turn it , push the lid firmly upward. Interior equipment J Glove compartment Unlock Lock HS0090 To open the lid, pull up the lock release. - CONTINUED - 6-3 J Center console HS0279 To open the glove compartment, pull the handle.

Owner's Manual
Page 148
... is fully opened, it can be used as a tray on which small objects can be thrown toward the vehicle's occupants and could damage the vehicle's interior trim and/or electrical equipment. Spilled liquids, if hot, could burn passengers and liquids of sudden braking, sudden steering, or a collision, objects on the tray...
... is fully opened, it can be used as a tray on which small objects can be thrown toward the vehicle's occupants and could damage the vehicle's interior trim and/or electrical equipment. Spilled liquids, if hot, could burn passengers and liquids of sudden braking, sudden steering, or a collision, objects on the tray...

Owner's Manual
Page 149
Be sure to close the compartment fully before driving. Interior equipment J Dashboard storage compartment Push HS0094 To open the coin tray, pull the upper edge of the lid. - CONTINUED - 6-5 J Coin tray HS0096 To open the dashboard compartment, push the button and pull up on the lid.
Be sure to close the compartment fully before driving. Interior equipment J Dashboard storage compartment Push HS0094 To open the coin tray, pull the upper edge of the lid. - CONTINUED - 6-5 J Coin tray HS0096 To open the dashboard compartment, push the button and pull up on the lid.

Owner's Manual
Page 151
To use only a SUBARU genuine cigarette lighter plug. When not in a fire. Accessory power socket B Electrical power socket located on the lower part of the instrument panel CAUTION The ... in the center console. Refer to the "Cigarette lighter" section in the accessory power socket. - CONTINUED - CAUTION 6-7 Do not use a cigarette lighter in this chapter. Interior equipment B Front passenger's cup holder HS0305 HG0306 The front passenger's cup holder is designed to use the cup holder, open the lid of the instrument...
To use only a SUBARU genuine cigarette lighter plug. When not in a fire. Accessory power socket B Electrical power socket located on the lower part of the instrument panel CAUTION The ... in the center console. Refer to the "Cigarette lighter" section in the accessory power socket. - CONTINUED - CAUTION 6-7 Do not use a cigarette lighter in this chapter. Interior equipment B Front passenger's cup holder HS0305 HG0306 The front passenger's cup holder is designed to use the cup holder, open the lid of the instrument...

Owner's Manual
Page 153
...instrumnet panel is not desired, always put the cap on the socket to use non-genuine cigarette lighter plugs or any foreign object from your SUBARU dealer. B Cigarette lighter (if equipped) WARNING To avoid being burned, never grasp the lighter by the end with the heating element. ...Do not use only a SUBARU genuine cigarette lighter plug. It is an optional accessory. Interior equipment Cigarette lighter (if equipped) CAUTION The electrical power socket located on the lower part of the instrument panel ...
...instrumnet panel is not desired, always put the cap on the socket to use non-genuine cigarette lighter plugs or any foreign object from your SUBARU dealer. B Cigarette lighter (if equipped) WARNING To avoid being burned, never grasp the lighter by the end with the heating element. ...Do not use only a SUBARU genuine cigarette lighter plug. It is an optional accessory. Interior equipment Cigarette lighter (if equipped) CAUTION The electrical power socket located on the lower part of the instrument panel ...

Owner's Manual
Page 155
To open the ashtray, pull the lid out. Fully close the ashtray after using it out while pushing the inner plate down . HG0307 - CONTINUED - 6-11 B Rear ashtray The ashtray is located at the back of the lid. To remove the ashtray for cleaning, open it and pull it out while pushing the inner plate down . To remove the ashtray for cleaning, open it and pull it to help reduce residual smoke. Interior equipment HS0107 To open the ashtray, pull the upper edge of the center console for use by rear seat passengers.
To open the ashtray, pull the lid out. Fully close the ashtray after using it out while pushing the inner plate down . HG0307 - CONTINUED - 6-11 B Rear ashtray The ashtray is located at the back of the lid. To remove the ashtray for cleaning, open it and pull it out while pushing the inner plate down . To remove the ashtray for cleaning, open it and pull it to help reduce residual smoke. Interior equipment HS0107 To open the ashtray, pull the upper edge of the center console for use by rear seat passengers.

Owner's Manual
Page 156
OM-H0132 Interior light OM-H0133 The interior light switch has three positions: ON: The light stays on the coat hook that might obstruct the driver's view or that weigh 2.2 lb (1 kg) or more. Coat hook CAUTION Never hang anything on continuously. 6-12 And do not hang items on the coat hook that could cause injury in sudden stops or in a collision.
OM-H0132 Interior light OM-H0133 The interior light switch has three positions: ON: The light stays on the coat hook that might obstruct the driver's view or that weigh 2.2 lb (1 kg) or more. Coat hook CAUTION Never hang anything on continuously. 6-12 And do not hang items on the coat hook that could cause injury in sudden stops or in a collision.

Owner's Manual
Page 157
When leaving your vehicle, make sure the light is turned off to avoid battery discharge. Spotlight (if equipped) OM-H0134 To turn it off . When leaving the vehicle, make sure the light is turned off to avoid battery discharge. - CONTINUED - 6-13 Interior equipment Middle position: The light comes on the spotlight, push the switch. To turn on only when any door is opened. OFF: The light stays off , push the switch again.
When leaving your vehicle, make sure the light is turned off to avoid battery discharge. Spotlight (if equipped) OM-H0134 To turn it off . When leaving the vehicle, make sure the light is turned off to avoid battery discharge. - CONTINUED - 6-13 Interior equipment Middle position: The light comes on the spotlight, push the switch. To turn on only when any door is opened. OFF: The light stays off , push the switch again.

Owner's Manual
Page 159
Depress the "ADJ" switch for 5 seconds or more and the display will show "DEVIATION" together with the "5" and "W". - CONTINUED - 6-15 HS6006BB 1. Turn on the ignition switch to select measurement units other than English. Interior equipment HS6005BB B Measurement unit selection (Default setting is English units) The following procedure is required to the "ACC" position and the display shows the default English measurement units. 2.
Depress the "ADJ" switch for 5 seconds or more and the display will show "DEVIATION" together with the "5" and "W". - CONTINUED - 6-15 HS6006BB 1. Turn on the ignition switch to select measurement units other than English. Interior equipment HS6005BB B Measurement unit selection (Default setting is English units) The following procedure is required to the "ACC" position and the display shows the default English measurement units. 2.

Owner's Manual
Page 161
Refer to the difference between magnetic and geographic North. Interior equipment NOTE The compass may be affected by interference in the magnetic field. (For example natural and artificial causes like tunnels, subways, sub-stations, railways, and so forth may affect compass operation.) n Compass setting HS6006CB 1. Deviation setting HS6009AB Depending on your location, the following adjustment is required due to - CONTINUED - 6-17
Refer to the difference between magnetic and geographic North. Interior equipment NOTE The compass may be affected by interference in the magnetic field. (For example natural and artificial causes like tunnels, subways, sub-stations, railways, and so forth may affect compass operation.) n Compass setting HS6006CB 1. Deviation setting HS6009AB Depending on your location, the following adjustment is required due to - CONTINUED - 6-17
